Canon imageFORMULA DR-2010C Compact Color Scanner User Manual - Page 33
Clearing a Paper Jam, CAUTION
 |
View all Canon imageFORMULA DR-2010C Compact Color Scanner manuals
Add to My Manuals
Save this manual to your list of manuals |
Page 33 highlights
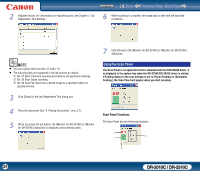
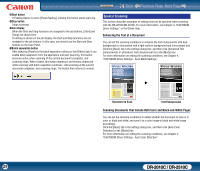
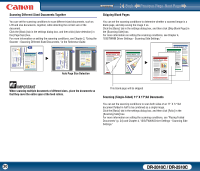
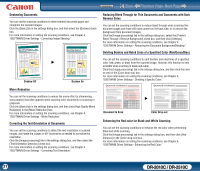
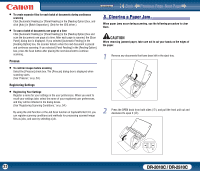
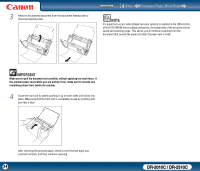
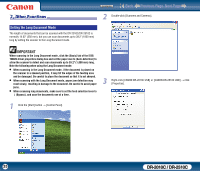
• To create separate files for each batch of documents during continuous scanning Click [Automatic Feeding] or [Panel Feeding] in the [Feeding Option] box, and click [Auto] in [Batch Separation]. (Only for the ISIS driver.) • To scan a batch of documents one page at a time Click [Automatic Feeding] or [Panel Feeding] in the [Feeding Option] box and scan the documents one page at a time. After each page is scanned, the [Scan Panel] dialog box is displayed. If you selected [Automatic Feeding] in the [Feeding Option] box, the scanner detects when the next document is placed and continues scanning. If you selected [Panel Feeding] in the [Feeding Option] box, press the Scan button after placing the next document to continue scanning. Prescan • To confirm images before scanning Select the [Prescan] check box. The [Prescan] dialog box is displayed when scanning starts. (See "Prescan," on p. 53.) Registering Settings • Registering Your Settings Register a name for your settings in the user preferences. When you want to recall your settings later, select the name of your registered user preferences, and they will be reflected in the dialog boxes. (See "Registering Scanning Conditions," on p. 54.) By using the Job Function or the Job Scan function of CapturePerfect 3.0, you can register scanning conditions and methods for processing scanned image files as jobs, and scan by selecting a job. Contents Back Previous Page Next Page Clearing a Paper Jam 66..CClelaerainrignagPaapPearpJearmJam When paper jams occur during scanning, use the following procedure to clear them. CAUTION When removing jammed paper, take care not to cut your hands on the edges of the paper. 1 Remove any documents that have been left in the eject tray. 2 Press the OPEN knob from both sides (c), and pull the front unit out and downward to open it (d). d c 33 DR-2010C / DR-2510C
-
 1
1 -
2
-
3
-
4
-
5
-
6
-
7
-
8
-
9
-
10
-
11
-
12
-
13
-
14
-
15
-
16
-
17
-
18
-
19
-
20
-
21
-
22
-
23
-
24
-
25
-
26
-
27
-
 28
28 -
 29
29 -
 30
30 -
 31
31 -
 32
32 -
 33
33 -
 34
34 -
 35
35 -
 36
36 -
 37
37 -
 38
38 -
39
-
40
-
41
-
42
-
43
-
44
-
45
-
46
-
47
-
48
-
49
-
50
-
51
-
52
-
53
-
54
-
55
-
56
-
57
-
58
-
59
-
60
-
61
-
62
-
63
-
64
-
65
-
66
-
67
-
68
-
69
-
70
-
71
-
72
-
73
-
74
-
75
-
76
-
77
-
78
-
79
-
80
-
81
-
82
 |
 |