Casio EX S100 Owners Manual - Page 80
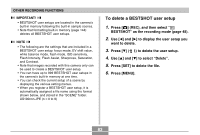
Using the BESTSHOT Mode, Press, REC, and, then select, BESTSHOT as the, recording mode
 |
UPC - 079767673741
View all Casio EX S100 manuals
Add to My Manuals
Save this manual to your list of manuals |
Page 80 highlights
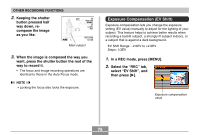
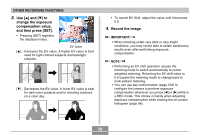
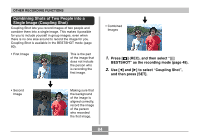
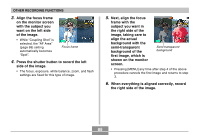
OTHER RECORDING FUNCTIONS Using the BESTSHOT Mode Selecting one of the 23 BESTSHOT scenes automatically sets up the camera for recording a similar type of image. Scene Number 1 2 3 4 5 6 7 8 9 10 11 12 13 14 15 16 17 18 19 20 21 22 Scene Name Portrait Scenery Portrait With Scenery Coupling Shot (page 84) Pre-shot (page 86) Children Candlelight Portrait Party Pet Flower Natural Green Sundown Night Scene Night Scene Portrait Fireworks Food Text Collection Monochrome Retro Twilight Business cards and documents (page 88) Scene Number 23 Scene Name White board, etc. (page 88) Register User Scene (page 82) 1. Press [ ] (REC), and then select " BESTSHOT" as the recording mode (page 48). • This enters the BESTSHOT mode and displays a sample scene. • You can use the key customization feature (page 103) to configure the camera to enter the BESTSHOT mode whenever you press [̇] or [̈] while in a REC mode. 2. Use [̇] and [̈] to select the sample scene you want, and then press [SET]. • If you want to check which sample scene is currently selected or if you want to change to a different scene, press [SET] again. 3. Record the image. 80
-
 1
1 -
2
-
3
-
4
-
5
-
6
-
7
-
8
-
9
-
10
-
11
-
12
-
13
-
14
-
15
-
16
-
17
-
18
-
19
-
20
-
21
-
22
-
23
-
24
-
25
-
26
-
27
-
28
-
29
-
30
-
31
-
32
-
33
-
34
-
35
-
36
-
37
-
38
-
39
-
40
-
41
-
42
-
43
-
44
-
45
-
46
-
47
-
48
-
49
-
50
-
51
-
52
-
53
-
54
-
55
-
56
-
57
-
58
-
59
-
60
-
61
-
62
-
63
-
64
-
65
-
66
-
67
-
68
-
69
-
70
-
71
-
72
-
73
-
74
-
 75
75 -
 76
76 -
 77
77 -
 78
78 -
 79
79 -
 80
80 -
 81
81 -
 82
82 -
 83
83 -
 84
84 -
 85
85 -
86
-
87
-
88
-
89
-
90
-
91
-
92
-
93
-
94
-
95
-
96
-
97
-
98
-
99
-
100
-
101
-
102
-
103
-
104
-
105
-
106
-
107
-
108
-
109
-
110
-
111
-
112
-
113
-
114
-
115
-
116
-
117
-
118
-
119
-
120
-
121
-
122
-
123
-
124
-
125
-
126
-
127
-
128
-
129
-
130
-
131
-
132
-
133
-
134
-
135
-
136
-
137
-
138
-
139
-
140
-
141
-
142
-
143
-
144
-
145
-
146
-
147
-
148
-
149
-
150
-
151
-
152
-
153
-
154
-
155
-
156
-
157
-
158
-
159
-
160
-
161
-
162
-
163
-
164
-
165
-
166
-
167
-
168
-
169
-
170
-
171
-
172
-
173
-
174
-
175
-
176
-
177
-
178
-
179
-
180
-
181
-
182
-
183
-
184
-
185
-
186
-
187
-
188
-
189
-
190
-
191
-
192
-
193
-
194
-
195
-
196
-
197
-
198
-
199
-
200
-
201
-
202
-
203
-
204
-
205
-
206
-
207
 |
 |