Cisco SRW224G4P User Guide - Page 48
Create LAG, LAG Broadcast Control, VLAN LAG Configuration
 |
UPC - 745883578535
View all Cisco SRW224G4P manuals
Add to My Manuals
Save this manual to your list of manuals |
Page 48 highlights
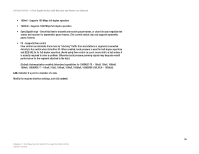
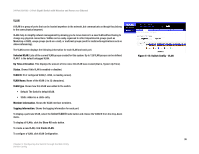
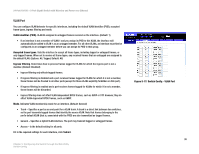
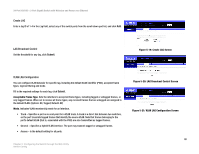
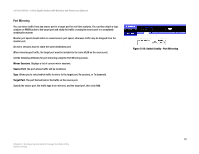
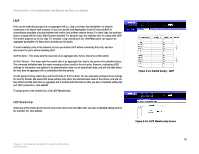
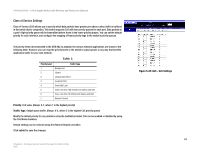
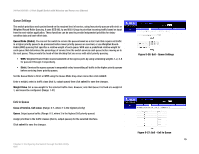
24-Port 10/100 + 2-Port Gigabit Switch with Webview and Power over Ethernet Create LAG Enter a lag ID of 1-4 in the Lag field, select any of the switch ports from the scroll-down port list, and click Add. LAG Broadcast Control Set the threshold for any lag, click Submit. Figure 5-19: Create LAG Screen VLAN LAG Configuration You can configure VLAN behavior for specific lag, including the default VLAN identifier (PVID), accepted frame types, ingress filtering and mode. Fill in the required settings for each lag, click Submit. Acceptable Frame Type. Sets the interface to accept all frame types, including tagged or untagged frames, or only tagged frames. When set to receive all frame types, any received frames that are untagged are assigned to the default VLAN. (Options: All, Tagged; Default: All) Mode. Indicates VLAN membership mode for an interface. • Trunk - Specifies a port as an end-point for a VLAN trunk. A trunk is a direct link between two switches, so the port transmits tagged frames that identify the source VLAN. Note that frames belonging to the port's default VLAN (that is, associated with the PVID) are also transmitted as tagged frames. • General - Specifies a hybrid VLAN interface. The port may transmit tagged or untagged frames. • Access - Is the default setting for all ports. Chapter 5: Configuring the Switch through the Web Utility Switch Config Figure 5-20: LAG Broadcast Control Screen Figure 5-21: VLAN LAG Configuration Screen 40
-
 1
1 -
2
-
3
-
4
-
5
-
6
-
7
-
8
-
9
-
10
-
11
-
12
-
13
-
14
-
15
-
16
-
17
-
18
-
19
-
20
-
21
-
22
-
23
-
24
-
25
-
26
-
27
-
28
-
29
-
30
-
31
-
32
-
33
-
34
-
35
-
36
-
37
-
38
-
39
-
40
-
41
-
42
-
 43
43 -
 44
44 -
 45
45 -
 46
46 -
 47
47 -
 48
48 -
 49
49 -
 50
50 -
 51
51 -
 52
52 -
 53
53 -
54
-
55
-
56
-
57
-
58
-
59
-
60
-
61
-
62
-
63
-
64
-
65
-
66
-
67
-
68
-
69
-
70
-
71
-
72
-
73
-
74
-
75
-
76
-
77
-
78
-
79
-
80
-
81
-
82
-
83
-
84
-
85
-
86
-
87
-
88
-
89
-
90
-
91
-
92
-
93
-
94
-
95
-
96
-
97
-
98
-
99
-
100
-
101
-
102
-
103
-
104
 |
 |
