Compaq ML370 ProLiant ML370 Maintenance and Service Guide - Page 39
Power Switch with Cable and LED Indicators
 |
UPC - 720591236915
View all Compaq ML370 manuals
Add to My Manuals
Save this manual to your list of manuals |
Page 39 highlights
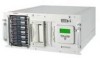
Removal and Replacement Procedures 2-23 Power Switch with Cable and LED Indicators To remove the power switch and cable assembly: 1. Perform the preparation procedures. See "Powering Down the Server" earlier in this chapter. 2. Open the front bezel (tower model only). See "Front Bezel" earlier in this chapter. 3. Remove the small access panel. See "Small Access Panel" earlier in this chapter. 4. Remove the single T-15 screw securing the power switch to the chassis . 5. Slide the power switch housing back , then lift it out of the chassis . 2 3 1 Figure 2-19. Removing the power switch with LED and cable
-
 1
1 -
2
-
3
-
4
-
5
-
6
-
7
-
8
-
9
-
10
-
11
-
12
-
13
-
14
-
15
-
16
-
17
-
18
-
19
-
20
-
21
-
22
-
23
-
24
-
25
-
26
-
27
-
28
-
29
-
30
-
31
-
32
-
33
-
 34
34 -
 35
35 -
 36
36 -
 37
37 -
 38
38 -
 39
39 -
 40
40 -
 41
41 -
 42
42 -
 43
43 -
 44
44 -
45
-
46
-
47
-
48
-
49
-
50
-
51
-
52
-
53
-
54
-
55
-
56
-
57
-
58
-
59
-
60
-
61
-
62
-
63
-
64
-
65
-
66
-
67
-
68
-
69
-
70
-
71
-
72
-
73
-
74
-
75
-
76
-
77
-
78
-
79
-
80
-
81
-
82
-
83
-
84
-
85
-
86
-
87
-
88
-
89
-
90
-
91
-
92
-
93
-
94
-
95
-
96
-
97
-
98
-
99
-
100
-
101
-
102
-
103
-
104
-
105
-
106
-
107
-
108
-
109
-
110
-
111
-
112
-
113
-
114
-
115
-
116
-
117
-
118
-
119
-
120
-
121
-
122
-
123
-
124
-
125
-
126
-
127
-
128
-
129
-
130
-
131
-
132
-
133
-
134
-
135
-
136
-
137
-
138
-
139
-
140
-
141
-
142
-
143
-
144
-
145
-
146
-
147
-
148
-
149
-
150
-
151
-
152
 |
 |

Removal and Replacement Procedures
2-23
Power Switch with Cable and LED Indicators
To remove the power switch and cable assembly:
1.
Perform the preparation procedures. See
“
Powering Down the Server
”
earlier in this
chapter.
2.
Open the front bezel (tower model only). See
“
Front Bezel
”
earlier in this chapter.
3.
Remove the small access panel. See
“
Small Access Panel
”
earlier in this chapter.
4.
Remove the single T-15 screw securing the power switch to the chassis
➊
.
5.
Slide the power switch housing back
➋
, then lift it out of the chassis
➌
.
2
3
1
Figure 2-19.
Removing the power switch with LED and cable