Computer Associates BABWBN2900NE2 Option Guide - Page 26
Exchange Disaster Recovery White Papers - 11 5
 |
UPC - 757943260885
View all Computer Associates BABWBN2900NE2 manuals
Add to My Manuals
Save this manual to your list of manuals |
Page 26 highlights
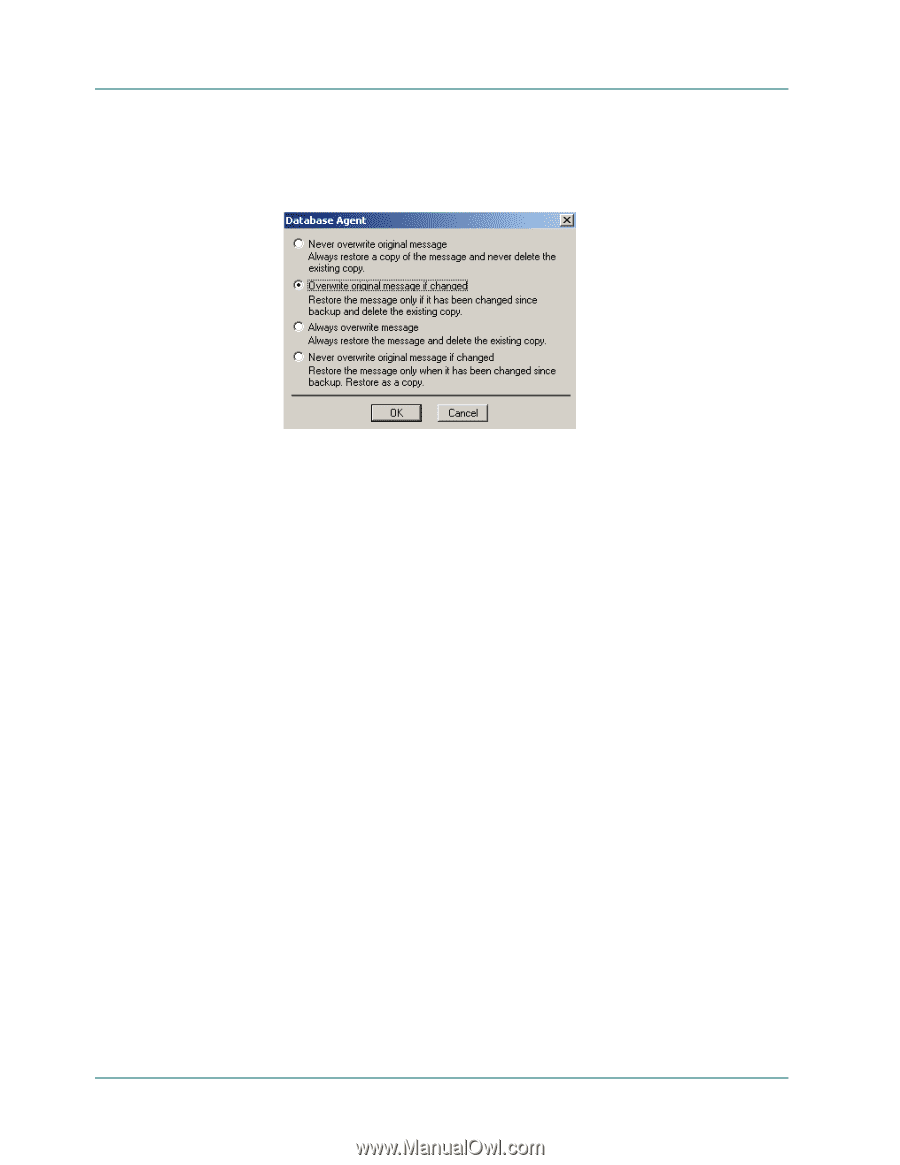
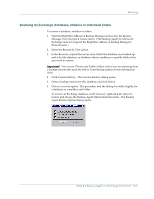
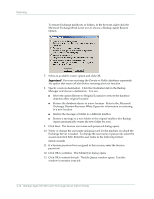
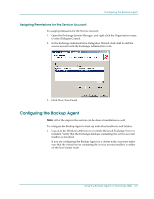
Restoring To restore Exchange mailboxes or folders, in the browser, right-click the Microsoft Exchange-Brick Level icon to choose a Backup Agent Restore Option. 7. Select an available restore option and click OK. Important! If you are restoring the Private or Public databases separately, the option that erases all data before restoring does not function. 8. Specify a restore destination. Click the Destination tab in the Backup Manager and choose a destination. You can: ■ Select the option Restore to Original Location to restore the database objects to their original location. ■ Restore the database objects to a new location. Refer to the Microsoft Exchange Disaster Recovery White Papers for information on restoring to a new location. ■ Restore the message or folder to a different mailbox. ■ Restore a message to a new folder in the original mailbox (the Backup Agent automatically creates the new folder for you). 9. Click Start. The Session user name and password dialog opens. 10. Verify or change the user name and password for the machine on which the Exchange Server is loaded. To change the user name or password, select the session and click Edit. Enter the user name in the following format: DOMAIN\USERNAME 11. If a Session password was assigned to this session, enter the Session password. 12. Click OK to continue. The Submit Job dialog opens. 13. Click OK to submit this job. The Job Queue window opens. Use this window to monitor your job. 2-16 Backup Agent for Microsof t Exchange Server Option Guide
-
 1
1 -
2
-
3
-
4
-
5
-
6
-
7
-
8
-
9
-
10
-
11
-
12
-
13
-
14
-
15
-
16
-
17
-
18
-
19
-
20
-
 21
21 -
 22
22 -
 23
23 -
 24
24 -
 25
25 -
 26
26 -
 27
27 -
 28
28 -
 29
29 -
 30
30 -
 31
31 -
32
-
33
-
34
-
35
-
36
-
37
-
38
-
39
-
40
-
41
-
42
-
43
-
44
-
45
-
46
-
47
-
48
-
49
-
50
-
51
-
52
 |
 |