Computer Associates BABWBN2900NE2 Option Guide - Page 46
Microsoft Exchange Disaster, Recovery White Papers, To restore the Information Store databases
 |
UPC - 757943260885
View all Computer Associates BABWBN2900NE2 manuals
Add to My Manuals
Save this manual to your list of manuals |
Page 46 highlights
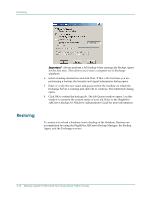
Restoring 8. Specify a restore destination. Click the Destination tab in the Backup window and choose a destination. You can: ■ Select the Restore to Original Location option to restore the database objects to their original location. ■ Restore the database objects to a new server. To do this, the target server must have the same Organization and Administrative Group name. Storage groups and databases with the same names as on the original server must already exist on the target server. The target databases must be configured so that they can be overwritten. To configure the target database, open the Exchange System Manager, right-click the target database and select Properties. Choose the Database tab and select the option This Database can be Overwritten by a Restore. Note: You cannot restore the database to an Exchange Server of a different version. For Disaster Recovery, you must re-install Windows 2000, recover your system state from a backup, restore your system drive, run Exchange in disaster recovery mode, and then recover the databases from a backup. Refer to the Microsoft Exchange Disaster Recovery White Papers for information on restoring to a new server. ■ Restore the folder to a different mailbox. ■ Restore a folder to a new folder in the original mailbox (the Backup Agent automatically creates the new folder for you). 9. Click Start to continue. The Session user name and password dialog opens. 10. Verify or change the user name and password for the machine on which the Exchange Server is loaded. To change the user name or password, select the session and click Edit. Enter the user name in the following format: DOMAIN\USERNAME 11. If a Session password was assigned, enter the Session password. 12. Click OK to continue. The Submit Job dialog opens. 13. Click OK to submit this job. The Job Queue window opens. Use this window to monitor your job. To restore the Information Store databases, the Microsoft Information Store service must be up and running, and the selected databases for restore must be dismounted before starting the restore job. If you are restoring individual databases without restoring the whole storage group, the "Apply existing logs" option is always applied to the restored databases. The "Apply existing logs" option will make the restored databases consistent with the rest of the storage group. 3-18 Backup Agent for Microsoft Exchange Server Option Guide
-
 1
1 -
2
-
3
-
4
-
5
-
6
-
7
-
8
-
9
-
10
-
11
-
12
-
13
-
14
-
15
-
16
-
17
-
18
-
19
-
20
-
21
-
22
-
23
-
24
-
25
-
26
-
27
-
28
-
29
-
30
-
31
-
32
-
33
-
34
-
35
-
36
-
37
-
38
-
39
-
40
-
 41
41 -
 42
42 -
 43
43 -
 44
44 -
 45
45 -
 46
46 -
 47
47 -
 48
48 -
 49
49 -
 50
50 -
 51
51 -
52
 |
 |
