Dell PowerConnect Brocade M6505 Hardware Reference Manual - Page 33
Using the CMC CLI to set the IP address
 |
View all Dell PowerConnect Brocade M6505 manuals
Add to My Manuals
Save this manual to your list of manuals |
Page 33 highlights
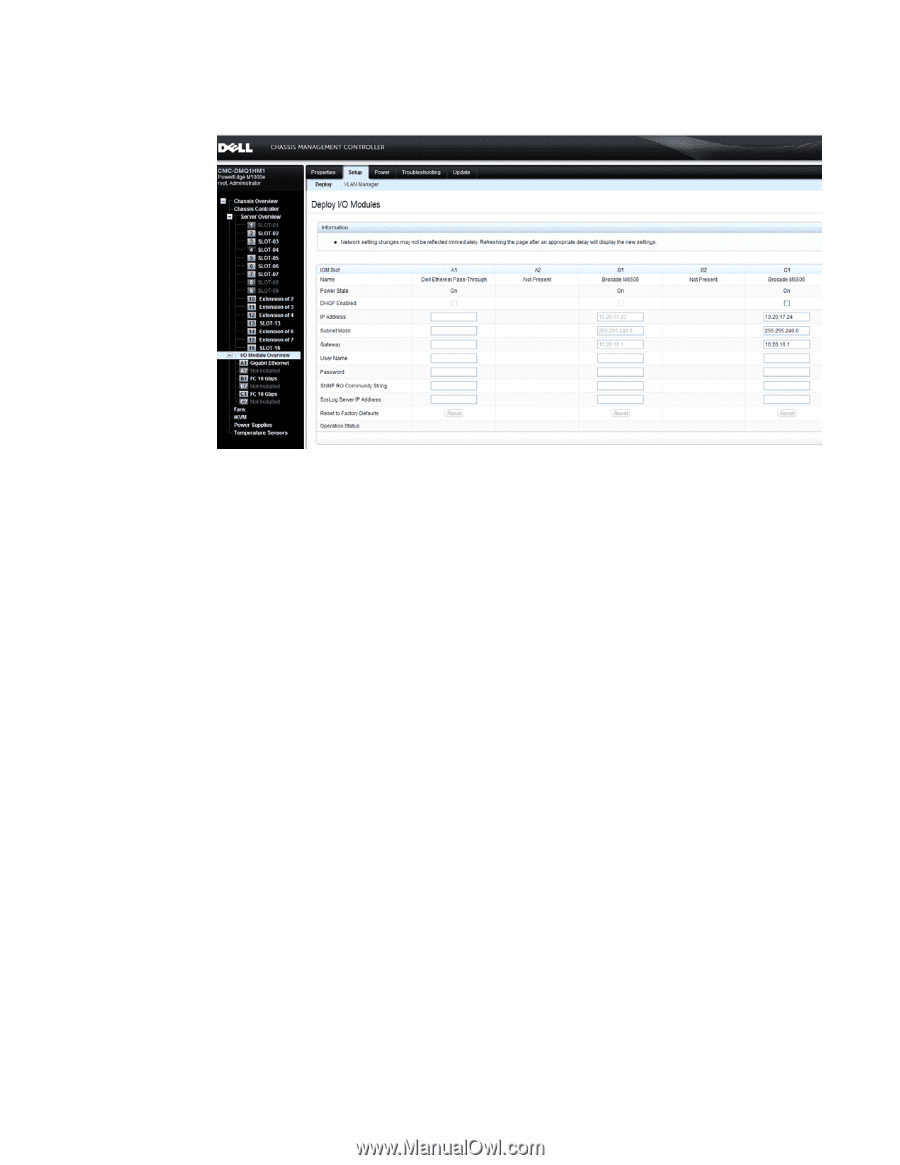
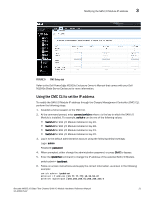
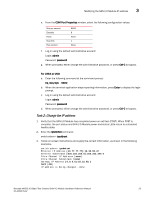
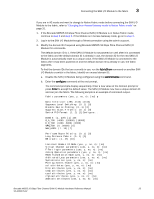
Modifying the SAN I/O Module IP address 3 FIGURE 5 CMC Setup tab Refer to the Dell PowerEdge M1000e Enclosure Owner's Manual that comes with your Dell M1000e Blade Server Enclosure for more information. Using the CMC CLI to set the IP address To modify the SAN I/O Module IP address through the Chassis Management Controller (CMC) CLI, perform the following steps: 1. Establish a Telnet session to the CMC CLI. 2. At the command prompt, enter connect switch-x where x is the bay in which the SAN I/O Module is installed. For example, switch-x can be one of the following values: • Switch-3 for SAN I/O Module installed in bay B1. • Switch-4 for SAN I/O Module installed in bay B2. • Switch-5 for SAN I/O Module installed in bay C1. • Switch-6 for SAN I/O Module installed in bay C2. 3. Log in to the default administrative account using the following default settings: Login: admin Password: password 4. When prompted, either change the administrative password, or press Ctrl-C to bypass. 5. Enter the ipAddrSet command to change the IP address of the selected SAN I/O Module. switch:admin> ipaddrset 6. Follow on-screen instructions and supply the correct information, as shown in the following example: switch:admin> ipaddrset Ethernet IP Address [10.77.77.77]:10.32.53.47 Ethernet Subnetmask [255.255.255.0]:255.255.240.0 Brocade M6505 16 Gbps Fibre Channel SAN I/O Module Hardware Reference Manual 21 53-1002576-02
-
 1
1 -
2
-
3
-
4
-
5
-
6
-
7
-
8
-
9
-
10
-
11
-
12
-
13
-
14
-
15
-
16
-
17
-
18
-
19
-
20
-
21
-
22
-
23
-
24
-
25
-
26
-
27
-
 28
28 -
 29
29 -
 30
30 -
 31
31 -
 32
32 -
 33
33 -
 34
34 -
 35
35 -
 36
36 -
 37
37 -
 38
38 -
39
-
40
-
41
-
42
-
43
-
44
-
45
-
46
-
47
-
48
-
49
-
50
-
51
-
52
-
53
-
54
-
55
-
56
-
57
-
58
-
59
-
60
-
61
-
62
-
63
-
64
-
65
-
66
-
67
-
68
-
69
-
70
 |
 |