Dell PowerConnect Brocade M6505 Hardware Reference Manual - Page 50
Insert the replacement SAN I/O Module in the I/O module bay of the Dell M1000e Blade,
 |
View all Dell PowerConnect Brocade M6505 manuals
Add to My Manuals
Save this manual to your list of manuals |
Page 50 highlights
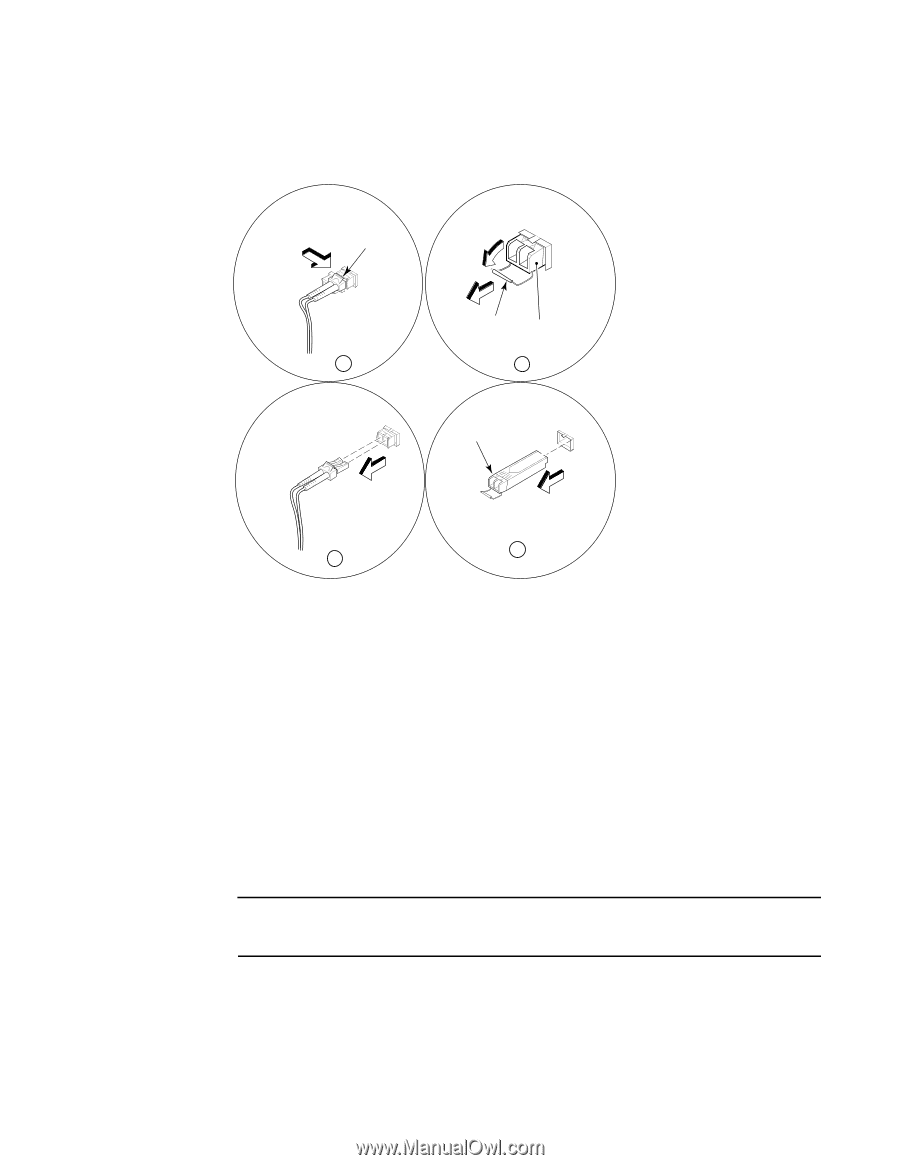
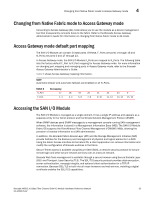
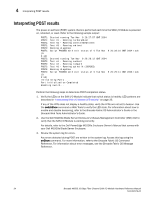
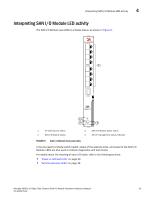
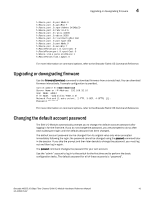
4 Removing and replacing SAN I/O Modules For added convenience, you can refer to Figure 7, which provides the generic process for removing an SFP+ transceiver from a port. Cable Release Bale SFP 1 3 SFP 4 2 1 Cable release clip 2 Disconnecting the cable 3 Opening the bale on the SFP+ 4 Removing the SFP+ FIGURE 7 Removing an SFP+ transceiver from a port 4. Disconnect the RJ-45 Ethernet cable from the COM serial port. 5. Press the release latch to free the release lever. Refer to Figure 3 on page 13. 6. Gently pull the release lever down and toward you to release the SAN I/O Module. You will feel the SAN I/O Module unseat and move out of the I/O module bay approximately 0.6 cm (0.25 inch). 7. Slide the SAN I/O Module out of the I/O module bay and set it aside. 8. Insert the replacement SAN I/O Module in the I/O module bay of the Dell M1000e Blade Server Enclosure. You must complete this step within 60 seconds. ATTENTION If you are not inserting a replacement SAN I/O Module in the I/O module bay, use a filler panel to fill the empty slot to maintain proper air flow and cooling. Do not leave the slot empty. 9. Reinsert the SFP+ transceivers that you removed in step 3. 38 Brocade M6505 16 Gbps Fibre Channel SAN I/O Module Hardware Reference Manual 53-1002576-02
-
 1
1 -
2
-
3
-
4
-
5
-
6
-
7
-
8
-
9
-
10
-
11
-
12
-
13
-
14
-
15
-
16
-
17
-
18
-
19
-
20
-
21
-
22
-
23
-
24
-
25
-
26
-
27
-
28
-
29
-
30
-
31
-
32
-
33
-
34
-
35
-
36
-
37
-
38
-
39
-
40
-
41
-
42
-
43
-
44
-
 45
45 -
 46
46 -
 47
47 -
 48
48 -
 49
49 -
 50
50 -
 51
51 -
 52
52 -
 53
53 -
 54
54 -
 55
55 -
56
-
57
-
58
-
59
-
60
-
61
-
62
-
63
-
64
-
65
-
66
-
67
-
68
-
69
-
70
 |
 |