Dell PowerEdge M640 EMC for VRTX enclosure Installation and Service Manual - Page 48
Installing the system into the enclosure
 |
View all Dell PowerEdge M640 manuals
Add to My Manuals
Save this manual to your list of manuals |
Page 48 highlights
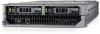
Installing the system into the enclosure Prerequisites Follow the safety guidelines listed in Safety instructions on page 45. CAUTION: To prevent damage to the I/O connectors, do not touch connectors or the connector pins. NOTE: Install the system partitions to install half-height system(s). For more information, see the PowerEdge VRTX Enclosure Owner's Manual at Dell.com/poweredgemanuals. Steps 1. If you are installing a new system, remove the I/O connector cover from the I/O connector(s) and save for future use. Figure 9. Removing the I/O connector cover 2. Orient the system so that the system handle is on the left side of the system. CAUTION: While installing the system into the enclosure, ensure that they are properly aligned with the slots, to prevent damage to the system connectors. 3. Align the system with the system slot and guide rails on the enclosure. 4. Holding the system handle, slide the system into the enclosure until the system locks into place. 48 Installing and removing system components
-
 1
1 -
2
-
3
-
4
-
5
-
6
-
7
-
8
-
9
-
10
-
11
-
12
-
13
-
14
-
15
-
16
-
17
-
18
-
19
-
20
-
21
-
22
-
23
-
24
-
25
-
26
-
27
-
28
-
29
-
30
-
31
-
32
-
33
-
34
-
35
-
36
-
37
-
38
-
39
-
40
-
41
-
42
-
 43
43 -
 44
44 -
 45
45 -
 46
46 -
 47
47 -
 48
48 -
 49
49 -
 50
50 -
 51
51 -
 52
52 -
 53
53 -
54
-
55
-
56
-
57
-
58
-
59
-
60
-
61
-
62
-
63
-
64
-
65
-
66
-
67
-
68
-
69
-
70
-
71
-
72
-
73
-
74
-
75
-
76
-
77
-
78
-
79
-
80
-
81
-
82
-
83
-
84
-
85
-
86
-
87
-
88
-
89
-
90
-
91
-
92
-
93
-
94
-
95
-
96
-
97
-
98
-
99
-
100
-
101
-
102
-
103
-
104
-
105
-
106
 |
 |
