Dell PowerEdge R440 EMC Installation and Service Manual - Page 115
Installing the hard drive backplane
 |
View all Dell PowerEdge R440 manuals
Add to My Manuals
Save this manual to your list of manuals |
Page 115 highlights
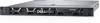
Figure 86. 10 x 2.5 backplane with expander 1. SAS_A connector 3. backplane power cable connector 5. SAS_C connector 2. backplane signal cable connector 4. SAS_B connector Installing the hard drive backplane Prerequisites Follow the safety guidelines listed in Safety instructions. NOTE: The procedure to install the backplane is similar for all backplane configurations. Steps 1. Align the slots on the backplane with the hooks on the system. 2. Lower the hard drive backplane until the blue release tabs snap into place. 3. If your backplane has an expander board, then tighten the captive screws to secure the expander board to the system. Figure 87. Installing the hard drive backplane Installing and removing system components 115
-
 1
1 -
2
-
3
-
4
-
5
-
6
-
7
-
8
-
9
-
10
-
11
-
12
-
13
-
14
-
15
-
16
-
17
-
18
-
19
-
20
-
21
-
22
-
23
-
24
-
25
-
26
-
27
-
28
-
29
-
30
-
31
-
32
-
33
-
34
-
35
-
36
-
37
-
38
-
39
-
40
-
41
-
42
-
43
-
44
-
45
-
46
-
47
-
48
-
49
-
50
-
51
-
52
-
53
-
54
-
55
-
56
-
57
-
58
-
59
-
60
-
61
-
62
-
63
-
64
-
65
-
66
-
67
-
68
-
69
-
70
-
71
-
72
-
73
-
74
-
75
-
76
-
77
-
78
-
79
-
80
-
81
-
82
-
83
-
84
-
85
-
86
-
87
-
88
-
89
-
90
-
91
-
92
-
93
-
94
-
95
-
96
-
97
-
98
-
99
-
100
-
101
-
102
-
103
-
104
-
105
-
106
-
107
-
108
-
109
-
 110
110 -
 111
111 -
 112
112 -
 113
113 -
 114
114 -
 115
115 -
 116
116 -
 117
117 -
 118
118 -
 119
119 -
 120
120 -
121
-
122
-
123
-
124
-
125
-
126
-
127
-
128
-
129
-
130
-
131
-
132
-
133
-
134
-
135
-
136
-
137
-
138
-
139
-
140
-
141
-
142
-
143
-
144
-
145
 |
 |

Figure 86. 10 x 2.5 backplane with expander
1.
SAS_A connector
2.
backplane signal cable connector
3.
backplane power cable connector
4.
SAS_B connector
5.
SAS_C connector
Installing the hard drive backplane
Prerequisites
Follow the safety guidelines listed in
Safety instructions
.
NOTE:
The procedure to install the backplane is similar for all backplane configurations.
Steps
1.
Align the slots on the backplane with the hooks on the system.
2.
Lower the hard drive backplane until the blue release tabs snap into place.
3.
If your backplane has an expander board, then tighten the captive screws to secure the expander board to the system.
Figure 87. Installing the hard drive backplane
Installing and removing system components
115