Dell PowerEdge R440 EMC Installation and Service Manual - Page 88
Installing the processor into a processor and heat sink module
 |
View all Dell PowerEdge R440 manuals
Add to My Manuals
Save this manual to your list of manuals |
Page 88 highlights
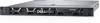
4. Remove the processor and heat sink module. Steps 1. Place the heat sink with the processor side facing up. 2. Insert a flat blade screwdriver into the release slot marked with a yellow label. Twist (do not pry) the screwdriver to break the thermal paste seal. 3. Push the retaining clips on the processor bracket to unlock the bracket from the heat sink. 4. Lift the bracket and the processor away from the heat sink, and place the processor connector side down on the processor tray. 5. Flex the outer edges of the bracket to release the bracket from the processor. NOTE: Ensure that the processor and the bracket are placed in the tray after you remove the heat sink. Figure 45. Removing the processor bracket Next steps Install the processor into the processor and heat sink module. Installing the processor into a processor and heat sink module Prerequisites Follow the safety guidelines listed in Safety instructions Steps 1. Place the processor in the processor tray. NOTE: Ensure that the pin 1 indicator on the processor tray is aligned with the pin 1 indicator on the processor. 2. Flex the outer edges of the bracket around the processor ensuring that the processor is locked into the clips on the bracket. NOTE: Ensure that the pin 1 indicator on the bracket is aligned with the pin 1 indicator on the processor before placing the bracket on the processor. NOTE: Ensure that the processor and the bracket are placed in the tray before you install the heat sink. 88 Installing and removing system components
-
 1
1 -
2
-
3
-
4
-
5
-
6
-
7
-
8
-
9
-
10
-
11
-
12
-
13
-
14
-
15
-
16
-
17
-
18
-
19
-
20
-
21
-
22
-
23
-
24
-
25
-
26
-
27
-
28
-
29
-
30
-
31
-
32
-
33
-
34
-
35
-
36
-
37
-
38
-
39
-
40
-
41
-
42
-
43
-
44
-
45
-
46
-
47
-
48
-
49
-
50
-
51
-
52
-
53
-
54
-
55
-
56
-
57
-
58
-
59
-
60
-
61
-
62
-
63
-
64
-
65
-
66
-
67
-
68
-
69
-
70
-
71
-
72
-
73
-
74
-
75
-
76
-
77
-
78
-
79
-
80
-
81
-
82
-
 83
83 -
 84
84 -
 85
85 -
 86
86 -
 87
87 -
 88
88 -
 89
89 -
 90
90 -
 91
91 -
 92
92 -
 93
93 -
94
-
95
-
96
-
97
-
98
-
99
-
100
-
101
-
102
-
103
-
104
-
105
-
106
-
107
-
108
-
109
-
110
-
111
-
112
-
113
-
114
-
115
-
116
-
117
-
118
-
119
-
120
-
121
-
122
-
123
-
124
-
125
-
126
-
127
-
128
-
129
-
130
-
131
-
132
-
133
-
134
-
135
-
136
-
137
-
138
-
139
-
140
-
141
-
142
-
143
-
144
-
145
 |
 |
