Dell Vostro 1420 Owners Manual - Page 156
Using the Operating System Media, Repair Your Computer, Advanced, Boot Options
 |
View all Dell Vostro 1420 manuals
Add to My Manuals
Save this manual to your list of manuals |
Page 156 highlights
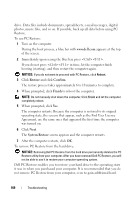
NOTE: You must press the key before the Windows logo appears on the screen. If you press after the Windows logo appears on the screen, the Advanced Boot Options menu will not appear on the screen. If you do not see the Advanced Boot Options menu, restart the computer, and then repeat this step until you see the menu on the screen. 3 Press to select Repair Your Computer on the Advanced Boot Options menu, and then press . 4 Specify the language settings that you want, and then click Next. 5 Log in as a user who has administrative credentials, and then click OK. 6 Click Dell Factory Image Restore. 7 In the Dell Factory Image Restore window, click Next. 8 Select the Yes, reformat hard drive and restore system software to factory condition check box. 9 Click Next. The computer is restored to the default factory configuration. 10 When the restore operation is completed, click Finish to restart the computer. Using the Operating System Media Before You Begin If you are considering reinstalling the Windows operating system to correct a problem with a newly installed driver, first try using Windows Device Driver Rollback (see "Using Windows Device Driver Rollback" on page 149). If Device Driver Rollback does not resolve the problem, then use System Restore to return your operating system to the operating state it was in before you installed the new device driver (see "Using Windows Vista System Restore" on page 153). NOTICE: Before performing the installation, back up all data files on your primary hard drive. For conventional hard drive configurations, the primary hard drive is the first drive detected by the computer. To reinstall Windows, you need the following items: • Dell Operating System media • Dell Drivers and Utilities media 156 Troubleshooting
-
 1
1 -
2
-
3
-
4
-
5
-
6
-
7
-
8
-
9
-
10
-
11
-
12
-
13
-
14
-
15
-
16
-
17
-
18
-
19
-
20
-
21
-
22
-
23
-
24
-
25
-
26
-
27
-
28
-
29
-
30
-
31
-
32
-
33
-
34
-
35
-
36
-
37
-
38
-
39
-
40
-
41
-
42
-
43
-
44
-
45
-
46
-
47
-
48
-
49
-
50
-
51
-
52
-
53
-
54
-
55
-
56
-
57
-
58
-
59
-
60
-
61
-
62
-
63
-
64
-
65
-
66
-
67
-
68
-
69
-
70
-
71
-
72
-
73
-
74
-
75
-
76
-
77
-
78
-
79
-
80
-
81
-
82
-
83
-
84
-
85
-
86
-
87
-
88
-
89
-
90
-
91
-
92
-
93
-
94
-
95
-
96
-
97
-
98
-
99
-
100
-
101
-
102
-
103
-
104
-
105
-
106
-
107
-
108
-
109
-
110
-
111
-
112
-
113
-
114
-
115
-
116
-
117
-
118
-
119
-
120
-
121
-
122
-
123
-
124
-
125
-
126
-
127
-
128
-
129
-
130
-
131
-
132
-
133
-
134
-
135
-
136
-
137
-
138
-
139
-
140
-
141
-
142
-
143
-
144
-
145
-
146
-
147
-
148
-
149
-
150
-
 151
151 -
 152
152 -
 153
153 -
 154
154 -
 155
155 -
 156
156 -
 157
157 -
 158
158 -
 159
159 -
 160
160 -
 161
161 -
162
-
163
-
164
-
165
-
166
-
167
-
168
-
169
-
170
-
171
-
172
-
173
-
174
-
175
-
176
-
177
-
178
-
179
-
180
-
181
-
182
-
183
-
184
-
185
-
186
-
187
-
188
-
189
-
190
-
191
-
192
-
193
-
194
-
195
-
196
-
197
-
198
-
199
-
200
-
201
-
202
-
203
-
204
-
205
-
206
-
207
-
208
-
209
-
210
-
211
-
212
-
213
-
214
-
215
-
216
-
217
-
218
-
219
-
220
-
221
-
222
-
223
-
224
-
225
-
226
-
227
-
228
-
229
-
230
-
231
-
232
-
233
-
234
-
235
-
236
-
237
-
238
-
239
-
240
-
241
-
242
-
243
-
244
-
245
-
246
-
247
-
248
 |
 |