Epson DS-30 Users Guide - Page 17
Scanning Using Document Capture Pro (for Windows), Document, Capture Pro Help, Start, All Programs
 |
View all Epson DS-30 manuals
Add to My Manuals
Save this manual to your list of manuals |
Page 17 highlights
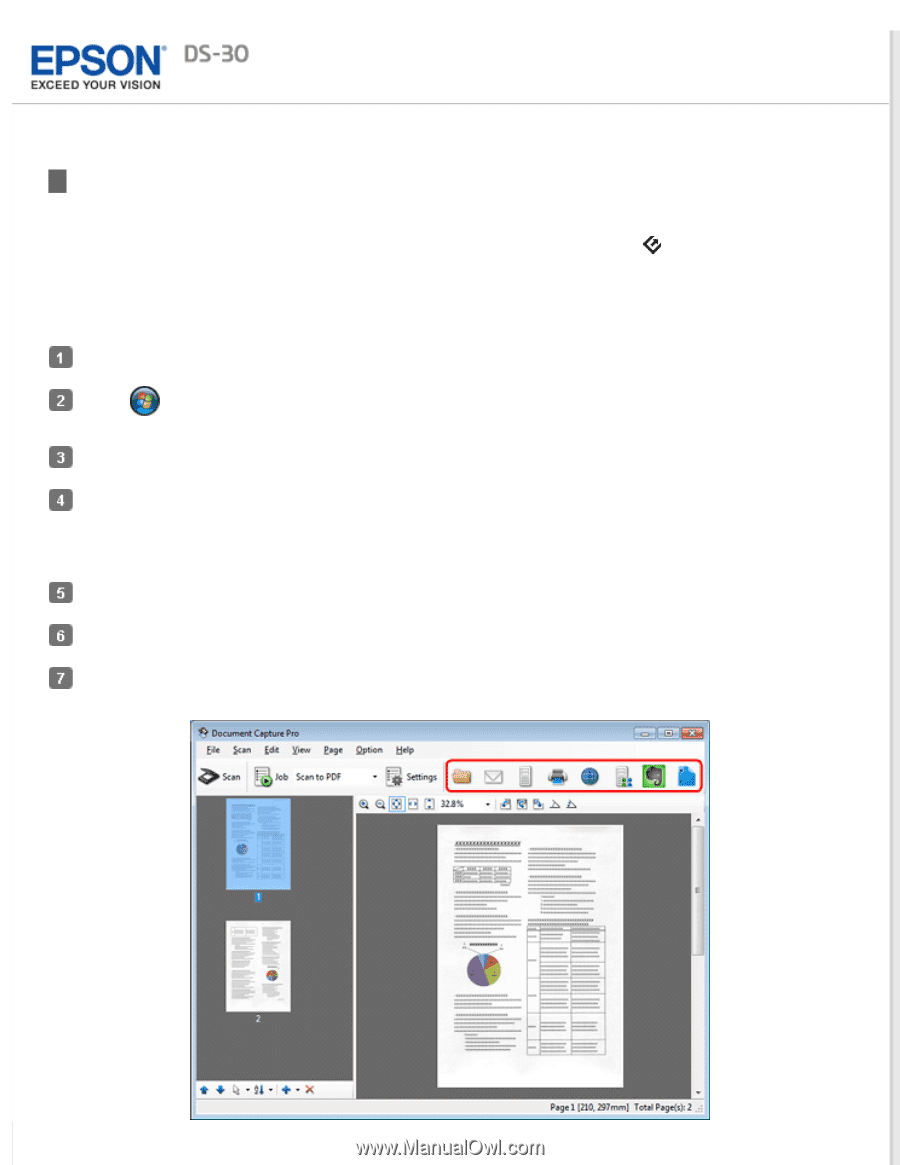
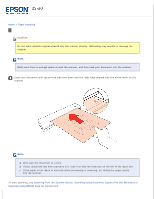
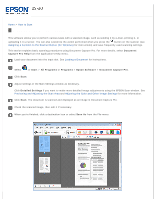
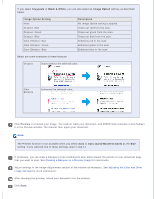
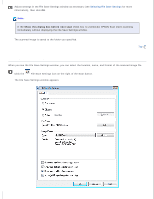
Home > How to Scan Scanning Using Document Capture Pro (for Windows) This software allows you to perform various tasks with a scanned image, such as sending it by e-mail, printing it, or uploading it to a server. You can also customize the action performed when you press the button on the scanner (see Assigning a Function to the Scanner Button (for Windows) for instructions) and save frequently used scanning settings. This section explains basic scanning procedures using Document Capture Pro. For more details, select Document Capture Pro Help from the application's Help menu. Load your document into the input slot. See Loading a Document for instructions. Select or Start > All Programs or Programs > Epson Software > Document Capture Pro. Click Scan. Adjust settings in the Main Settings window as necessary. Click Detailed Settings if you want to make more detailed image adjustments using the EPSON Scan window. See Previewing and Adjusting the Scan Area and Adjusting the Color and Other Image Settings for more information. Click Scan. The document is scanned and displayed as an image in Document Capture Pro. Check the scanned image, then edit it if necessary. When you're finished, click a destination icon or select Save As from the File menu.
-
 1
1 -
2
-
3
-
4
-
5
-
6
-
7
-
8
-
9
-
10
-
11
-
 12
12 -
 13
13 -
 14
14 -
 15
15 -
 16
16 -
 17
17 -
 18
18 -
 19
19 -
 20
20 -
 21
21 -
 22
22 -
23
-
24
-
25
-
26
-
27
-
28
-
29
-
30
-
31
-
32
-
33
-
34
-
35
-
36
-
37
-
38
-
39
-
40
-
41
-
42
-
43
-
44
-
45
-
46
-
47
-
48
-
49
-
50
-
51
-
52
-
53
-
54
-
55
-
56
-
57
-
58
-
59
-
60
-
61
-
62
-
63
 |
 |