Epson DS-30 Users Guide - Page 39
Scanning to the Cloud (for Windows), Document Capture Pro
 |
View all Epson DS-30 manuals
Add to My Manuals
Save this manual to your list of manuals |
Page 39 highlights
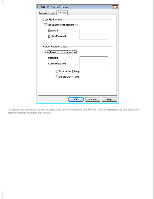
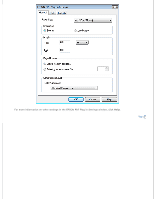
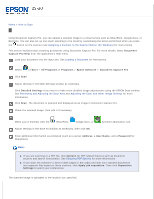
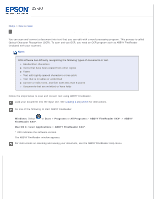
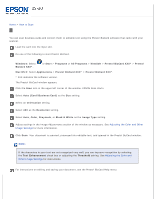
Home > How to Scan Scanning to the Cloud (for Windows) Using Document Capture Pro, you can upload a scanned image to a cloud service such as SharePoint, Google Docs, or Evernote. You can also set up one touch scanning to the cloud by customizing the action performed when you press the button on the scanner (see Assigning a Function to the Scanner Button (for Windows) for instructions). This section explains basic scanning procedures using Document Capture Pro. For more details, select Document Capture Pro Help from the application's Help menu. Load your document into the input slot. See Loading a Document for instructions. Select or Start > All Programs or Programs > Epson Software > Document Capture Pro. Click Scan. Adjust settings in the Main Settings window as necessary. Click Detailed Settings if you want to make more detailed image adjustments using the EPSON Scan window. See Previewing and Adjusting the Scan Area and Adjusting the Color and Other Image Settings for more information. Click Scan. The document is scanned and displayed as an image in Document Capture Pro. Check the scanned image, then edit it if necessary. When you're finished, click the SharePoint, Google Docs, or Evernote destination icon. Adjust settings in the Save As window as necessary, then click OK. Enter additional information as prompted (such as a server Address, a User Name, and a Password for SharePoint). Note: If you are scanning to a PDF file, click Options for PDF related features such as document security and search functionality. See Selecting PDF Options for more information. If you want the software to detect blank pages or bar codes and split your scanned documents into separate files based on these markers, click Apply job separation. Then click Separation Settings to select your preferences. The scanned image is uploaded to the location you specified.
-
 1
1 -
2
-
3
-
4
-
5
-
6
-
7
-
8
-
9
-
10
-
11
-
12
-
13
-
14
-
15
-
16
-
17
-
18
-
19
-
20
-
21
-
22
-
23
-
24
-
25
-
26
-
27
-
28
-
29
-
30
-
31
-
32
-
33
-
 34
34 -
 35
35 -
 36
36 -
 37
37 -
 38
38 -
 39
39 -
 40
40 -
 41
41 -
 42
42 -
 43
43 -
 44
44 -
45
-
46
-
47
-
48
-
49
-
50
-
51
-
52
-
53
-
54
-
55
-
56
-
57
-
58
-
59
-
60
-
61
-
62
-
63
 |
 |