Epson Stylus Pro 3800 Professional Edition Printer Guide - Page 73
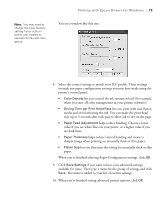
sharper image when printing on unusually thick or thin paper.
 |
View all Epson Stylus Pro 3800 Professional Edition manuals
Add to My Manuals
Save this manual to your list of manuals |
Page 73 highlights
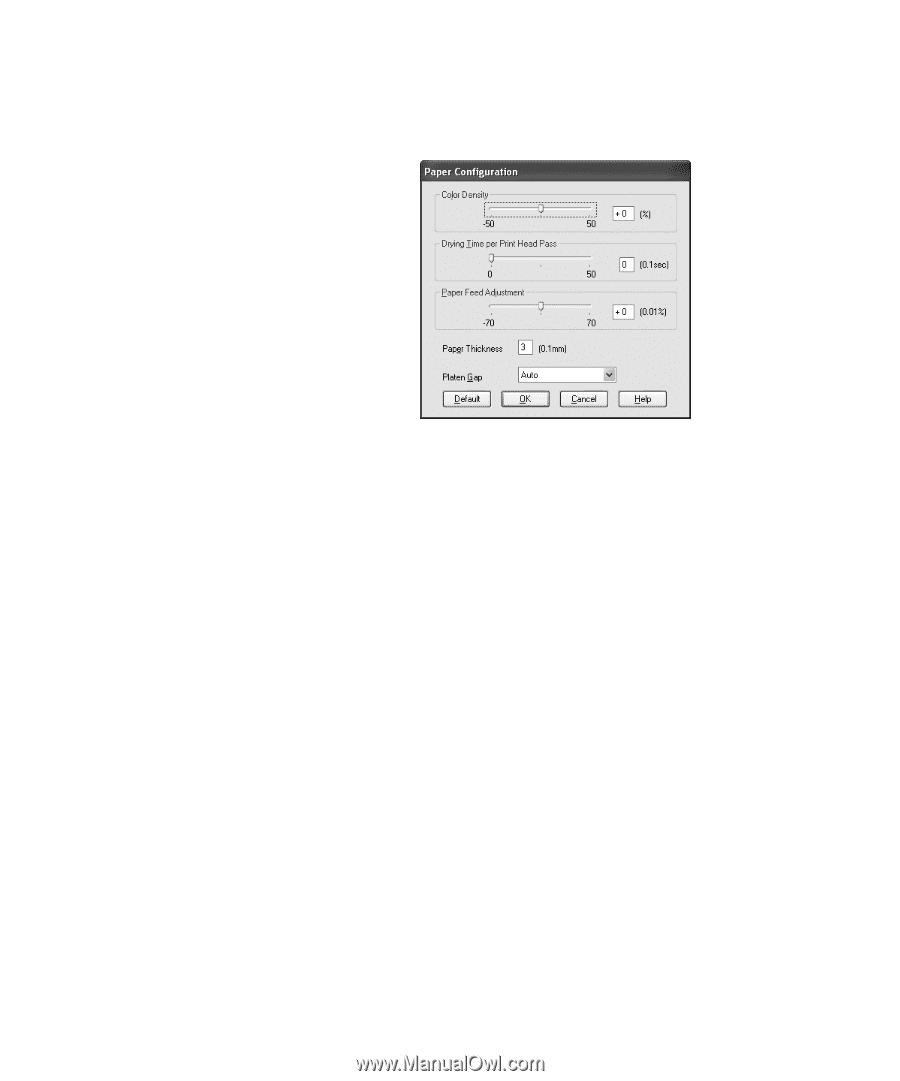
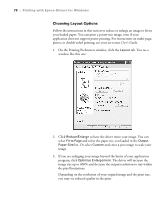
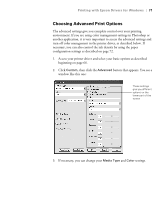
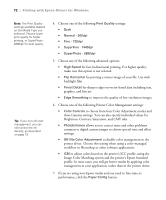
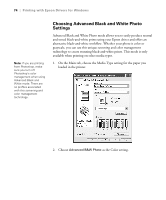
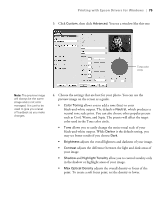
Note: You may need to change the Color Density setting if your custom profile was created to optimize D-max and color gamut. Printing with Epson Drivers for Windows | 73 You see a window like this one: 8. Select the correct settings to match your ICC profile. These settings override any paper configuration settings you may have made using the printer's control panel. • Color Density lets you control the ink saturation level (for example, when you turn off color management in your printer software). • Drying Time per Print Head Pass lets you print with non-Epson media and avoid smearing the ink. You can make the print head wait up to 5 seconds after each pass to allow ink to dry on the page. • Paper Feed Adjustment helps reduce banding. Choose a lower value if you see white lines on your prints, or a higher value if you see dark lines. • Paper Thickness helps reduce vertical banding and creates a sharper image when printing on unusually thick or thin paper. • Platen Gap lets you fine-tune the setting for unusually thick or thin paper. When you're finished selecting Paper Configuration settings, click OK. 9. Click Save Settings if you want to have your advanced settings available for reuse. Then type a name for the group of settings and click Save. The name is added to your list of custom settings. 10. When you're finished setting advanced printer options, click OK. 4-73
-
 1
1 -
2
-
3
-
4
-
5
-
6
-
7
-
8
-
9
-
10
-
11
-
12
-
13
-
14
-
15
-
16
-
17
-
18
-
19
-
20
-
21
-
22
-
23
-
24
-
25
-
26
-
27
-
28
-
29
-
30
-
31
-
32
-
33
-
34
-
35
-
36
-
37
-
38
-
39
-
40
-
41
-
42
-
43
-
44
-
45
-
46
-
47
-
48
-
49
-
50
-
51
-
52
-
53
-
54
-
55
-
56
-
57
-
58
-
59
-
60
-
61
-
62
-
63
-
64
-
65
-
66
-
67
-
 68
68 -
 69
69 -
 70
70 -
 71
71 -
 72
72 -
 73
73 -
 74
74 -
 75
75 -
 76
76 -
 77
77 -
 78
78 -
79
-
80
-
81
-
82
-
83
-
84
-
85
-
86
-
87
-
88
-
89
-
90
-
91
-
92
-
93
-
94
-
95
-
96
-
97
-
98
-
99
-
100
-
101
-
102
-
103
-
104
-
105
-
106
-
107
-
108
-
109
-
110
-
111
-
112
-
113
-
114
-
115
-
116
-
117
-
118
-
119
-
120
-
121
-
122
-
123
-
124
-
125
-
126
-
127
-
128
-
129
-
130
-
131
-
132
-
133
-
134
 |
 |