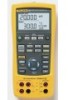
Fluke 726 FE 726 Users Manual
Fluke 726 Manual
 |
View all Fluke 726 manuals
Add to My Manuals
Save this manual to your list of manuals |
Fluke 726 manual content summary:
- Fluke 726 | FE 726 Users Manual - Page 1
September 2005 © 2005 Fluke Corporation. All rights reserved. All product names are trademarks of their respective companies. ® 726 Multifunction Process Calibrator Users Manual - Fluke 726 | FE 726 Users Manual - Page 2
warranty on behalf of Fluke. Warranty support is available only if product is purchased through a Fluke authorized sales outlet or Buyer has paid the applicable international price. Fluke reserves the right to invoice Buyer for importation costs of repair/replacement parts when product purchased in - Fluke 726 | FE 726 Users Manual - Page 3
Table of Contents Title Page Introduction...1 Contacting Fluke...1 Standard Equipment...3 Safety Information ...3 Symbols ...7 Getting Acquainted with the Calibrator 8 Input and Output Terminals 8 Keys...10 Display ...13 Configuration Menus ...14 Contrast Adjustment 14 Shut Down Mode ...15 CJC - Fluke 726 | FE 726 Users Manual - Page 4
726 Users Manual HART Resistor ON/OFF 16 Getting Started ...16 Voltage to Voltage Modules 28 Using Source Mode...30 Sourcing 4 to 20 mA 30 Simulating a 4- to 20-mA Transmitter 30 Sourcing Other Electrical Parameters 32 Simulating Thermocouples 34 Simulating RTDs ...36 Sourcing Pressure - Fluke 726 | FE 726 Users Manual - Page 5
the Batteries 53 Cleaning the Calibrator 54 Service Center Calibration or Repair 54 Replacement Parts 54 Accessories ...56 External Fluke Pressure Module Compatibility 56 Specifications ...59 DC Voltage Measurement and Source 59 DC mA Measurement and Source 59 Ohms Measurement 60 Ohms - Fluke 726 | FE 726 Users Manual - Page 6
726 Users Manual Index Loop Power Supply 64 Pulse Read and Pulse Source 64 Pressure Measurement 64 General Specifications 65 iv - Fluke 726 | FE 726 Users Manual - Page 7
1. Summary of Source and Measure Functions 2 2. International Symbols ...7 3. Input/Output Terminals and Connectors 9 4. Key Functions...11 5. Thermocouple Types Accepted 22 6. RTD Types Accepted...25 7. mA Step Values ...42 8. Replacement Parts ...54 9. Fluke Pressure Module Compatibility 56 10 - Fluke 726 | FE 726 Users Manual - Page 8
726 Users Manual vi - Fluke 726 | FE 726 Users Manual - Page 9
. Measuring Temperature with an RTD, Measuring 2-, 3-, and 4-Wire Resistance 26 12. Gage and Differential Pressure Modules 27 13. Connections for Measuring Pressure 29 14. Connections for Simulating a 4- to 20-mA Transmitter 31 15. Electrical Sourcing - Fluke 726 | FE 726 Users Manual - Page 10
726 Users Manual 18. Connections for Sourcing Pressure 40 19. SAVE DATA Menu Showing Measurement Memory Location 3, 1 44 20. Calibrating a Thermocouple Transmitter 46 21. Calibrating a Pressure-to-Current (P/I) Transmitter 48 22. Calibrating a Current-to-Pressure (I/P) Transmitter 50 23. - Fluke 726 | FE 726 Users Manual - Page 11
. • Manual and automatic stepping and ramping. • Stores and recalls calibration screens. • Control the Calibrator remotely from a PC running a terminal emulator program. Contacting Fluke To order accessories, receive operating assistance, or locate the nearest Fluke distributor or Service Center - Fluke 726 | FE 726 Users Manual - Page 12
726 Users Manual Function dc V dc mA Frequency Resistance Thermocouple RTD (ResistanceTemperature Detector) Pressure Pulse Other functions 2 Table 1. Summary of Source and Measure Functions 0 V to 30 V Measure 0 V to 20 V Source 0 to 24 mA 0 to 24 mA 2 CPM to 15 kHz 0 Ω to 4000 Ω 2 CPM to - Fluke 726 | FE 726 Users Manual - Page 13
• Stackable alligator clip test leads • 726 Product Overview (not shown in Figure 1) • 725/726 CD-ROM (contains Users Manual; not shown in Figure 1) • 4 AA Batteries (installed) Multifunction Process Calibrator Standard Equipment Safety Information The Calibrator is designed in accordance with CAN - Fluke 726 | FE 726 Users Manual - Page 14
726 Users Manual XW Warning To avoid possible electric shock or personal injury: • Use the Calibrator only as described in the Users Manual or the protection provided by the Calibrator may be impaired. • Do not apply more than the rated voltage, as marked on the Calibrator, between the terminals, or - Fluke 726 | FE 726 Users Manual - Page 15
it from the pressure module. • Use only 4 AA batteries, properly installed in the Calibrator case, to power the Calibrator. • Disconnect test leads before changing to another measure or source function. • When servicing the Calibrator, use only specified replacement parts. • To avoid false readings - Fluke 726 | FE 726 Users Manual - Page 16
726 Users Manual AC72 Alligator Clips TL75 Test Lead Set Stackable Test Leads FREQ TC RTD PULSE CONFIG SELECTION SAVE RECALL ENTER EXIT CONFIG 100% 25% TRIGGER/STOP 25% Return to 0% Recall SOURCE mA+ / 30V MAX MEASURE ALL TERMINALS 3W V Hz MEASURE TC V mA mA- RTD LOOP 4W - Fluke 726 | FE 726 Users Manual - Page 17
Multifunction Process Calibrator Safety Information Symbols Symbols used on the Calibrator and in this manual are explained in Table 2. B F J f P ) Table 2. International Symbols AC - Alternating current DC - Direct current T M Double insulated Battery Earth ground Pressure Conforms to - Fluke 726 | FE 726 Users Manual - Page 18
726 Users Manual Getting Acquainted with the Calibrator Input and Output Terminals Figure 2 shows the Calibrator input and output terminals. Table 3 explains their use. 8 1 726 PRECISION CALIBRATOR %Error V mA LOOP ZERO 3 Seconds OPEN/CLOSE SWITCH TEST MEAS SOURCE HART V mA TC RTD FREQ PULSE - Fluke 726 | FE 726 Users Manual - Page 19
Multifunction Process Calibrator Getting Acquainted with the Calibrator No A B, C D E, F G, H Table 3. Input/Output Terminals and Connectors Name Description Pressure module connector/serial connector Connects the Calibrator to a pressure module or to a PC for a remote control serial - Fluke 726 | FE 726 Users Manual - Page 20
726 Users Manual Keys Figure 3 shows the Calibrator keys and Table 4 explains their use. 2 1 726 PRECISION CALIBRATOR %Error V mA LOOP ZERO 3 Seconds OPEN/CLOSE SWITCH TEST MEAS SOURCE HART V mA TC RTD FREQ PULSE CONFIG SELECTION SAVE RECALL ENTER TRIGGER/STOP Return to Recal EXIT CONFIG - Fluke 726 | FE 726 Users Manual - Page 21
Multifunction Process Calibrator Getting Acquainted with the Calibrator Table 4. Key Functions No Name Description A O Turns the source value. K J Press and hold to store the source value as the 0 % value. Press and hold when powering up to identify the firmware version. The firmware version - Fluke 726 | FE 726 Users Manual - Page 22
726 Users Manual Table 4. Key Functions (cont.) Calibrator through MEASURE and SOURCE modes in the lower display. Q T Selects TC (thermocouple) measurement and sourcing RTD (resistance temperature detector) measurement and sourcing function in lower display. Repeated pushes cycle through the RTD - Fluke 726 | FE 726 Users Manual - Page 23
4 shows the elements of a typical display. Low Battery Symbol Mode Indicator Loop Indicator Multifunction Process Calibrator Getting Acquainted with the Calibrator Memory Locations for Calibrator Setups HART Mode Indicator Units Display % Error Indicators Auto Ramp Figure 4. Elements of - Fluke 726 | FE 726 Users Manual - Page 24
726 Users Manual Configuration Menus Use the configuration menus to set or change these parameters of the Calibrator: • Contrast Adjustment • the setting. 14 726 PRECISION CALIBRATOR 1 3 %Error V mA LOOP ZERO 3 Seconds OPEN/CLOSE SWITCH TEST MEAS SOURCE HART V mA TC RTD FREQ PULSE CONFIG - Fluke 726 | FE 726 Users Manual - Page 25
Compensation (CJC) is a value for the cold end of a thermocouple at the Meter's end. 1. Press C until SELECT CJC appears on the display. 2. Use select °C or °F. 3. Press S to save the setting. Multifunction Process Calibrator Configuration Menus Frequency Pulse Output Voltage 1. Press C until FREQ - Fluke 726 | FE 726 Users Manual - Page 26
726 Users Manual HART Resistor ON/OFF 1. Press C until SELECT HART ON or OFF appears on the 6. 2. Press O to turn on the Calibrator. Press l to select dc voltage (upper display). M 3. If necessary, press for SOURCE mode (lower display). The Calibrator is still measuring dc voltage, the active - Fluke 726 | FE 726 Users Manual - Page 27
Multifunction Process Calibrator Getting Started 726 PRECISION CALIBRATOR %Error V mA LOOP ZERO 3 Seconds OPEN/CLOSE STWEISTTCH MEAS SOURCE CONFIG SELECTION SAVE RECALL ENTER TRIGGER/STOP HART V mA TC RTD FREQ PULSE EXIT CONFIG 100% 25% 25% 0% Figure 6. Voltage-to-Voltage Test bec39f.eps - Fluke 726 | FE 726 Users Manual - Page 28
726 Users Manual Using Measure Mode Measuring Electrical Parameters (Upper Display) To measure the current or voltage output of a transmitter, or to measure the output of a 700 Series pressure module, use the upper display and proceed as follows: 1. Press l to select volts or current. LOOP should - Fluke 726 | FE 726 Users Manual - Page 29
Multifunction Process Calibrator Using Measure Mode 726 PRECISION CALIBRATOR %Error V mA LOOP ZERO 3 Seconds OPEN/CLOSE SWITCH TEST MEAS SOURCE HART V mA TC RTD FREQ PULSE CONFIG SELECTION SAVE RECALL ENTER TRIGGER/STOP Return to Recall EXIT CONFIG 100% 25% 25% 0% Red HART Communicator - Fluke 726 | FE 726 Users Manual - Page 30
726 Users Manual Measuring Electrical Parameters (Lower Display) To measure electrical parameters using the lower display, proceed as follows: 1. Connect the Calibrator 20 726 PRECISION CALIBRATOR Red Black %Error V mA LOOP ZERO 3 Seconds OPEN/CLOSE SWITCH TEST MEAS SOURCE HART V mA TC RTD - Fluke 726 | FE 726 Users Manual - Page 31
Measuring Temperature Using Thermocouples The Calibrator supports 13 standard thermocouples. Table 5 summarizes the ranges appropriate TC miniplug, then to the TC input/output as shown in Figure 10. Multifunction Process Calibrator Using Measure Mode W Caution One pin is wider than the other. Do not - Fluke 726 | FE 726 Users Manual - Page 32
726 Users Manual Table 5. Thermocouple Types Accepted Type Positive Lead Material Positive Lead (H) Color ANSI* IEC** Negative Lead Material E Chromel Purple Violet Constantan N Ni-Cr-Si Orange Pink - Fluke 726 | FE 726 Users Manual - Page 33
Multifunction Process Calibrator Using Measure Mode 30V MAX ALL TERMINALS SOURCE / MEASURE mA+ 3W V TC Hz RTD MEASURE V mA LOOP mA- TC 4W COM COM TC Miniplug Process Temperature Warning 30 V maximum to Figure 10. Measuring Temperature with a Thermocouple bec12f.eps 23 - Fluke 726 | FE 726 Users Manual - Page 34
726 Users Manual Using Resistance-Temperature Detectors (RTDs) The Calibrator accepts RTD types shown in Table 6. RTDs are characterized by their resistance at 0 °C (32 °F), which is called the "ice point" or R0. The most common R0 is 100 Ω. The Calibrator accepts RTD measurement inputs in two-, - Fluke 726 | FE 726 Users Manual - Page 35
Multifunction Process Calibrator Using Measure Mode Table 6. RTD Types Accepted RTD Type Ice Point (R ) 0 Material α Range (°C) Pt100 (3926) 100 Ω Platinum 0.003926 Ω/°C -200 to 630 Pt100 (385) 100 Ω Platinum 0.00385 Ω/°C -200 to 800 Ni120 (672) 120 Ω Nickel 0.00672 Ω/°C -80 to - Fluke 726 | FE 726 Users Manual - Page 36
726 Users Manual 2W 30V MAX ALL TERMINALS SOURCE / MEASURE mA+ 3W V TC Hz RTD MEASURE V mA LOOP mA- 4W COM COM 3W 30V MAX ALL TERMINALS SOURCE / MEASURE mA+ 3W V TC Hz RTD MEASURE V mA LOOP mA- 4W COM COM RTD RTD 4W 30V MAX ALL TERMINALS SOURCE / MEASURE mA+ 3W V TC - Fluke 726 | FE 726 Users Manual - Page 37
system, shut off the valve and slowly bleed off the pressure before attaching the pressure module to the pressure line. Multifunction Process Calibrator Using Measure Mode Gage 700P06 PRESSURE MODULE RANGE 100 PSIG 700 kPa 7 bar BURST PRESSURE 300 PSIG Low Differential 700P04 PRESSURE - Fluke 726 | FE 726 Users Manual - Page 38
726 Users Manual • Never apply pressure above the rated maximum printed on the pressure module. • Only use the pressure module with specified materials. Refer to the printing on the pressure module or the pressure module instruction absolute pressure module. To adjust the Calibrator reading, - Fluke 726 | FE 726 Users Manual - Page 39
726 PRECISION CALIBRATOR %Error V mA LOOP ZERO 3 Seconds OPEN/CLOSE SWITCH TEST MEAS SOURCE HART V mA TC RTD FREQ PULSE CONFIG SELECTION SAVE RECALL ENTER TRIGGER/STOP Return to Recall EXIT CONFIG 100% 25% 25% 0% Multifunction Process Calibrator Using Measure Mode Gage Module Isolation - Fluke 726 | FE 726 Users Manual - Page 40
726 Users Manual Using Source Mode In SOURCE mode, the Calibrator: • generates calibrated signals for testing and calibrating process instruments • supplies voltages, currents, frequencies, and resistances • simulates the electrical output of RTD and thermocouple temperature sensors • measures gas - Fluke 726 | FE 726 Users Manual - Page 41
726 PRECISION CALIBRATOR Multifunction Process Calibrator Using Source Mode Red + +24 V Loop Power Supply %Error V mA LOOP ZERO 3 Seconds OPEN/CLOSE SWITCH TEST MEAS SOURCE HART V mA TC RTD FREQ PULSE CONFIG SELECTION SAVE RECALL ENTER TRIGGER/STOP Return to Recall EXIT CONFIG 100% 25 - Fluke 726 | FE 726 Users Manual - Page 42
726 Users Manual Sourcing Other Electrical Parameters Volts, ohms, and frequency are also sourced and shown in the lower display. To select an electrical sourcing function, proceed as follows: 1. Connect the test leads as shown in Figure 15, depending on the source function. M 2. If necessary, press - Fluke 726 | FE 726 Users Manual - Page 43
- Red HART Communicator Black Multifunction Process Calibrator Using Source Mode 30V MAX ALL TERMINALS +mmAS+AOURCE / MEASURE V 3W TC Hz RTD MEASURE V mA LOOP mA- 4W COM COM Common V Hz + - Red Black 30V MAX ALL TERMINALS SOURCE / MEASURE mA+ 3W V TC Hz RTD MEASURE V mA LOOP - Fluke 726 | FE 726 Users Manual - Page 44
726 Users Manual Simulating Thermocouples Connect the Calibrator TC input/output to the instrument under test with , then to the TC input/output as shown in Figure 16. M 2. If necessary, press for SOURCE mode. 3. Press T for the TC display. If desired, continue pressing this key to select the desired - Fluke 726 | FE 726 Users Manual - Page 45
Multifunction Process Calibrator Using Source Mode 726 PRECISION CALIBRATOR %Error V mA LOOP ZERO 3 Seconds OPEN/CLOSE SWITCH TEST MEAS SOURCE HART V mA TC RTD FREQ PULSE CONFIG SELECTION SAVE RECALL ENTER TRIGGER/STOP Return to Recall EXIT CONFIG 100% 25% 25% 0% Color depends on type of - Fluke 726 | FE 726 Users Manual - Page 46
726 Users Manual Simulating RTDs Connect the Calibrator to the instrument under test as shown in Figure 17. Proceed as follows to simulate an RTD: M 1. If necessary, press for SOURCE mode. 2. Press R for the RTD display. Note Use the 3W and 4W terminals for measurement only, not for simulation. The - Fluke 726 | FE 726 Users Manual - Page 47
Multifunction Process Calibrator Using Source Mode 726 PRECISION CALIBRATOR %Error V mA LOOP ZERO 3 Seconds OPEN/CLOSE SWITCH TEST MEAS SOURCE CONFIG SELECTION SAVE RECALL ENTER HART V mA TC RTD FREQ PULSE EXIT CONFIG 100% 25% TRIGGER/STOP 25% Return to 0% Recall RED 1 4 SENSOR - Fluke 726 | FE 726 Users Manual - Page 48
which makes it a calibrated source. Many ranges and types of pressure modules are available from Fluke, see "Accessories". Before using a pressure module, read its instruction sheet. The modules vary in use, media, and accuracy. Attach the appropriate pressure module for the process pressure to be - Fluke 726 | FE 726 Users Manual - Page 49
Press U (lower display). The Calibrator automatically senses which pressure module is attached and sets its range accordingly. Multifunction Process Calibrator Using Source Mode 3. Zero the pressure module as described in the module's Instruction Sheet. Modules vary in zeroing procedures depending - Fluke 726 | FE 726 Users Manual - Page 50
726 Users Manual 726 PRECISION CALIBRATOR Measure mA Source Pressure 24 V Loop Power Enabled Hand Pump %Error V mA LOOP ZERO 3 Seconds OPEN/CLOSE SWITCH TEST MEAS SOURCE HART V mA TC RTD FREQ PULSE CONFIG SELECTION SAVE RECALL ENTER TRIGGER/STOP Return to Recall EXIT CONFIG 100% 25% 25% - Fluke 726 | FE 726 Users Manual - Page 51
Manually stepping an output in 25 % increments. • Switch between the 0 and 100 % span points by momentarily pushing J or G. Multifunction Process Calibrator additional features are available for adjusting the value of source functions: • Stepping the output manually with the H and I keys, or in - Fluke 726 | FE 726 Users Manual - Page 52
726 Users Manual Manually Stepping the mA Output To manually step current output: • Use H or I to step the current up or down in 25 % steps. • Touch either J to go to 0 %, or G to go to 100 %. Auto Ramping the Output Auto ramping can continuously apply a varying stimulus from the Calibrator to a - Fluke 726 | FE 726 Users Manual - Page 53
Push Z to select the desired memory location (at the top of the LCD). 4. Push S to recall the setup from the proper memory location. Multifunction Process Calibrator Storing and Recalling Data Storing and Recalling Data Up to 40 data samples can be stored in a nonvolatile memory to be recalled for - Fluke 726 | FE 726 Users Manual - Page 54
726 Users Manual Memory Locations Save Data Mode Indicator S A V E D A T A Data Point 1 bec46f.eps Figure next saved measurement, 2 of 5 for example. Pulse Train Source/Read Pulse Train Source/Read counts input pulses or sources output pulses. Use the configuration menus to set the frequency and - Fluke 726 | FE 726 Users Manual - Page 55
Press T (lower display). If desired, continue pressing this key to select the desired thermocouple type. Multifunction Process Calibrator Calibrating a Transmitter M 4. If necessary, press for SOURCE mode. 5. Set the zero and span parameters by pressing X and W. Enter these parameters by pressing - Fluke 726 | FE 726 Users Manual - Page 56
726 Users Manual 726 PRECISION CALIBRATOR %Error V mA LOOP ZERO 3 Seconds OPEN/CLOSE SWITCH TEST MEAS SOURCE HART V mA TC RTD FREQ PULSE CONFIG SELECTION SAVE RECALL ENTER TRIGGER/STOP Return to Recall EXIT CONFIG 100% 25% 25% 0% Red TEST DC PWR - ++ - +- HART Communicator Black - Fluke 726 | FE 726 Users Manual - Page 57
). If required, press l again to activate loop power. 3. Press U (lower display). Multifunction Process Calibrator Calibrating a Pressure Transmitter M 4. If necessary, press for SOURCE mode. 5. Zero the pressure module. 6. Perform checks at 0 % and 100 % of span and adjust the transmitter as - Fluke 726 | FE 726 Users Manual - Page 58
726 Users Manual 726 PRECISION CALIBRATOR Measure mA Source Pressure 24 V Loop Power Enabled Hand Pump SIGNAL + - TEST %Error V mA LOOP ZERO 3 Seconds OPEN/CLOSE SWITCH TEST MEAS SOURCE HART V mA TC RTD FREQ PULSE CONFIG SELECTION SAVE RECALL ENTER TRIGGER/STOP Return to Recall EXIT - Fluke 726 | FE 726 Users Manual - Page 59
transmitter and measures the corresponding output pressure. 2. Press A (upper display). Multifunction Process Calibrator Calibrating an I/P Device 3. Press V for sourcing current (lower display). M 4. If necessary, press for SOURCE mode. 5. Enter the desired current by pressing X and W. Press Y and - Fluke 726 | FE 726 Users Manual - Page 60
Manual 726 PRECISION CALIBRATOR Measure Pressure Source mA SIGNAL + - TEST %Error V mA LOOP ZERO 3 Seconds OPEN/CLOSE SWITCH TEST MEAS SOURCE HART V mA TC RTD FREQ PULSE CONFIG SELECTION SAVE RECALL ENTER TRIGGER/STOP Return to Recall EXIT CONFIG 100% 25% 25% 00%% Pressure Module - Fluke 726 | FE 726 Users Manual - Page 61
the test several times to confirm repeatability. Multifunction Process Calibrator Pressure Switch Test OPEN displays once the switch to exit the switch test. Testing an Output Device Use the source functions to test and calibrate actuators, recording, and indicating devices. Proceed as follows: 1. - Fluke 726 | FE 726 Users Manual - Page 62
726 Users Manual Remote Control Commands The Calibrator may be remotely controlled from a PC running a terminal emulator program. The remote control commands give access to all capabilities of the Calibrator with the exception of pressure measurement. See the Fluke Web Site for the 726 Remote - Fluke 726 | FE 726 Users Manual - Page 63
possible electric shock or personal injury, replace the batteries as soon as the battery indicator (M) appears. Figure 24 shows you how to replace the batteries. Multifunction Process Calibrator Maintenance Battery and Compartment Figure 24. Replacing the Batteries bec38f.eps 53 - Fluke 726 | FE 726 Users Manual - Page 64
726 Users Manual Cleaning the Calibrator WCaution To avoid damaging the plastic lens and case, do not use solvents or abrasive cleansers. Clean the Calibrator and pressure modules with a soft cloth dampened with water or water and mild soap. Service Center Calibration or Repair Calibration, repairs, - Fluke 726 | FE 726 Users Manual - Page 65
Multifunction Process Calibrator Maintenance 1 2 10 3 4 6 5 9 7 11 8 Figure 25. Replacement Parts bec45f.eps 55 - Fluke 726 | FE 726 Users Manual - Page 66
726 Users Manual Accessories For more information about these accessories, contact your Fluke representative. Fluke Pressure Module Compatibility is listed in Table 9. Pressure Modules and Fluke model numbers are listed in Table 10. Contact your Fluke representative about new pressure modules not - Fluke 726 | FE 726 Users Manual - Page 67
-700P27 Fluke-700P07 Fluke-700P08 Fluke-700P09 Table 10. Pressure Modules Range 0 to 1" H2O 0 to 10" H2O 0 to 1 psi 0 to 1 psi 0 to 5 psi 0 to 5 psi 0 to 15 psi 0 to 15 psi 0 to 30 psi 0 to 100 psi 0 to 300 psi 0 to 500 psi 0 to 1,000 psi 0 to 1,500 psi Multifunction Process Calibrator Accessories - Fluke 726 | FE 726 Users Manual - Page 68
726 Users Manual Fluke Model Number Fluke-700P29 Fluke-700P30 Fluke-700P31 Fluke-700PA3 Fluke-700PA4 Fluke-700PA5 Fluke-700PA6 Fluke-700PV3 Fluke-700PV4 Fluke-700PD2 Fluke-700PD3 Fluke-700PD4 Fluke-700PD5 Fluke-700PD6 Fluke-700PD7 Table 10. Pressure Modules (cont.) Range 0 to 3,000 psi 0 to 5,000 - Fluke 726 | FE 726 Users Manual - Page 69
Multifunction Process Calibrator Specifications Specifications Specifications are based on a one year calibration cycle and apply from +18 °C to +28 °C unless stated otherwise. All specifications assume a five-minute warmup period. DC Voltage Measurement and Source Range Minimum Maximum - Fluke 726 | FE 726 Users Manual - Page 70
726 Users Manual Ohms Measurement Ohms Range Ohms Read (low) Ohms Read (high) Ohms Source Ohms Range Minimum Ohms Source (low) 5.0 5.0 Ohms Source (high) 400 1500 Unit is compatible with smart transmitters and PLCs. Frequency response is ≤ 5 mS Frequency Measurement Range CPM Read Hz - Fluke 726 | FE 726 Users Manual - Page 71
Multifunction Process Calibrator Specifications Frequency Source Range CPM Source Hz Source KHz Source 2.0 1.0 1.0 10.00 Minimum Maximum 1000 1000.0 10.00 15.00 Temperature, Thermocouples Type Minimum -210 J 0.0 800 -200 K 0.0 1000 T -250 0.0 -250 E -100 R -20 0.0 CJC error - Fluke 726 | FE 726 Users Manual - Page 72
726 Users Manual Type S B C L U N XK BP -20 0.0 600 800 1000 0.0 1000 -200 0.0 -200 0.0 -200 0.0 -200 0.0 800 Minimum Maximum 0.0 1767 800 1000 1820 1000 2316 0.0 900 0.0 600 0.0 1300 800 800 2500 Thermocouple in mV read Thermocouple in mV source Maximum current output in voltage ranges is 1 mA - Fluke 726 | FE 726 Users Manual - Page 73
Multifunction Process Calibrator Specifications RTD Accuracy (Read and Source) (ITS-90) Range Minimum Maximum Accuracy Ni120 (672) -80.00 260.00 0.15 -200.00 100.00 0.15 100.00 300.00 0.25 Pt100 (385) 300.00 600.00 0.35 600.00 800.00 0.45 -200.00 100.00 0.15 Pt100 (3926) - Fluke 726 | FE 726 Users Manual - Page 74
726 Users Manual Loop Power Supply Voltage: 24 V Maximum current: 22 mA Short circuit protected. Pulse Read and Pulse Source Pulse Min Source 1 Read Pressure Measurement Range Resolution Determined by pressure module 5 digits Max 10,000 100,000 Accuracy Determined by pressure module - Fluke 726 | FE 726 Users Manual - Page 75
(% RH operating without condensation) Vibration Safety Power requirements Protection Class Size Weight Multifunction Process Calibrator Specifications -10 °C to 50 °C - 20 °C to 70 °C ± 0.005 % of range/°C outside of 23 ± 5 °C 3000 meters above mean sea level 90 % (10 to 30 °C) 75 % (30 to 40 - Fluke 726 | FE 726 Users Manual - Page 76
726 Users Manual 66 - Fluke 726 | FE 726 Users Manual - Page 77
simulating, 30 -A- Accessories, 56 Auto ramping output, 42 -B- -D- Battery, replacing, 53 -C- Calibration, 54 Celcius and Fahrenheit, 15 Cleaning calibrator, 54 Cold Junction Compensation (CJC), 15 Commands Remote Control, 52 configuration menus, 14 Connections for pressure sourcing, 39 Contact - Fluke 726 | FE 726 Users Manual - Page 78
, 56 Pressure modules, zeroing, 28 Pressure Switch Test, 51 Pressure transmitter, calibrating, 47 Pulse Train Source/Read, 44 -R- ramping, 41 Recalling setups, 42, 43 Remote control commands, 52 Repair, 54 Resistance-Temperature Detectors accepted types (table), 25 RTD simulating, 36 RTD measuring - Fluke 726 | FE 726 Users Manual - Page 79
down mode, 15 Thermocouple, 34 Simulating loop power, 30 RTD, 36 thermocouples, 34 Source functions, summary (table), 2 Source mode, 30 Sourcing 4 to 20 mA, 30 electrical parameters, 32 pressure, 38 thermocouples, 34 Specifications, 59 Standard equipment, 3 stepping, 41 Stepping output, 42 Storing - Fluke 726 | FE 726 Users Manual - Page 80
726 Users Manual 70
-
 1
1 -
 2
2 -
 3
3 -
 4
4 -
 5
5 -
 6
6 -
 7
7 -
8
-
9
-
10
-
11
-
12
-
13
-
14
-
15
-
16
-
17
-
18
-
19
-
20
-
21
-
22
-
23
-
24
-
25
-
26
-
27
-
28
-
29
-
30
-
31
-
32
-
33
-
34
-
35
-
36
-
37
-
38
-
39
-
40
-
41
-
42
-
43
-
44
-
45
-
46
-
47
-
48
-
49
-
50
-
51
-
52
-
53
-
54
-
55
-
56
-
57
-
58
-
59
-
60
-
61
-
62
-
63
-
64
-
65
-
66
-
67
-
68
-
69
-
70
-
71
-
72
-
73
-
74
-
75
-
76
-
77
-
78
-
79
-
80
 |
 |

®
726
Multifunction Process Calibrator
Users Manual
September 2005
© 2005 Fluke Corporation
.
All rights reserved.
All product names are trademarks of their respective companies.