HTC S621 User Manual - Page 126
Capture Format., Shutter Sound., Keep Backlight, Review Duration., No Limit, Show Controls.
 |
UPC - 821793000233
View all HTC S621 manuals
Add to My Manuals
Save this manual to your list of manuals |
Page 126 highlights
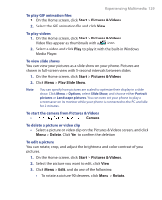
126 Experiencing Multimedia Option Allows you to Specify the white balance setting such as Auto, Daylight, Night, Incandescent, and Fluorescent to suit the lighting environment. You can also choose a special effect such as Grayscale, Sepia, or Cool to apply to your photos or video clips. Choose the resolution to use and set the storage location (phone or storage card) for captured files. When capturing images, you can also set the Quality and enable Time Stamp. Switch between different capture modes such as Photo, Video, Contacts Picture, and more. For details, see "Capture modes" earlier in this chapter. Access more settings that lets you customize the Camera or Video Recorder functions. For details, see the following section "Advanced settings of the Camera Menu." Advanced settings of the Camera Menu • Capture Format. Specify the file format for the image/video. • Shutter Sound. Choose whether or not you want the camera to make a shutter sound when you press the ENTER button to take photos or record video clips. • Keep Backlight. Choose whether to turn the backlight on or off while using the camera. This overrides your device backlight settings while you are using the camera. • Review Duration. Set a time length for displaying the captured image/video on the Review screen before automatically saving it and returning to the live Camera screen. Select No Limit if you do not want to impose a time limit. • Show Controls. Select On or Off to display or hide the indicators on the Camera screen. • Flicker Adjustment. When taking indoor shots, flicker on the camera screen may be caused by inconsistencies between the vertical scan rate of the camera display and the flicker frequency of fluorescent lighting. To reduce flicker, you can change the flicker adjustment setting to Auto or to the proper frequency (50Hz or 60Hz) of the country where your device is being used.
-
 1
1 -
2
-
3
-
4
-
5
-
6
-
7
-
8
-
9
-
10
-
11
-
12
-
13
-
14
-
15
-
16
-
17
-
18
-
19
-
20
-
21
-
22
-
23
-
24
-
25
-
26
-
27
-
28
-
29
-
30
-
31
-
32
-
33
-
34
-
35
-
36
-
37
-
38
-
39
-
40
-
41
-
42
-
43
-
44
-
45
-
46
-
47
-
48
-
49
-
50
-
51
-
52
-
53
-
54
-
55
-
56
-
57
-
58
-
59
-
60
-
61
-
62
-
63
-
64
-
65
-
66
-
67
-
68
-
69
-
70
-
71
-
72
-
73
-
74
-
75
-
76
-
77
-
78
-
79
-
80
-
81
-
82
-
83
-
84
-
85
-
86
-
87
-
88
-
89
-
90
-
91
-
92
-
93
-
94
-
95
-
96
-
97
-
98
-
99
-
100
-
101
-
102
-
103
-
104
-
105
-
106
-
107
-
108
-
109
-
110
-
111
-
112
-
113
-
114
-
115
-
116
-
117
-
118
-
119
-
120
-
 121
121 -
 122
122 -
 123
123 -
 124
124 -
 125
125 -
 126
126 -
 127
127 -
 128
128 -
 129
129 -
 130
130 -
 131
131 -
132
-
133
-
134
-
135
-
136
-
137
-
138
-
139
-
140
-
141
-
142
-
143
-
144
-
145
-
146
-
147
-
148
-
149
-
150
-
151
-
152
-
153
-
154
-
155
-
156
-
157
-
158
-
159
-
160
-
161
-
162
-
163
-
164
-
165
-
166
-
167
-
168
-
169
-
170
-
171
-
172
 |
 |
