HP 1150c HP OfficeJet Pro 1150C - (English) User Guide - Page 27
Insert the HP OfficeJet Pro 1150C CD-ROM number 1 or diskette number - officejet pro for windows 7
 |
View all HP 1150c manuals
Add to My Manuals
Save this manual to your list of manuals |
Page 27 highlights
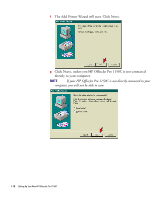
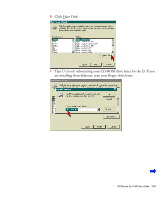
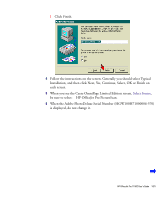
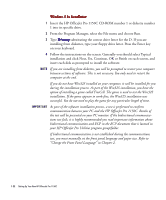
Windows 3.1x Installation 1 Insert the HP OfficeJet Pro 1150C CD-ROM number 1 or diskette number 1 into its specific drive. 2 From the Program Manager, select the File menu and choose Run. 3 Type D:\setup substituting the correct drive letter for the D. If you are installing from diskettes, type your floppy drive letter. Press the Enter key on your keyboard. 4 Follow the instructions on the screen. Generally you should select Typical installation and click Next, Yes, Continue, OK or Finish on each screen, and insert each disk as prompted to install the software. NOTE If you are installing from diskettes, you will be prompted to restart your computer between sections of software. This is not necessary. You only need to restart the computer at the end. If you do not have Win32S installed on your computer, it will be installed for you during the installation process. As part of the Win32S installation, you have the option of installing a game called FreeCell. The game is used to test the Win32S installation. If the game appears to work fine, the Win32S installation was successful. You do not need to play the game for any particular length of time. IMPORTANT As part of the software installation process, a test is performed to confirm communication between your PC and the HP OfficeJet Pro 1150C. Results of the test will be presented on your PC monitor. If the bidirectional communications test fails, it is highly recommended you read important information about bidirectional communication and ECP in the ECP document that is located in your HP OfficeJet Pro Utilities program group/folder. If bidirectional communication is not established during the communications test, you must manually set the front panel language and paper size. Refer to "Change the Front Panel Language" in Chapter 2. 1-22 Setting Up Your New HP OfficeJet Pro 1150C
-
 1
1 -
2
-
3
-
4
-
5
-
6
-
7
-
8
-
9
-
10
-
11
-
12
-
13
-
14
-
15
-
16
-
17
-
18
-
19
-
20
-
21
-
 22
22 -
 23
23 -
 24
24 -
 25
25 -
 26
26 -
 27
27 -
 28
28 -
 29
29 -
 30
30 -
 31
31 -
 32
32 -
33
-
34
-
35
-
36
-
37
-
38
-
39
-
40
-
41
-
42
-
43
-
44
-
45
-
46
-
47
-
48
-
49
-
50
-
51
-
52
-
53
-
54
-
55
-
56
-
57
-
58
-
59
-
60
-
61
-
62
-
63
-
64
-
65
-
66
-
67
-
68
-
69
-
70
-
71
-
72
-
73
-
74
 |
 |