HP 1150c HP OfficeJet Pro 1150C - (English) User Guide - Page 46
Edit Your Scanned Pictures
 |
View all HP 1150c manuals
Add to My Manuals
Save this manual to your list of manuals |
Page 46 highlights
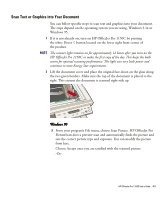
5 Click Accept. 6 In the Save As dialog box, give the file a name, and then click Save. HP OfficeJet Pro PictureScan scans the picture and saves it to the filename you specified. 7 You can now import the picture file into your program. Edit Your Scanned Pictures You can edit your scanned pictures using the image editor software provided with your HP OfficeJet Pro 1150C. If you installed the software for your HP OfficeJet Pro 1150C from a CD-ROM, your image editor is Adobe PhotoDeluxe. If you installed the software from floppy disks, you must order Adobe Photoshop LE through HP's Distribution Center. (See Chapter 5, "Getting Help", for more details.) Edit your scanned pictures in Windows 95 1 Double-click the picture in your document that was scanned using HP PictureLink. NOTE Adobe PhotoDeluxe may need to be open in the foreground. 2 Modify the picture. NOTE For detailed information on using Adobe PhotoDeluxe, choose its Help button. After you have finished editing your picture, you can click the Exit button and the modified picture appears in your document. Edit your scanned pictures in Windows 3.1x (Windows 95 if you are not using HP PictureLink) 1 Double-click the Adobe PhotoDeluxe icon in the Adobe PhotoDeluxe program group. 2 Click Open File. 3 Select the file you want, and then click Open. HP OfficeJet Pro 1150C User's Guide 4-7
-
 1
1 -
2
-
3
-
4
-
5
-
6
-
7
-
8
-
9
-
10
-
11
-
12
-
13
-
14
-
15
-
16
-
17
-
18
-
19
-
20
-
21
-
22
-
23
-
24
-
25
-
26
-
27
-
28
-
29
-
30
-
31
-
32
-
33
-
34
-
35
-
36
-
37
-
38
-
39
-
40
-
 41
41 -
 42
42 -
 43
43 -
 44
44 -
 45
45 -
 46
46 -
 47
47 -
 48
48 -
 49
49 -
 50
50 -
 51
51 -
52
-
53
-
54
-
55
-
56
-
57
-
58
-
59
-
60
-
61
-
62
-
63
-
64
-
65
-
66
-
67
-
68
-
69
-
70
-
71
-
72
-
73
-
74
 |
 |