HP 11kVA 400 Volt IEC309 16A 3-Phase Input 30xC13/3xC19 HP Monitored Power Dis - Page 24
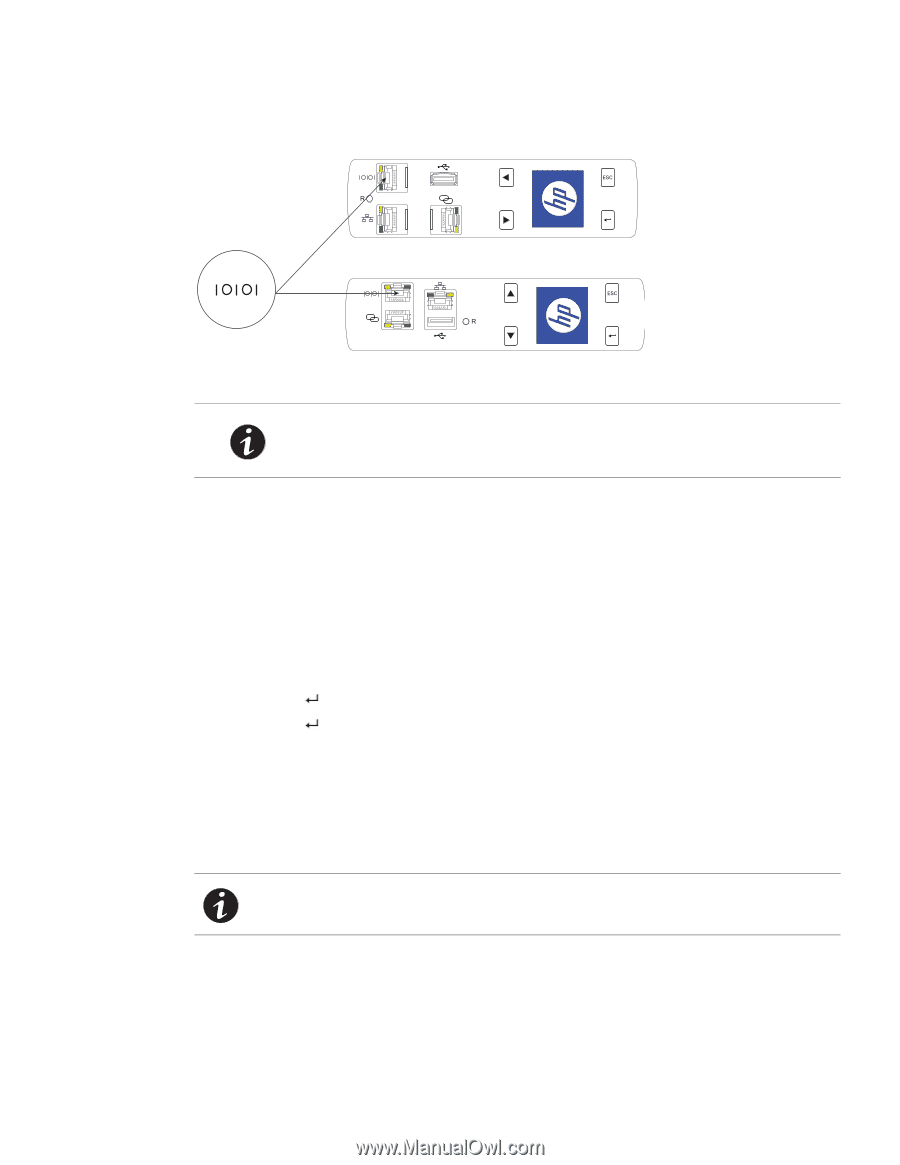
Connecting to a LAN Ethernet Port, Connecting to a Computer Serial Port
 |
View all HP 11kVA 400 Volt IEC309 16A 3-Phase Input 30xC13/3xC19 manuals
Add to My Manuals
Save this manual to your list of manuals |
Page 24 highlights
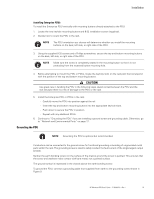
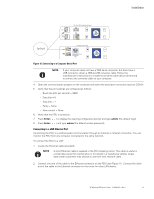
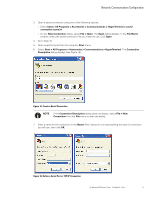
22U, 36U, 42U Model Front Panel Installation 1U Model Front Panel Figure 10. Connecting to a Computer Serial Port NOTE If your computer does not have a DB9 serial connector, but does have a USB connector, obtain a DB9-to-USB converter cable. Follow the manufacturer's instructions to install the converter cable device drivers and to connect the converter cable to your computer. 4. Open the communication program on the computer and select the serial port connection (such as COM1). 5. Verify that the port settings are configured as follows: - Baud rate (bits per second) = 9600 - Data bits = 8 - Stop bits = 1 - Parity = None - Flow control = None 6. Verify that the PDU is turned on. 7. Press Enter ( ) to display the opening configuration prompt and type admin (the default login). 8. Press Enter ( ) and type admin (the default access password). Connecting to a LAN Ethernet Port Connecting the PDU to a LAN provides communication through an Internet or Intranet connection. You can monitor the PDU from any computer connected to the same network. To connect the PDU to a LAN: 1. Locate the Ethernet cable (provided). NOTE A short Ethernet cable is supplied in the PDU shipping carton. This cable is useful in a small data center for maintenance or for checks in a warehouse setting. Larger data center customers may choose to use their own network cable. 2. Connect one end of the cable to the Ethernet connector on the PDU (see Figure 11). Connect the other end of the cable to the Ethernet connector on the router (or other LAN device. HP Monitored PDU User's Guide P-164000281-Rev 1 18
-
 1
1 -
2
-
3
-
4
-
5
-
6
-
7
-
8
-
9
-
10
-
11
-
12
-
13
-
14
-
15
-
16
-
17
-
18
-
 19
19 -
 20
20 -
 21
21 -
 22
22 -
 23
23 -
 24
24 -
 25
25 -
 26
26 -
 27
27 -
 28
28 -
 29
29 -
30
-
31
-
32
-
33
-
34
-
35
-
36
-
37
-
38
-
39
-
40
-
41
-
42
-
43
-
44
-
45
-
46
-
47
-
48
-
49
-
50
-
51
-
52
-
53
-
54
-
55
-
56
-
57
-
58
-
59
-
60
-
61
-
62
-
63
-
64
-
65
-
66
-
67
-
68
-
69
-
70
-
71
-
72
-
73
-
74
-
75
-
76
-
77
-
78
-
79
-
80
-
81
-
82
-
83
-
84
-
85
-
86
-
87
-
88
-
89
-
90
-
91
-
92
-
93
-
94
-
95
-
96
-
97
-
98
-
99
-
100
-
101
-
102
-
103
-
104
-
105
-
106
-
107
-
108
-
109
-
110
-
111
-
112
-
113
-
114
-
115
-
116
-
117
-
118
-
119
-
120
 |
 |