HP 11kVA 400 Volt IEC309 16A 3-Phase Input 30xC13/3xC19 HP Monitored Power Dis - Page 78
Set LDAP Server Global Parameters, Modify LDAP Server Settings
 |
View all HP 11kVA 400 Volt IEC309 16A 3-Phase Input 30xC13/3xC19 manuals
Add to My Manuals
Save this manual to your list of manuals |
Page 78 highlights
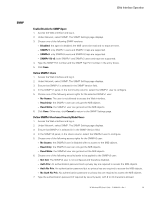
Web Interface Operation Set LDAP Server Global Parameters 1. Access the Web interface and log in. 2. Under Network and Security, select LDAP. The LDAP page displays. 3. In the LDAP Server Global Parameters panel, select the following: l Encryption Method: The Encryption method defines if an SSL connection is used between the PDU and the LDAP server when the LDAP requests are sent during the PDU user authentication process. From the drop-down list, select one of the following: - None: (No SSL connection) The data is sent without encryption. The standard port number is 389 (the port for no encryption). It can be set or modified from the LDAP Server Settings dialog. - LDAPS: (With SSL Connection) This selection uses an LDAP-over-SSL connection. The standard port number is 636. It can be set or modified from the LDAP Server Settings dialog - Start TLS: (With SSL Connection) Use the "start TLS" extension (RFC 2830). The standard port number is 389 (the same port that for no encryption). It can be set or modify from the LDAP Server Settings dialog. l Bind Type: The bind operation uses the LDAP user credentials to identify the LDAP authentication connection between the PDU and the LDAP server. From the drop-down list, select one of the following: - Simple: The user credentials are sent without encryption. However, if an SSL connection is used, the credentials are encapsulated in an SSL-encrypted connection. - SASL Digest MD5: Using MD5, a hash algorithm is used to encrypt the user credentials. 4. To upload your AC Certificate, select Browse. Highlight the selected file and click Open. ! IMPORTANT The AC Certificate is the AC Certificate of the LDAP server, not the AC Certificate of the PDU. The certificate format is a Base64 encoded DER certificate, enclosed between the "-----BEGIN CERTIFICATE-----" and "-----END CERTIFICATE-----" tag.In order to configure your LDAP server for SSL, you need the AC certificate of the PDU certificate. You can download it from the HP Web site. NOTE When uploading a file, you cannot write the file path in the text field. You must select the file from the file explorer window that displays when you click Browse. 5. Click Upload. 6. Click Save. Modify LDAP Server Settings 1. Access the Web interface and log in. 2. Under Network and Security, select LDAP. The LDAP page displays. 3. In the LDAP Server panel, click a linked host name. The LDAP Server Settings dialog displays. 4. In the Enable Server drop-down list, select Enable or Disable. 5. If enabled, you can choose to change the server name, the port number, and the number of seconds to time out in the Server, Port, and Time Out (sec) entry boxes. 6. Click Save. Otherwise, click Cancel to return to the LDAP page. HP Monitored PDU User's Guide P-164000281-Rev 1 72
-
 1
1 -
2
-
3
-
4
-
5
-
6
-
7
-
8
-
9
-
10
-
11
-
12
-
13
-
14
-
15
-
16
-
17
-
18
-
19
-
20
-
21
-
22
-
23
-
24
-
25
-
26
-
27
-
28
-
29
-
30
-
31
-
32
-
33
-
34
-
35
-
36
-
37
-
38
-
39
-
40
-
41
-
42
-
43
-
44
-
45
-
46
-
47
-
48
-
49
-
50
-
51
-
52
-
53
-
54
-
55
-
56
-
57
-
58
-
59
-
60
-
61
-
62
-
63
-
64
-
65
-
66
-
67
-
68
-
69
-
70
-
71
-
72
-
 73
73 -
 74
74 -
 75
75 -
 76
76 -
 77
77 -
 78
78 -
 79
79 -
 80
80 -
 81
81 -
 82
82 -
 83
83 -
84
-
85
-
86
-
87
-
88
-
89
-
90
-
91
-
92
-
93
-
94
-
95
-
96
-
97
-
98
-
99
-
100
-
101
-
102
-
103
-
104
-
105
-
106
-
107
-
108
-
109
-
110
-
111
-
112
-
113
-
114
-
115
-
116
-
117
-
118
-
119
-
120
 |
 |
