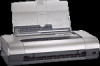
HP Deskjet 450 HP Deskjet 450 - User Guide - Page 58
Poor print quality, Check if print cartridge is removed, Check the paper size
 |
UPC - 844844844303
View all HP Deskjet 450 manuals
Add to My Manuals
Save this manual to your list of manuals |
Page 58 highlights
Check if print cartridge is removed If a print cartridge is removed while a page is printing, the data intended for that print cartridge will be lost and will be missing on the printout. If you remove a print cartridge, make sure to wait until the entire page is printed. Check the paper size Make sure the paper size selected in the printer driver matches the paper size loaded in the printer. The size of the document you are printing might be larger than the media in the tray, so that content is cut off because it is outside the printable area. If the layout of the document you are trying to print will fit on a media size supported by the printer, then load the correct media size. Make sure to select the correct page orientation. Alternatively, in Windows you can open the printer driver and click HP ZoomSmart in the Setup tab. Then select Scale to fit paper in device to scale the document to fit the media size currently selected. Use the card slot for media 4.72 in (120 mm) width or less. Ensure the paper guide on the slot fits snugly against the media. Adjust the paper guide on the slot until it fits snugly against the left edge of the media. If you do not have the Toolbox (Windows) or HP Inkjet Utility (Macintosh) installed, print a configuration page to check printer media settings for direct printing. This information will verify whether you are loading the correct media size and type before printing. See Printing diagnostic and configuration pages. Poor print quality Check the print cartridges Replace any low or empty print cartridges, then try to print again. If your printout is grainy, has stray dots, jagged edges, or the ink is bleeding into another color on the page, try aligning the print cartridges as described in Aligning the print cartridges. If you are printing with only one print cartridge, see Single-cartridge printing mode. If the lines on the printout are broken, one of the print cartridges may be defective or have clogged ink nozzles. Try cleaning the print cartridges. For instructions, see Cleaning the print cartridges. Check the paper quality The paper might be too moist or too rough. Make sure that the media you are using meets HP specifications, then try to print again. It is recommended to use inkjet media. See HP Supplies and Accessories for a list of HP-recommended media. 7-11 ENWW
-
 1
1 -
2
-
3
-
4
-
5
-
6
-
7
-
8
-
9
-
10
-
11
-
12
-
13
-
14
-
15
-
16
-
17
-
18
-
19
-
20
-
21
-
22
-
23
-
24
-
25
-
26
-
27
-
28
-
29
-
30
-
31
-
32
-
33
-
34
-
35
-
36
-
37
-
38
-
39
-
40
-
41
-
42
-
43
-
44
-
45
-
46
-
47
-
48
-
49
-
50
-
51
-
52
-
 53
53 -
 54
54 -
 55
55 -
 56
56 -
 57
57 -
 58
58 -
 59
59 -
 60
60 -
 61
61 -
 62
62 -
 63
63 -
64
-
65
-
66
-
67
-
68
-
69
-
70
-
71
-
72
-
73
-
74
-
75
-
76
-
77
-
78
-
79
-
80
-
81
-
82
-
83
-
84
-
85
-
86
-
87
-
88
-
89
-
90
-
91
 |
 |