HP ENVY 4520 User Guide - Page 17
Print, Print documents, Paper/Quality
 |
View all HP ENVY 4520 manuals
Add to My Manuals
Save this manual to your list of manuals |
Page 17 highlights
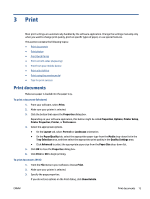
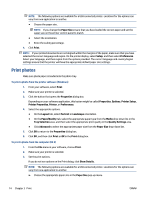
3 Print Most print settings are automatically handled by the software application. Change the settings manually only when you want to change print quality, print on specific types of paper, or use special features. This section contains the following topics: ● Print documents ● Print photos ● Print Quick Forms ● Print on both sides (duplexing) ● Print from your mobile device ● Print with AirPrint ● Print using the maximum dpi ● Tips for print success Print documents Make sure paper is loaded into the paper tray. To print a document (Windows) 1. From your software, select Print. 2. Make sure your printer is selected. 3. Click the button that opens the Properties dialog box. Depending on your software application, this button might be called Properties, Options, Printer Setup, Printer Properties, Printer, or Preferences. 4. Select the appropriate options. ● On the Layout tab, select Portrait or Landscape orientation. ● On the Paper/Quality tab, select the appropriate paper type from the Media drop-down list in the Tray Selection area, and then select the appropriate print quality in the Quality Settings area. ● Click Advanced to select the appropriate paper size from the Paper Size drop-down list. 5. Click OK to close the Properties dialog box. 6. Click Print or OK to begin printing. To print documents (OS X) 1. From the File menu in your software, choose Print. 2. Make sure your printer is selected. 3. Specify the page properties. If you do not see options on the Print dialog, click Show Details. ENWW Print documents 13
-
 1
1 -
2
-
3
-
4
-
5
-
6
-
7
-
8
-
9
-
10
-
11
-
 12
12 -
 13
13 -
 14
14 -
 15
15 -
 16
16 -
 17
17 -
 18
18 -
 19
19 -
 20
20 -
 21
21 -
 22
22 -
23
-
24
-
25
-
26
-
27
-
28
-
29
-
30
-
31
-
32
-
33
-
34
-
35
-
36
-
37
-
38
-
39
-
40
-
41
-
42
-
43
-
44
-
45
-
46
-
47
-
48
-
49
-
50
-
51
-
52
-
53
-
54
-
55
-
56
-
57
-
58
-
59
-
60
-
61
-
62
-
63
-
64
-
65
-
66
-
67
-
68
-
69
-
70
-
71
-
72
-
73
-
74
-
75
-
76
-
77
-
78
-
79
-
80
-
81
-
82
 |
 |
