HP ENVY 4520 User Guide - Page 28
Change scan settings (Windows), Webscan, Start Scan, Windows 8.1, All Apps, Windows Vista, Start
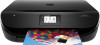 |
View all HP ENVY 4520 manuals
Add to My Manuals
Save this manual to your list of manuals |
Page 28 highlights
To scan using Webscan Webscan offers basic scan options. For additional scan options or functionality, scan from the HP printer software. 1. Load the original print side down on the right front corner of the scanner glass. 2. Open the embedded web server. For more information, see Open the embedded Web server on page 41. 3. Click the Scan tab. 4. Click Webscan in the left pane, change any settings, and then click Start Scan . Change scan settings (Windows) You can modify any of the scan settings either for a singular use or save the changes to use permanently. These settings include options such as page size and orientation, scan resolution, contrast, and the folder location for saved scans. 1. Load the original print side down on the right front corner of the scanner glass. 2. Double-click the printer icon on the desktop or do one of the following to open the printer software: ● Windows 8.1: Click the down arrow in lower left corner of the Start screen, and then select the printer name. ● Windows 8: Right-click an empty area on the Start screen, click All Apps on the app bar, and then select the printer name. ● Windows 7, Windows Vista, and Windows XP: From the computer desktop, click Start, select All Programs, click HP, click the folder for the printer, and then select the icon with the printer's name. 3. In the printer software, click Scan a Document or Photo . 4. Click the More link in the top right corner of the HP Scan dialog. The detailed settings pane appears on the right. The left column summarizes the current settings for each section. The right column allows you to change the settings in the highlighted section. 5. Click each section at the left of the detailed settings pane to review the settings in that section. You can review and change most settings using drop-down menus. Some settings allow greater flexibility by displaying a new pane. These are indicated by a + (plus sign) at the right of the setting. You must either accept or cancel any changes on this pane to return to the detailed settings pane. 6. When you have finished changing settings, do one of the following. ● Click Scan . You are prompted to save or reject the changes to the shortcut after the scan is finished. ● Click the save icon to the right of the shortcut, and then click Scan . Go online to learn more about using the HP Scan software. Learn how to: ● customize scan settings, such as image file type, scan resolution, and contrast levels. ● scan to network folders and cloud drives. ● preview and adjust images before scanning. 24 Chapter 4 Copy and scan ENWW
-
 1
1 -
2
-
3
-
4
-
5
-
6
-
7
-
8
-
9
-
10
-
11
-
12
-
13
-
14
-
15
-
16
-
17
-
18
-
19
-
20
-
21
-
22
-
 23
23 -
 24
24 -
 25
25 -
 26
26 -
 27
27 -
 28
28 -
 29
29 -
 30
30 -
 31
31 -
 32
32 -
 33
33 -
34
-
35
-
36
-
37
-
38
-
39
-
40
-
41
-
42
-
43
-
44
-
45
-
46
-
47
-
48
-
49
-
50
-
51
-
52
-
53
-
54
-
55
-
56
-
57
-
58
-
59
-
60
-
61
-
62
-
63
-
64
-
65
-
66
-
67
-
68
-
69
-
70
-
71
-
72
-
73
-
74
-
75
-
76
-
77
-
78
-
79
-
80
-
81
-
82
 |
 |