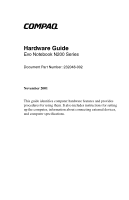
HP Evo Notebook n200 Hardware Guide Evo Notebook N200 Series - Page 3

Contents - battery

Page 3 highlights

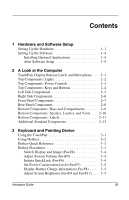
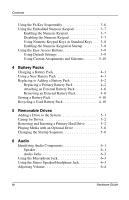
Contents 1 Hardware and Software Setup Setting Up the Hardware 1-1 Setting Up the Software 1-4 Installing Optional Applications 1-4 After Software Setup 1-5 2 A Look at the Computer TouchPad, Display Release Latch, and Microphone . . . 2-1 Top Components: Lights 2-2 Top Components: Power Controls 2-3 Top Components: Keys and Buttons 2-4 Left Side Components 2-5 Right Side Components 2-6 Front Panel Components 2-7 Rear Panel Components 2-8 Bottom Components: Bays and Compartments 2-9 Bottom Components: Speaker, Latches, and Vents . . . 2-10 Bottom Components: Labels 2-11 Additional Standard Components 2-12 3 Keyboard and Pointing Device Using the TouchPad 3-1 Using Hotkeys 3-2 Hotkey Quick Reference 3-3 Hotkey Procedures 3-3 Switch Display and Image (Fn+F4 3-4 Adjust System Volume (Fn+F5 3-4 Initiate QuickLock (Fn+F6 3-4 Set Power Conservation Level (Fn+F7 3-5 Display Battery Charge Information (Fn+F8) . . . . . 3-5 Adjust Screen Brightness (Fn+F9 and Fn+F11). . . . 3-5 Hardware Guide iii

  • 1
  • 2
  • 3
  • 4
  • 5
  • 6
  • 7
  • 8
  • 9
  • 10
  • 11
  • 12
  • 13
  • 14
  • 15
  • 16
  • 17
  • 18
  • 19
  • 20
  • 21
  • 22
  • 23
  • 24
  • 25
  • 26
  • 27
  • 28
  • 29
  • 30
  • 31
  • 32
  • 33
  • 34
  • 35
  • 36
  • 37
  • 38
  • 39
  • 40
  • 41
  • 42
  • 43
  • 44
  • 45
  • 46
  • 47
  • 48
  • 49
  • 50
  • 51
  • 52
  • 53
  • 54
  • 55
  • 56
  • 57
  • 58
  • 59
  • 60
  • 61
  • 62
  • 63
  • 64
  • 65
  • 66
  • 67
  • 68
  • 69
  • 70
  • 71
  • 72
  • 73
  • 74
  • 75
  • 76
  • 77
  • 78
  • 79
  • 80
  • 81
  • 82
  • 83
  • 84
  • 85
  • 86

Hardware Guide
iii
Contents
1
Hardware and Software Setup
Setting Up the Hardware. . . . . . . . . . . . . . . . . . . . . . . . .
1
1
Setting Up the Software . . . . . . . . . . . . . . . . . . . . . . . . .
1
4
Installing Optional Applications. . . . . . . . . . . . . . . .
1
4
After Software Setup . . . . . . . . . . . . . . . . . . . . . . . .
1
5
2
A Look at the Computer
TouchPad, Display Release Latch, and Microphone . . .
2
1
Top Components: Lights. . . . . . . . . . . . . . . . . . . . . . . . .
2
2
Top Components: Power Controls . . . . . . . . . . . . . . . . .
2
3
Top Components: Keys and Buttons. . . . . . . . . . . . . . . .
2
4
Left Side Components. . . . . . . . . . . . . . . . . . . . . . . . . . .
2
5
Right Side Components. . . . . . . . . . . . . . . . . . . . . . . . . .
2
6
Front Panel Components . . . . . . . . . . . . . . . . . . . . . . . . .
2
7
Rear Panel Components . . . . . . . . . . . . . . . . . . . . . . . . .
2
8
Bottom Components: Bays and Compartments . . . . . . .
2
9
Bottom Components: Speaker, Latches, and Vents . . .
2
10
Bottom Components: Labels. . . . . . . . . . . . . . . . . . . . .
2
11
Additional Standard Components . . . . . . . . . . . . . . . . .
2
12
3
Keyboard and Pointing Device
Using the TouchPad . . . . . . . . . . . . . . . . . . . . . . . . . . . .
3
1
Using Hotkeys. . . . . . . . . . . . . . . . . . . . . . . . . . . . . . . . .
3
2
Hotkey Quick Reference . . . . . . . . . . . . . . . . . . . . . . . . .
3
3
Hotkey Procedures . . . . . . . . . . . . . . . . . . . . . . . . . . . . .
3
3
Switch Display and Image (Fn+F4) . . . . . . . . . . . . .
3
4
Adjust System Volume (Fn+F5). . . . . . . . . . . . . . . .
3
4
Initiate QuickLock (Fn+F6) . . . . . . . . . . . . . . . . . . .
3
4
Set Power Conservation Level (Fn+F7) . . . . . . . . . .
3
5
Display Battery Charge Information (Fn+F8) . . . . .
3
5
Adjust Screen Brightness (Fn+F9 and Fn+F11). . . .
3
5