HP Evo Notebook n200 Hardware Guide Evo Notebook N200 Series - Page 73
Replace the 2 screws securing the cover to the computer, downward until it is seated
 |
View all HP Evo Notebook n200 manuals
Add to My Manuals
Save this manual to your list of manuals |
Page 73 highlights
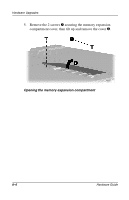
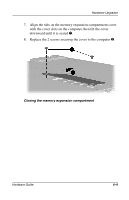
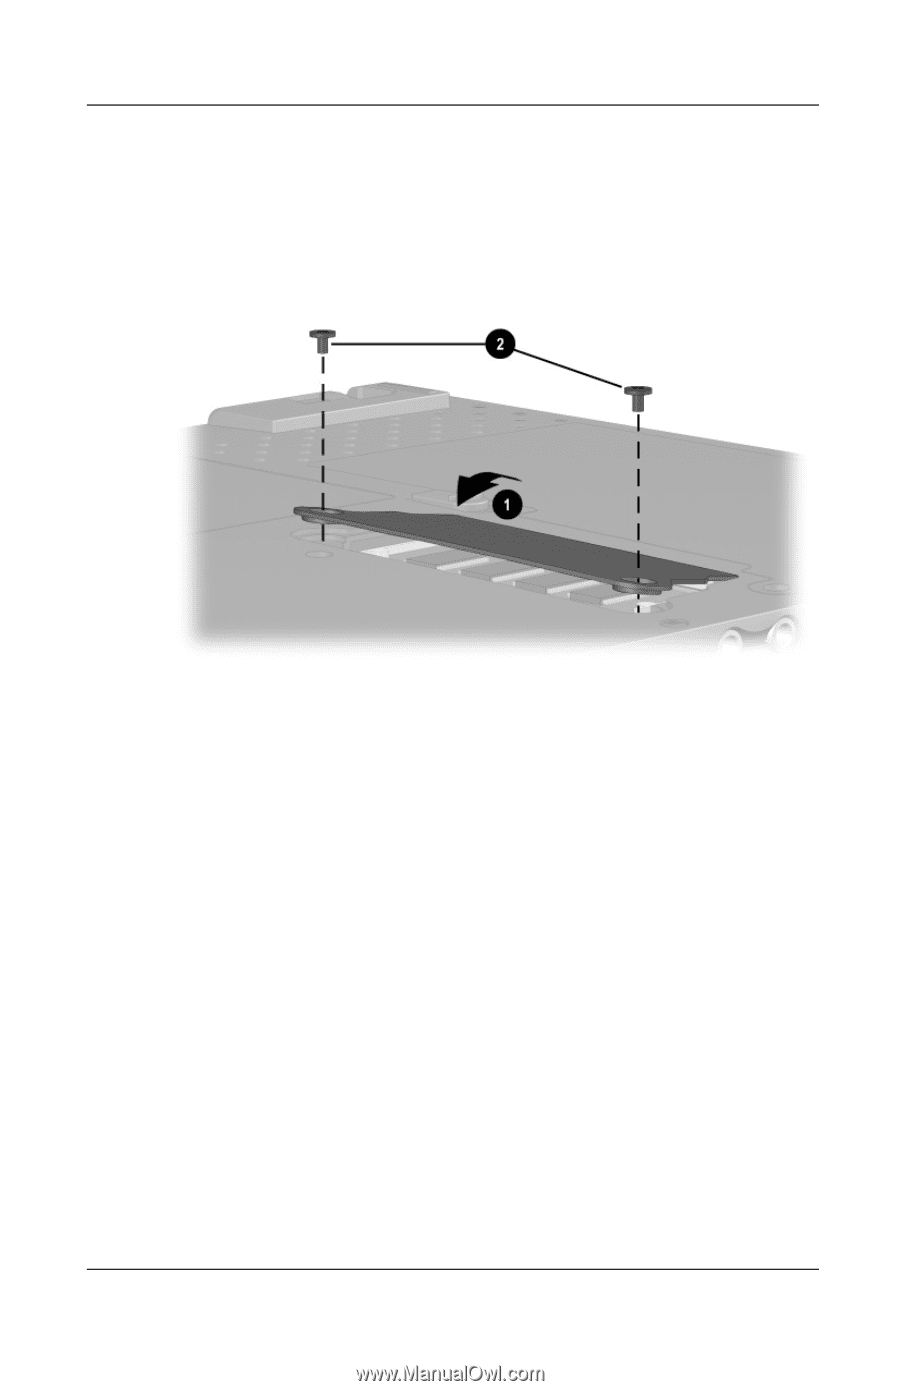
Hardware Upgrades 7. Align the tabs on the memory expansion compartment cover with the cover slots on the computer, then tilt the cover downward until it is seated 1. 8. Replace the 2 screws securing the cover to the computer 2. Closing the memory expansion compartment Hardware Guide 8-9
-
 1
1 -
2
-
3
-
4
-
5
-
6
-
7
-
8
-
9
-
10
-
11
-
12
-
13
-
14
-
15
-
16
-
17
-
18
-
19
-
20
-
21
-
22
-
23
-
24
-
25
-
26
-
27
-
28
-
29
-
30
-
31
-
32
-
33
-
34
-
35
-
36
-
37
-
38
-
39
-
40
-
41
-
42
-
43
-
44
-
45
-
46
-
47
-
48
-
49
-
50
-
51
-
52
-
53
-
54
-
55
-
56
-
57
-
58
-
59
-
60
-
61
-
62
-
63
-
64
-
65
-
66
-
67
-
 68
68 -
 69
69 -
 70
70 -
 71
71 -
 72
72 -
 73
73 -
 74
74 -
 75
75 -
 76
76 -
 77
77 -
 78
78 -
79
-
80
-
81
-
82
-
83
-
84
-
85
-
86
 |
 |
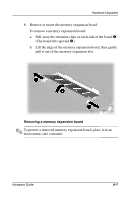
Hardware Upgrades
Hardware Guide
8
–
9
7.
Align the tabs on the memory expansion compartment cover
with the cover slots on the computer, then tilt the cover
downward until it is seated
1
.
8.
Replace the 2 screws securing the cover to the computer
2
.
Closing the memory expansion compartment