HP FAX-750 Service Manual - Page 66
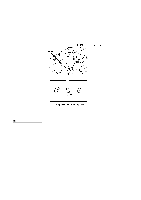
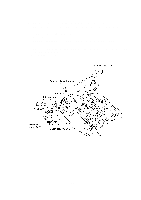
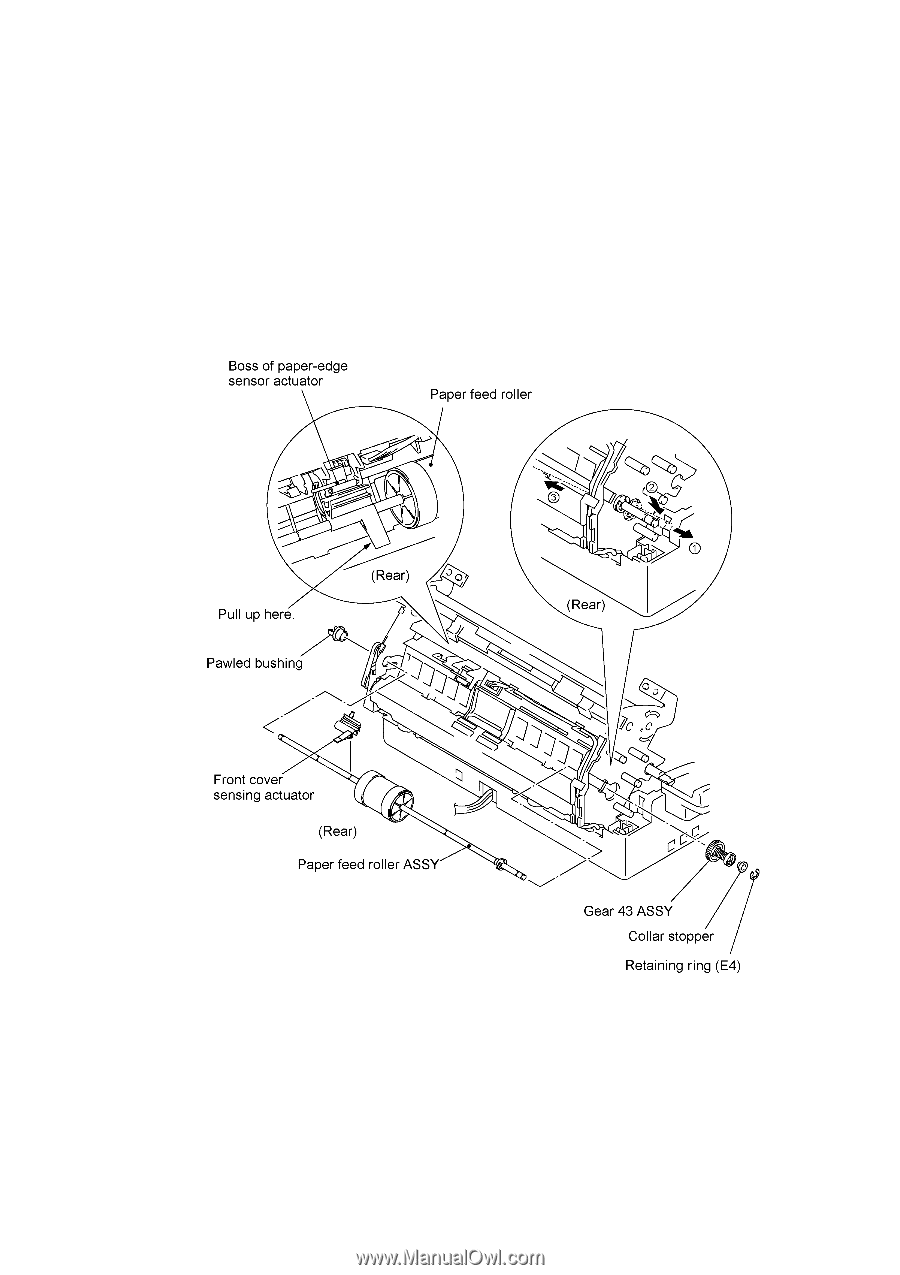
At the left end when viewed from the rear, remove the pawled bushing by pulling its pawls, Next
 |
View all HP FAX-750 manuals
Add to My Manuals
Save this manual to your list of manuals |
Page 66 highlights
(6) Remove the front cover sensing actuator from the paper feed roller shaft by pulling up the actuator's rear edge as shown below. (7) At the right end of the paper feed roller ASSY (when viewed from the rear), remove the collar stopper and gear 43 ASSY by removing the retaining ring. (8) At the left end (when viewed from the rear), remove the pawled bushing by pulling its pawls outwards. Next, pull the paper feed roller shaft to the right until the left end of the shaft comes out of the platen frame and then tilt the shaft to the right so that the bushing-fixed end can pass through the lower hole, and take it out to the left. IV - 26
-
 1
1 -
2
-
3
-
4
-
5
-
6
-
7
-
8
-
9
-
10
-
11
-
12
-
13
-
14
-
15
-
16
-
17
-
18
-
19
-
20
-
21
-
22
-
23
-
24
-
25
-
26
-
27
-
28
-
29
-
30
-
31
-
32
-
33
-
34
-
35
-
36
-
37
-
38
-
39
-
40
-
41
-
42
-
43
-
44
-
45
-
46
-
47
-
48
-
49
-
50
-
51
-
52
-
53
-
54
-
55
-
56
-
57
-
58
-
59
-
60
-
 61
61 -
 62
62 -
 63
63 -
 64
64 -
 65
65 -
 66
66 -
 67
67 -
 68
68 -
 69
69 -
 70
70 -
 71
71 -
72
-
73
-
74
-
75
-
76
-
77
-
78
-
79
-
80
-
81
-
82
-
83
-
84
-
85
-
86
-
87
-
88
-
89
-
90
-
91
-
92
-
93
-
94
-
95
-
96
-
97
-
98
-
99
-
100
-
101
-
102
-
103
-
104
-
105
-
106
-
107
-
108
-
109
-
110
-
111
-
112
-
113
-
114
-
115
-
116
-
117
-
118
-
119
-
120
-
121
-
122
-
123
-
124
-
125
-
126
-
127
-
128
-
129
-
130
-
131
-
132
-
133
-
134
-
135
-
136
-
137
-
138
-
139
-
140
-
141
-
142
-
143
-
144
-
145
-
146
-
147
-
148
-
149
-
150
-
151
-
152
-
153
-
154
-
155
-
156
-
157
-
158
-
159
-
160
-
161
-
162
-
163
-
164
-
165
-
166
-
167
-
168
-
169
-
170
-
171
-
172
-
173
-
174
-
175
-
176
-
177
-
178
-
179
-
180
-
181
-
182
-
183
-
184
-
185
-
186
-
187
-
188
-
189
-
190
-
191
-
192
-
193
-
194
-
195
-
196
-
197
-
198
-
199
-
200
-
201
-
202
-
203
-
204
-
205
-
206
-
207
-
208
-
209
-
210
-
211
-
212
-
213
-
214
-
215
-
216
-
217
-
218
 |
 |
IV
- 26
(6)
Remove the front cover sensing actuator from the paper feed roller shaft by pulling up the
actuator's rear edge as shown below.
(7)
At the right end of the paper feed roller ASSY (when viewed from the rear), remove the collar
stopper and gear 43 ASSY by removing the retaining ring.
(8)
At the left end (when viewed from the rear), remove the pawled bushing by pulling its pawls
outwards.
Next, pull the paper feed roller shaft to the right until the left end of the shaft comes out of the
platen frame and then tilt the shaft to the right so that the bushing-fixed end can pass through
the lower hole, and take it out to the left.