HP Indigo WS6000 Indigo High Quality Color Control HQCC Process for PSPs and B - Page 28
Check Measurements, HP SmartStream Labels and Packaging Color, Engine, Powered by Esko V5.2 User Guide
 |
View all HP Indigo WS6000 manuals
Add to My Manuals
Save this manual to your list of manuals |
Page 28 highlights
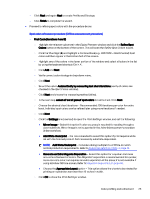
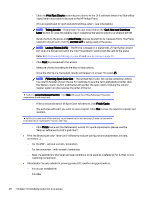
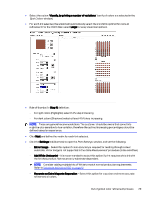
- Once the charts are measured, review the measurements in the Check Measurements window. Inspect colors for any patches that may appear to be out of sequence or improperly read (the color will stand out against adjacent patches). Four options are available when inspecting color measurements - choose the most appropriate method: ○ Find and Repair Bad Measurements - The software attempts to find bad measurements and asks to repair or re-measure any patches found. ○ Apply Smoothing - This option applies a more progressive color to the entire list of ink patches by using average values from neighboring color patches (see TIP below). ○ Measure Again [Selected patch] - This option allows for re-measurement of color patches. ○ Repair (Ctrl+R) [Selected Patch] - Averages a chosen patch color from adjacent patches. TIP: Averaging, randomizing, and smoothing are optional steps; they can be useful tools to effectively remove printing variations, and may be recommended in some situations. Smoothing is reversible by clicking the Undo Smoothing button. For more information refer to pages 42-45 in HP SmartStream Labels and Packaging Color Engine, Powered by Esko V5.2 User Guide (CA494-22970). - Click Next to proceed with the wizard. - Set the Profile name(*) and add a description(**); add appropriate keywords for searching if desired. NOTE: ● (*) Profile Naming - Decide on a naming convention for both Profiles and Strategies - if they are required to have different names. The strategy name will be the same as the profile name when automatically created at the end of the wizard. The Strategy name can be changed later if desired. For suggested naming conventions refer to Naming conventions on page 40. ● (**) Profile Descriptions - The description shows up next to the name in the Profile window. A good description is an excellent way to differentiate one profile from another at a single glance. - Consider the following points about finish and proofing. Finish and proofing considerations ○ Lamination, coating, and varnish play a role in the final color of a printed product. ○ Measure both profile and spot color refinement charts post-finishing process (for all chart measurements). ● Print two sets of charts, one finished for measurements, and one unfinished; store both for historical comparison or additional measurement needs. ● Print two sets of proofs for each job: one finished (for customer approval and finishing reference), one unfinished for comparison at press (for future runs); both should be saved for reference. 24 Chapter 3 Detailed production processes
-
 1
1 -
2
-
3
-
4
-
5
-
6
-
7
-
8
-
9
-
10
-
11
-
12
-
13
-
14
-
15
-
16
-
17
-
18
-
19
-
20
-
21
-
22
-
 23
23 -
 24
24 -
 25
25 -
 26
26 -
 27
27 -
 28
28 -
 29
29 -
 30
30 -
 31
31 -
 32
32 -
 33
33 -
34
-
35
-
36
-
37
-
38
-
39
-
40
-
41
-
42
-
43
-
44
-
45
-
46
-
47
-
48
-
49
-
50
-
51
-
52
-
53
-
54
 |
 |
