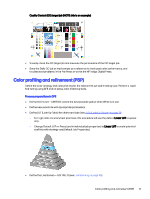
HP Indigo WS6000 Indigo High Quality Color Control HQCC Process for PSPs and B - Page 30
Quit now and Continue Later, Refinement, Print Test Charts, Taking breaks, Later, print 5 sets
 |
View all HP Indigo WS6000 manuals
Add to My Manuals
Save this manual to your list of manuals |
Page 30 highlights
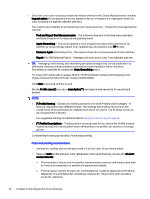
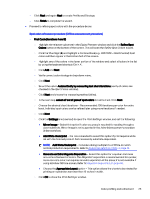
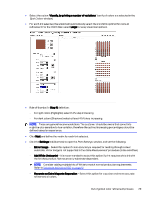
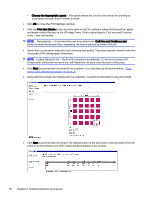
○ Click the Print Test Charts button to print charts to the DFE software where the files will be ripped and made ready to be sent to the HP Indigo Press. (This is a good spot to 'Quit now and Continue Later' - see note below). NOTE: Taking breaks - At any time, the user may click on the 'Quit Now and Continue Later' button to close the window. Upon reopening, the wizard will pick up where it left off. ○ Send charts to the press and print 5 sets (choose best prints to measure from). The Press operator should verify that the correct LUT is being used at the press. NOTE: Lookup Tables (LUTs) - The Profile is based on a preferred LUT. Verify the correct LUT and Line Screen are set in the Job Properties for each chart file sent to the press. Refer to LUTs (Look-Up Tables) on page 39 and Line Screens on page 39. ○ Click Next to proceed with the wizard. ○ Measure charts according to the wizard instructions. Once the charts are measured, results will appear on screen for review (*). NOTE: (*) Sorting Spot Color List - The refined Spot Color list can be sorted by clicking the column header of your choice. For example, to see the list in alphabetical order, click the 'Name' column button and the list will reorder the spot colors. Clicking the column header again can also reverse the order of the list. ► Perform a second refinement iteration - Click Next and repeat the Offline Refinement Procedure steps above (2nd through this). ○ After a second iteration of Spot Color refinement, click Finish Cycle. ○ The software will ask if you want to save a report. Click Yes to save the report to a preferred location. ► At this point, additional refinement may be performed but it is not necessary. Further refinement to individual colors may be performed at a later time. ○ Click Finish twice exit the Refinement wizard. For quick adjustments please use the "Manual refinement proof a grid chart". ● Print the Brand spot color library with different products configurations (substrates, ink sets, varnishes, ..). - For the PSP - without varnish / lamination - For the converter - with varnish / lamination - Keep the spot library at proper storage conditions to be used as a reference for further colors matching comparison. ● Standardize the job, substrate, priming, press, DFE and finishing parameters. - Ink set per installed ink - Ink order 26 Chapter 3 Detailed production processes
-
 1
1 -
2
-
3
-
4
-
5
-
6
-
7
-
8
-
9
-
10
-
11
-
12
-
13
-
14
-
15
-
16
-
17
-
18
-
19
-
20
-
21
-
22
-
23
-
24
-
 25
25 -
 26
26 -
 27
27 -
 28
28 -
 29
29 -
 30
30 -
 31
31 -
 32
32 -
 33
33 -
 34
34 -
 35
35 -
36
-
37
-
38
-
39
-
40
-
41
-
42
-
43
-
44
-
45
-
46
-
47
-
48
-
49
-
50
-
51
-
52
-
53
-
54
 |
 |