HP Model 712/100 hp 9000 series 700 model 712 service handbook (a2615-90039) - Page 27
Monitor Controls, Connectors, and Indicators
 |
View all HP Model 712/100 manuals
Add to My Manuals
Save this manual to your list of manuals |
Page 27 highlights
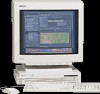
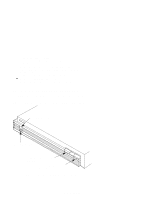
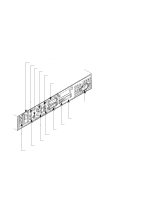
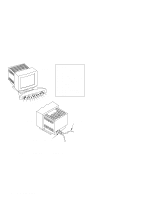
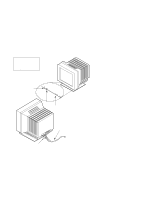
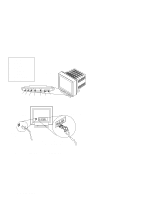
Monitor Controls, Connectors, and Indicators This section describes the controls, connectors, and indicators for the supported monitors. The Power-On LED, when lit, indicates that the monitor has ac power applied. Use the following controls to adjust the monitor: D The Power-On button turns the monitor's power on and off. D The Brightness control adjusts the brightness of the display. D The Contrast control adjusts the light-to-dark and dark-to-light contrast of the display. D The Degauss control demagnetizes the color monitor. Degaussing disperses any accumulated magnetic charge from the face of the monitor. Magnetic disturbances such as picture distortion or color impurity can be caused by either moving the monitor from one place to another or swiveling the monitor on its base. Refer to the manual that came with the monitor for information on any other controls that may be present on the monitor. The following figures illustrate the monitors for the workstation. Figure 1-3 shows the 12-inch, 1024x768, flat panel display. NOTICE: The 12-inch, 1024x768, flat panel display is not supported on the Model 712/100. Figure 1-4 shows the 15-inch, 1024x768, color monitor. NOTICE: The 15-inch, 1024x768, color monitor is not supported on the Model 712/100. Figure 1-5 shows the 17-inch, 1024x768, color monitor. Figure 1-6 shows the 19-inch, 1280x1024, color monitor. 1-8 Product Information
-
 1
1 -
2
-
3
-
4
-
5
-
6
-
7
-
8
-
9
-
10
-
11
-
12
-
13
-
14
-
15
-
16
-
17
-
18
-
19
-
20
-
21
-
 22
22 -
 23
23 -
 24
24 -
 25
25 -
 26
26 -
 27
27 -
 28
28 -
 29
29 -
 30
30 -
 31
31 -
 32
32 -
33
-
34
-
35
-
36
-
37
-
38
-
39
-
40
-
41
-
42
-
43
-
44
-
45
-
46
-
47
-
48
-
49
-
50
-
51
-
52
-
53
-
54
-
55
-
56
-
57
-
58
-
59
-
60
-
61
-
62
-
63
-
64
-
65
-
66
-
67
-
68
-
69
-
70
-
71
-
72
-
73
-
74
-
75
-
76
-
77
-
78
-
79
-
80
-
81
-
82
-
83
-
84
-
85
-
86
-
87
-
88
-
89
-
90
-
91
-
92
-
93
-
94
-
95
-
96
-
97
-
98
-
99
-
100
-
101
-
102
-
103
-
104
-
105
-
106
-
107
-
108
-
109
-
110
-
111
-
112
-
113
-
114
-
115
-
116
-
117
-
118
-
119
-
120
-
121
-
122
-
123
-
124
-
125
-
126
-
127
-
128
-
129
-
130
-
131
-
132
-
133
-
134
-
135
-
136
-
137
-
138
-
139
 |
 |