HP Officejet Pro X451 HP Officejet Pro X451 and X551 - User Guide - Page 43
Connect the product, Connect the product using a USB cable, CD installation
 |
View all HP Officejet Pro X451 manuals
Add to My Manuals
Save this manual to your list of manuals |
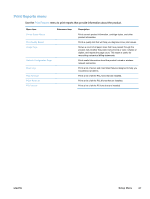
Page 43 highlights
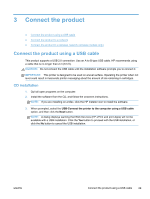
3 Connect the product ● Connect the product using a USB cable ● Connect the product to a network ● Connect the product to a wireless network (wireless models only) Connect the product using a USB cable This product supports a USB 2.0 connection. Use an A-to-B type USB cable. HP recommends using a cable that is no longer than 2 m (6.5 ft). CAUTION: Do not connect the USB cable until the installation software prompts you to connect it. IMPORTANT: This printer is designed to be used on a level surface. Operating the printer when not level could result in inaccurate printer messaging about the amount of ink remaining in cartridges. CD installation 1. Quit all open programs on the computer. 2. Install the software from the CD, and follow the onscreen instructions. NOTE: If you are installing on a Mac, click the HP Installer icon to install the software. 3. When prompted, select the USB-Connect the printer to the computer using a USB cable option, and then click the Next button. NOTE: A dialog displays warning that Web Services (HP ePrint and print Apps) will not be available with a USB installation. Click the Yes button to proceed with the USB installation, or click the No button to cancel the USB installation. ENWW Connect the product using a USB cable 29
-
 1
1 -
2
-
3
-
4
-
5
-
6
-
7
-
8
-
9
-
10
-
11
-
12
-
13
-
14
-
15
-
16
-
17
-
18
-
19
-
20
-
21
-
22
-
23
-
24
-
25
-
26
-
27
-
28
-
29
-
30
-
31
-
32
-
33
-
34
-
35
-
36
-
37
-
 38
38 -
 39
39 -
 40
40 -
 41
41 -
 42
42 -
 43
43 -
 44
44 -
 45
45 -
 46
46 -
 47
47 -
 48
48 -
49
-
50
-
51
-
52
-
53
-
54
-
55
-
56
-
57
-
58
-
59
-
60
-
61
-
62
-
63
-
64
-
65
-
66
-
67
-
68
-
69
-
70
-
71
-
72
-
73
-
74
-
75
-
76
-
77
-
78
-
79
-
80
-
81
-
82
-
83
-
84
-
85
-
86
-
87
-
88
-
89
-
90
-
91
-
92
-
93
-
94
-
95
-
96
-
97
-
98
-
99
-
100
-
101
-
102
-
103
-
104
-
105
-
106
-
107
-
108
-
109
-
110
-
111
-
112
-
113
-
114
-
115
-
116
-
117
-
118
-
119
-
120
-
121
-
122
-
123
-
124
-
125
-
126
-
127
-
128
-
129
-
130
-
131
-
132
-
133
-
134
-
135
-
136
-
137
-
138
-
139
-
140
-
141
-
142
-
143
-
144
-
145
-
146
-
147
-
148
-
149
-
150
-
151
-
152
-
153
-
154
-
155
-
156
-
157
-
158
-
159
-
160
-
161
-
162
-
163
-
164
-
165
-
166
-
167
-
168
-
169
-
170
-
171
-
172
-
173
-
174
-
175
-
176
-
177
-
178
-
179
-
180
-
181
-
182
-
183
-
184
-
185
-
186
-
187
-
188
-
189
-
190
-
191
-
192
-
193
-
194
-
195
-
196
-
197
-
198
-
199
-
200
-
201
-
202
-
203
-
204
-
205
-
206
-
207
-
208
 |
 |