HP Officejet Pro X451 HP Officejet Pro X451 and X551 - User Guide - Page 70
Load Tray 2 or optional Tray 3, Slide the front paper length guide so that
 |
View all HP Officejet Pro X451 manuals
Add to My Manuals
Save this manual to your list of manuals |
Page 70 highlights
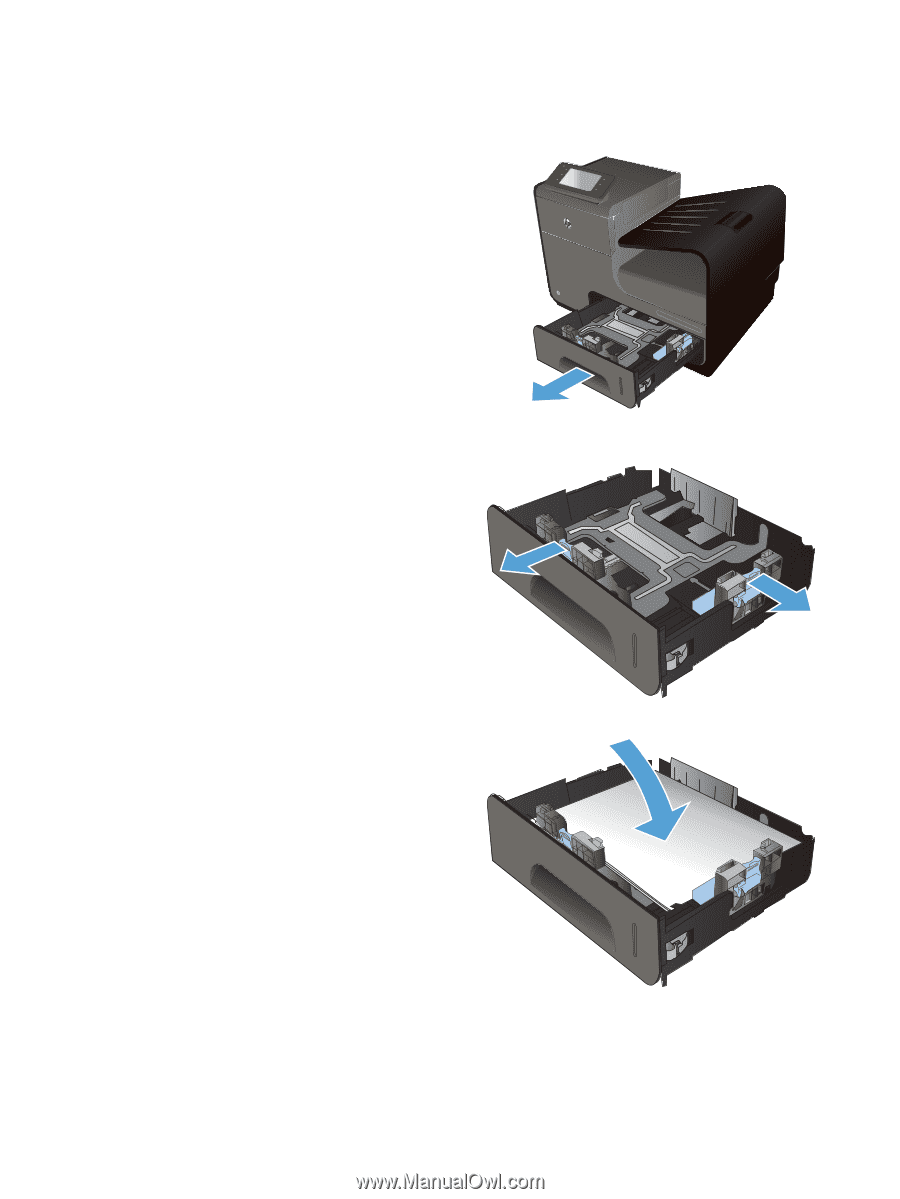
Load Tray 2 or optional Tray 3 1. Pull the tray out of the product. 2. Slide open the paper length and width guides. 3. Place the paper in the tray and make sure that it is flat at all four corners. Slide the side paper width guides so that they align with the paper-size marking in the bottom of the tray. Slide the front paper length guide so that it pushes the stack of paper against the back of the tray. NOTE: Place the paper into the tray with the side to be printed on face-up. 56 Chapter 6 Paper and print media ENWW
-
 1
1 -
2
-
3
-
4
-
5
-
6
-
7
-
8
-
9
-
10
-
11
-
12
-
13
-
14
-
15
-
16
-
17
-
18
-
19
-
20
-
21
-
22
-
23
-
24
-
25
-
26
-
27
-
28
-
29
-
30
-
31
-
32
-
33
-
34
-
35
-
36
-
37
-
38
-
39
-
40
-
41
-
42
-
43
-
44
-
45
-
46
-
47
-
48
-
49
-
50
-
51
-
52
-
53
-
54
-
55
-
56
-
57
-
58
-
59
-
60
-
61
-
62
-
63
-
64
-
 65
65 -
 66
66 -
 67
67 -
 68
68 -
 69
69 -
 70
70 -
 71
71 -
 72
72 -
 73
73 -
 74
74 -
 75
75 -
76
-
77
-
78
-
79
-
80
-
81
-
82
-
83
-
84
-
85
-
86
-
87
-
88
-
89
-
90
-
91
-
92
-
93
-
94
-
95
-
96
-
97
-
98
-
99
-
100
-
101
-
102
-
103
-
104
-
105
-
106
-
107
-
108
-
109
-
110
-
111
-
112
-
113
-
114
-
115
-
116
-
117
-
118
-
119
-
120
-
121
-
122
-
123
-
124
-
125
-
126
-
127
-
128
-
129
-
130
-
131
-
132
-
133
-
134
-
135
-
136
-
137
-
138
-
139
-
140
-
141
-
142
-
143
-
144
-
145
-
146
-
147
-
148
-
149
-
150
-
151
-
152
-
153
-
154
-
155
-
156
-
157
-
158
-
159
-
160
-
161
-
162
-
163
-
164
-
165
-
166
-
167
-
168
-
169
-
170
-
171
-
172
-
173
-
174
-
175
-
176
-
177
-
178
-
179
-
180
-
181
-
182
-
183
-
184
-
185
-
186
-
187
-
188
-
189
-
190
-
191
-
192
-
193
-
194
-
195
-
196
-
197
-
198
-
199
-
200
-
201
-
202
-
203
-
204
-
205
-
206
-
207
-
208
 |
 |
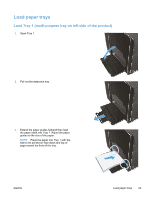
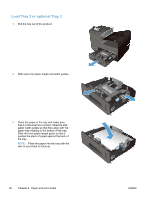
Load Tray 2 or optional Tray 3
1.
Pull the tray out of the product.
2.
Slide open the paper length and width guides.
3.
Place the paper in the tray and make sure
that it is flat at all four corners. Slide the side
paper width guides so that they align with the
paper-size marking in the bottom of the tray.
Slide the front paper length guide so that it
pushes the stack of paper against the back of
the tray.
NOTE:
Place the paper into the tray with the
side to be printed on face-up.
56
Chapter 6
Paper and print media
ENWW