HP Officejet Pro X451 HP Officejet Pro X451 and X551 - User Guide - Page 50
Connect the product to a wireless network using a USB cable (Officejet Pro X451 only)
 |
View all HP Officejet Pro X451 manuals
Add to My Manuals
Save this manual to your list of manuals |
Page 50 highlights
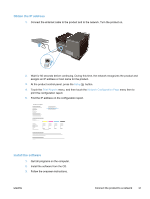
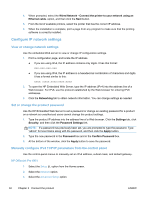
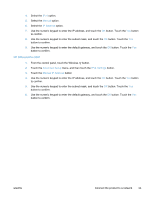
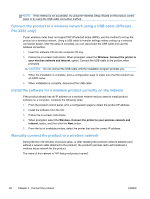
NOTE: If this method is not successful, try using the Wireless Setup Wizard on the product control panel or try using the USB cable connection method. Connect the product to a wireless network using a USB cable (Officejet Pro X451 only) If your wireless router does not support WiFi-Protected Setup (WPS), use this method to set up the product on a wireless network. Using a USB cable to transfer settings makes setting up a wireless connection easier. After the setup is complete, you can disconnect the USB cable and use the wireless connection. 1. Insert the software CD into the computer CD tray. 2. Follow the on-screen instructions. When prompted, select the Wireless- Connect the printer to your wireless network and internet. option. Connect the USB cable to the product when prompted. CAUTION: Do not connect the USB cable until the installation program prompts you. 3. When the installation is complete, print a configuration page to make sure that the product has an SSID name. 4. When installation is complete, disconnect the USB cable. Install the software for a wireless product currently on the network If the product already has an IP address on a wireless network and you want to install product software on a computer, complete the following steps. 1. From the product control panel, print a configuration page to obtain the product IP address. 2. Install the software from the CD. 3. Follow the on-screen instructions. 4. When prompted, select the Wireless- Connect the printer to your wireless network and internet. option, and then click the Next button. 5. From the list of available printers, select the printer that has the correct IP address. Manually connect the product to a wireless network During the first 120 minutes of product setup, or after resetting the product's network defaults (and without a network cable attached to the product), the product's wireless radio will broadcast a wireless setup network for the product. The name of this network is "HP-Setup-xx-[product name]". 36 Chapter 3 Connect the product ENWW
-
 1
1 -
2
-
3
-
4
-
5
-
6
-
7
-
8
-
9
-
10
-
11
-
12
-
13
-
14
-
15
-
16
-
17
-
18
-
19
-
20
-
21
-
22
-
23
-
24
-
25
-
26
-
27
-
28
-
29
-
30
-
31
-
32
-
33
-
34
-
35
-
36
-
37
-
38
-
39
-
40
-
41
-
42
-
43
-
44
-
 45
45 -
 46
46 -
 47
47 -
 48
48 -
 49
49 -
 50
50 -
 51
51 -
 52
52 -
 53
53 -
 54
54 -
 55
55 -
56
-
57
-
58
-
59
-
60
-
61
-
62
-
63
-
64
-
65
-
66
-
67
-
68
-
69
-
70
-
71
-
72
-
73
-
74
-
75
-
76
-
77
-
78
-
79
-
80
-
81
-
82
-
83
-
84
-
85
-
86
-
87
-
88
-
89
-
90
-
91
-
92
-
93
-
94
-
95
-
96
-
97
-
98
-
99
-
100
-
101
-
102
-
103
-
104
-
105
-
106
-
107
-
108
-
109
-
110
-
111
-
112
-
113
-
114
-
115
-
116
-
117
-
118
-
119
-
120
-
121
-
122
-
123
-
124
-
125
-
126
-
127
-
128
-
129
-
130
-
131
-
132
-
133
-
134
-
135
-
136
-
137
-
138
-
139
-
140
-
141
-
142
-
143
-
144
-
145
-
146
-
147
-
148
-
149
-
150
-
151
-
152
-
153
-
154
-
155
-
156
-
157
-
158
-
159
-
160
-
161
-
162
-
163
-
164
-
165
-
166
-
167
-
168
-
169
-
170
-
171
-
172
-
173
-
174
-
175
-
176
-
177
-
178
-
179
-
180
-
181
-
182
-
183
-
184
-
185
-
186
-
187
-
188
-
189
-
190
-
191
-
192
-
193
-
194
-
195
-
196
-
197
-
198
-
199
-
200
-
201
-
202
-
203
-
204
-
205
-
206
-
207
-
208
 |
 |