HP Officejet Pro X451 HP Officejet Pro X451 and X551 - User Guide - Page 56
Change the settings for all print jobs until the software program is closed
 |
View all HP Officejet Pro X451 manuals
Add to My Manuals
Save this manual to your list of manuals |
Page 56 highlights
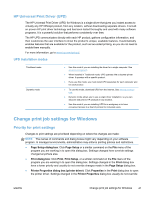
settings anywhere else in the printing software, but will be applied if no conflicting command is sent with a print job. You can change most of the print settings here. ● Default printer driver settings: The default printer driver settings determine the settings used in all print jobs, unless settings are changed in the Page Setup, Print, or Printer Properties dialog boxes. ● Printer control panel settings: Settings changed at the printer control panel have a lower priority than changes made anywhere else. Change the settings for all print jobs until the software program is closed 1. On the File menu in the software program, click Print. 2. Select the driver, and then click Properties or Preferences. The steps can vary; this procedure is most common. Change the default settings for all print jobs 1. Windows XP, Windows Server 2003, and Windows Server 2008 (using the default Start menu view): Click Start, and then click Printers and Faxes. Windows XP, Windows Server 2003, and Windows Server 2008 (using the Classic Start menu view): Click Start, click Settings, and then click Printers. Windows Vista: Click Start, click Control Panel, and then in the category for Hardware and Sound click Printer. Windows 7: Click Start, and then click Devices and Printers. 2. Right-click the driver icon, and then select Printing Preferences. Change the product configuration settings 1. Windows XP, Windows Server 2003, and Windows Server 2008 (using the default Start menu view): Click Start, and then click Printers and Faxes. Windows XP, Windows Server 2003, and Windows Server 2008 (using the Classic Start menu view): Click Start, click Settings, and then click Printers. Windows Vista: Click Start, click Control Panel, and then in the category for Hardware and Sound click Printer. Windows 7: Click Start, and then click Devices and Printers. 2. Right-click the driver icon, and then select Properties or Printer properties. 3. Click the Device Settings tab. 42 Chapter 4 Use the product with Windows ENWW
-
 1
1 -
2
-
3
-
4
-
5
-
6
-
7
-
8
-
9
-
10
-
11
-
12
-
13
-
14
-
15
-
16
-
17
-
18
-
19
-
20
-
21
-
22
-
23
-
24
-
25
-
26
-
27
-
28
-
29
-
30
-
31
-
32
-
33
-
34
-
35
-
36
-
37
-
38
-
39
-
40
-
41
-
42
-
43
-
44
-
45
-
46
-
47
-
48
-
49
-
50
-
 51
51 -
 52
52 -
 53
53 -
 54
54 -
 55
55 -
 56
56 -
 57
57 -
 58
58 -
 59
59 -
 60
60 -
 61
61 -
62
-
63
-
64
-
65
-
66
-
67
-
68
-
69
-
70
-
71
-
72
-
73
-
74
-
75
-
76
-
77
-
78
-
79
-
80
-
81
-
82
-
83
-
84
-
85
-
86
-
87
-
88
-
89
-
90
-
91
-
92
-
93
-
94
-
95
-
96
-
97
-
98
-
99
-
100
-
101
-
102
-
103
-
104
-
105
-
106
-
107
-
108
-
109
-
110
-
111
-
112
-
113
-
114
-
115
-
116
-
117
-
118
-
119
-
120
-
121
-
122
-
123
-
124
-
125
-
126
-
127
-
128
-
129
-
130
-
131
-
132
-
133
-
134
-
135
-
136
-
137
-
138
-
139
-
140
-
141
-
142
-
143
-
144
-
145
-
146
-
147
-
148
-
149
-
150
-
151
-
152
-
153
-
154
-
155
-
156
-
157
-
158
-
159
-
160
-
161
-
162
-
163
-
164
-
165
-
166
-
167
-
168
-
169
-
170
-
171
-
172
-
173
-
174
-
175
-
176
-
177
-
178
-
179
-
180
-
181
-
182
-
183
-
184
-
185
-
186
-
187
-
188
-
189
-
190
-
191
-
192
-
193
-
194
-
195
-
196
-
197
-
198
-
199
-
200
-
201
-
202
-
203
-
204
-
205
-
206
-
207
-
208
 |
 |
