HP PSC 1350/1340 HP PSC 1300 series All-in-One - (English) Reference Guide - Page 28
create borderless prints, Editor available through the HP Director. Just start the HP Director
 |
View all HP PSC 1350/1340 manuals
Add to My Manuals
Save this manual to your list of manuals |
Page 28 highlights
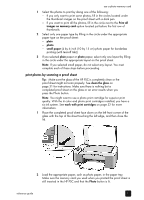
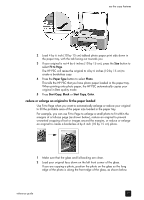
chapter 3 Note: If you use an old proof sheet and photos have been deleted from the memory card since the proof sheet was printed, it will not be possible to print those photos. 3 Press the Photo button. The HP PSC scans the proof sheet and prints the photos you selected, using the paper type and layout indicated on the sheet. Tip: If you want to view your photos instead of printing them, try using the Slide Show feature available through the HP Photo & Imaging Gallery component of the HP Photo and Imaging Director (HP Director). This is a fast way to see all the files you've transferred from an inserted memory card to your computer. Tip: The Macintosh version of the HP Gallery does not have a Slide Show feature, but you can create a multimedia slide showlike presentation if you have a writable CD drive by using the Memories Disc feature. For information on using Memories Disc, see the onscreen hp photo and imaging help that came with your software. create borderless prints An exceptional feature of your HP PSC is its ability to turn the digital photos on a memory card into professional, borderless prints. 1 Insert the memory card into the appropriate slot on your HP PSC. Make sure the paper tray contains letter or A4 paper; otherwise the proof sheet does not print. 2 Press the Photo button to print a proof sheet. See print a proof sheet on page 20 for details. 3 Remove the proof sheet from the HP PSC. 4 Select photos on the proof sheet you want as borderless prints by filling in the circles under the photos. See complete the proof sheet on page 20 for more information. 5 Fill in the circle for small paper 4 by 6 inch (10 by 15 cm) in the bottom right area of the proof sheet. Do not select any other layout or paper type. 6 Place the completed proof sheet correctly on the glass. 7 Load 4 by 6 inch (10 by 15 cm) tabbed photo paper print side down in the paper tray, with the tab facing out towards you. 8 Press the Photo button to scan the proof sheet. The selected photos are printed as borderless prints. See print photos by scanning a proof sheet on page 21 for details. Tip: You can enhance and edit digital photos with the HP Image Editor available through the HP Director. Just start the HP Director and click HP Gallery. Select the photo you want to edit, and click Image Editor in the top pane. Add text or special effects to the photo, improve a poor quality photo, or get rid of red eye. Tip: On a Macintosh double-click the image in the HP Gallery and edit it in an Image Window. For information on editing images, see the onscreen hp photo and imaging help that came with your software. 22 hp psc 1300 series
-
 1
1 -
2
-
3
-
4
-
5
-
6
-
7
-
8
-
9
-
10
-
11
-
12
-
13
-
14
-
15
-
16
-
17
-
18
-
19
-
20
-
21
-
22
-
 23
23 -
 24
24 -
 25
25 -
 26
26 -
 27
27 -
 28
28 -
 29
29 -
 30
30 -
 31
31 -
 32
32 -
 33
33 -
34
-
35
-
36
-
37
-
38
-
39
-
40
-
41
-
42
-
43
-
44
-
45
-
46
-
47
-
48
-
49
-
50
-
51
-
52
-
53
-
54
-
55
-
56
-
57
-
58
-
59
-
60
-
61
-
62
-
63
-
64
-
65
-
66
-
67
-
68
-
69
-
70
-
71
-
72
-
73
-
74
-
75
-
76
-
77
-
78
-
79
-
80
-
81
-
82
 |
 |
