HP PSC 1350/1340 HP PSC 1300 series All-in-One - (English) Reference Guide - Page 65
access hp instant share from the hp director, At the Create HP Instant Share E-Mail screen
 |
View all HP PSC 1350/1340 manuals
Add to My Manuals
Save this manual to your list of manuals |
Page 65 highlights
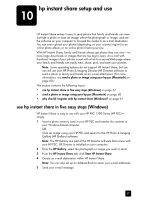
hp instant share setup and use Note: The HP Gallery has many editing tools that you can use to edit your image and achieve the results you want. For more information, see the onscreen hp photo & imaging help that came with your software. 5 Click the HP Instant Share tab. 6 To use HP Instant Share, go to step 5 in access hp instant share from the hp director on page 59. access hp instant share from the hp director This section addresses how to use the HP Instant Share e-mail service. The terms photo and image are both referred to as image in this section. For more information on using the HP Director, see the onscreen hp photo & imaging help that came with your software. 1 Open the HP Director. 2 From the HP Director, click HP Gallery. The HP Photo & Imaging Gallery appears. 3 Select an image from the folder in which it is stored. Note: For more information, see the onscreen hp photo & imaging help that came with your software. 4 Click the HP Instant Share tab. 5 In the Control area, click Start HP Instant Share. The Go Online screen appears in the Work area. 6 Click Next. The One-Time Setup-Region and Terms of Use screen appears. 7 Select your country/region from the drop-down list. 8 Read the Terms of Service, select the I agree check box, and click Next. The Select an HP Instant Share Service screen appears. 9 Select HP Instant Share E-mail: send images through e-mail. 10 Click Next. 11 At the Create HP Instant Share E-Mail screen, complete the To, From, Subject, and Message fields. Note: To open and maintain an e-mail address book, click Address Book, register with HP Instant Share, and obtain a HP Passport. Note: To send your e-mail message to multiple addresses, click How to email multiple people. 12 Click Next. The Add Captions screen appears. 13 Enter a caption for your digital image, and then click Next. Your image is uploaded to the HP Instant Share services website. After the image is uploaded, the Photos E-mailed screen appears. Your e-mail is sent with a link to a secure Web page that stores your image for 60 days. 14 Click Finish. The HP Instant Share website opens in your browser. reference guide 59
-
 1
1 -
2
-
3
-
4
-
5
-
6
-
7
-
8
-
9
-
10
-
11
-
12
-
13
-
14
-
15
-
16
-
17
-
18
-
19
-
20
-
21
-
22
-
23
-
24
-
25
-
26
-
27
-
28
-
29
-
30
-
31
-
32
-
33
-
34
-
35
-
36
-
37
-
38
-
39
-
40
-
41
-
42
-
43
-
44
-
45
-
46
-
47
-
48
-
49
-
50
-
51
-
52
-
53
-
54
-
55
-
56
-
57
-
58
-
59
-
 60
60 -
 61
61 -
 62
62 -
 63
63 -
 64
64 -
 65
65 -
 66
66 -
 67
67 -
 68
68 -
 69
69 -
 70
70 -
71
-
72
-
73
-
74
-
75
-
76
-
77
-
78
-
79
-
80
-
81
-
82
 |
 |
