HP PSC 1350/1340 HP PSC 1300 series All-in-One - (English) Reference Guide - Page 72
your HP PSC., HP PSC 1300 Series
 |
View all HP PSC 1350/1340 manuals
Add to My Manuals
Save this manual to your list of manuals |
Page 72 highlights
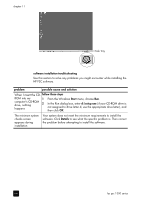
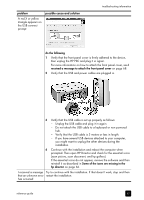
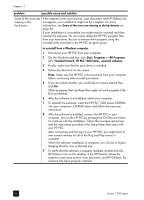
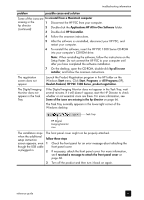
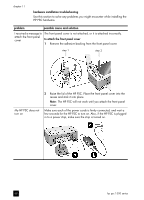
chapter 11 problem possible cause and solution Some of the icons are missing in the hp director If the essential icons (scan picture, scan document, and HP Gallery) do not appear, your installation might not be complete. For more information, see Some of the icons are missing in the hp director on page 66. If your installation is incomplete you might need to uninstall and then reinstall the software. Do not simply delete the HP PSC program files from your hard drive. Be sure to remove them properly using the uninstall utility provided in the HP PSC program group. to uninstall from a Windows computer 1 Disconnect your HP PSC from your computer. 2 On the Windows task bar, click Start, Programs or All Programs (XP), Hewlett-Packard, HP PSC 1300 Series, uninstall software. 3 Finally, make sure that the print driver is installed. 4 Follow the directions on the screen. Note: Make sure the HP PSC is disconnected from your computer before continuing with uninstall procedure. 5 If you are asked whether you would like to remove shared files, click No. Other programs that use these files might not work properly if the files are deleted. 6 After the software is uninstalled, restart your computer. 7 To reinstall the software, insert the HP PSC 1300 Series CD-ROM into your computer's CD-ROM drive, and follow the onscreen instructions. 8 After the software is installed, connect the HP PSC to your computer. Turn on the HP PSC by pressing the On/Resume button. To continue with the installation, follow the onscreen instructions and the instructions provided in the Setup Poster that came with your HP PSC. After connecting and turning on your HP PSC, you might have to wait several minutes for all of the Plug and Play events to complete. When the software installation is complete, you will see a Digital Imaging Monitor icon in the task tray. 9 To verify that the software is properly installed, double-click the HP Director icon on the desktop. If the HP Director shows the essential icons (scan picture, scan document, and HP Gallery), the software has been properly installed. 66 hp psc 1300 series
-
 1
1 -
2
-
3
-
4
-
5
-
6
-
7
-
8
-
9
-
10
-
11
-
12
-
13
-
14
-
15
-
16
-
17
-
18
-
19
-
20
-
21
-
22
-
23
-
24
-
25
-
26
-
27
-
28
-
29
-
30
-
31
-
32
-
33
-
34
-
35
-
36
-
37
-
38
-
39
-
40
-
41
-
42
-
43
-
44
-
45
-
46
-
47
-
48
-
49
-
50
-
51
-
52
-
53
-
54
-
55
-
56
-
57
-
58
-
59
-
60
-
61
-
62
-
63
-
64
-
65
-
66
-
 67
67 -
 68
68 -
 69
69 -
 70
70 -
 71
71 -
 72
72 -
 73
73 -
 74
74 -
 75
75 -
 76
76 -
 77
77 -
78
-
79
-
80
-
81
-
82
 |
 |
