HP Pavilion 8200 HP Pavilion PC Model 8290 - User's Guide - Page 61
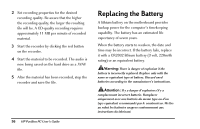
Replacing the battery
 |
View all HP Pavilion 8200 manuals
Add to My Manuals
Save this manual to your list of manuals |
Page 61 highlights
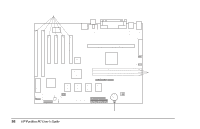
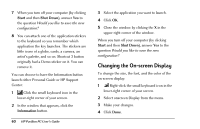
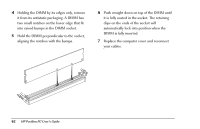
Replacing the battery To replace the battery: 1 Turn off the computer and all peripherals. 2 Disconnect the power cord and modem cable. 3 Remove the computer cover according to the directions in the booklet Removing the Computer Covers. 4 If necessary, remove any full-length add-in cards to gain access to the socket. (See the next page for battery location.) 5 Remove any components that are blocking access to the battery. 6 Gently pry the battery free from its socket, taking care to note the positive (+) and negative (-) orientation of the battery. 7 Install the new battery in the socket, observing the correct polarity. 8 Replace any components that were removed. 9 Replace any add-in cards that were removed and then replace the computer cover. 10 Run the BIOS (Basic Input Output System) Setup program to reset the date and time. (For instructions, see "Starting the BIOS Setup Program" on page 66.) Note: Your motherboard will be similar to the one shown on the next page. Chapter 6 • Upgrading and Servicing Your Computer 57
-
 1
1 -
2
-
3
-
4
-
5
-
6
-
7
-
8
-
9
-
10
-
11
-
12
-
13
-
14
-
15
-
16
-
17
-
18
-
19
-
20
-
21
-
22
-
23
-
24
-
25
-
26
-
27
-
28
-
29
-
30
-
31
-
32
-
33
-
34
-
35
-
36
-
37
-
38
-
39
-
40
-
41
-
42
-
43
-
44
-
45
-
46
-
47
-
48
-
49
-
50
-
51
-
52
-
53
-
54
-
55
-
 56
56 -
 57
57 -
 58
58 -
 59
59 -
 60
60 -
 61
61 -
 62
62 -
 63
63 -
 64
64 -
 65
65 -
 66
66 -
67
-
68
-
69
-
70
-
71
-
72
-
73
-
74
-
75
-
76
-
77
-
78
-
79
-
80
-
81
-
82
-
83
-
84
-
85
-
86
 |
 |