HP T1120 Hp Designjet T1120 SD-MFP - Quick Reference Guide: English - Page 17
Set the Scan Area input size for Copy and Scan
 |
UPC - 884420612513
View all HP T1120 manuals
Add to My Manuals
Save this manual to your list of manuals |
Page 17 highlights
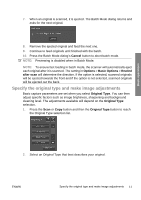
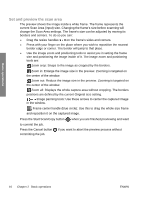
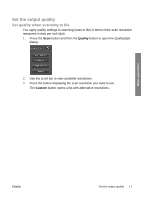
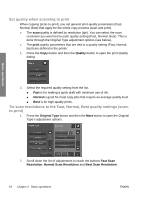
3. You can fine-tune the Original Type settings (optional): Press the More button to expand the Original Type dialog and make adjustment options relevant to the selected Original Type. Press OK when done. Basic operations 4. Press the Context-sensitive Help button for additional information about each setting and about saving your settings as a new custom Original Type. NOTE: You can press the Preview Before Scan/Copy button and then the Adjustment button to make image adjustments and view the effects on your screen. See Preview copies and scans on page 15. Set input and output sizes The "Scan Area" is your input size and defines how much of the image is captured. Often, this will be equal to the total size of the original. However, there may be cases when you only want to scan a portion of the original or wish the capture area to be equal to a certain standard size. When copying, you can also determine the output size (the size of the image in your printed copy) through the Resize setting. You can choose No resize to use the current Scan Area size for a 1:1 copy, or you can select a different size in order to reduce or enlarge the printed image in relation to the Scan Area size. NOTE: When scanning, the image's size in the output file is always equal to the Scan Area size (1:1). Set the Scan Area (input size) for Copy and Scan When in the Scan or Copy screens, press the Scan Area button to view the Scan Area size list. ENWW Set input and output sizes 13
-
 1
1 -
2
-
3
-
4
-
5
-
6
-
7
-
8
-
9
-
10
-
11
-
 12
12 -
 13
13 -
 14
14 -
 15
15 -
 16
16 -
 17
17 -
 18
18 -
 19
19 -
 20
20 -
 21
21 -
 22
22 -
23
-
24
-
25
-
26
-
27
-
28
-
29
-
30
-
31
-
32
-
33
-
34
-
35
-
36
-
37
-
38
-
39
-
40
-
41
-
42
-
43
-
44
-
45
-
46
-
47
-
48
 |
 |
