HP T1120 Hp Designjet T1120 SD-MFP - Quick Reference Guide: English - Page 42
To install a new software version from a PC
 |
UPC - 884420612513
View all HP T1120 manuals
Add to My Manuals
Save this manual to your list of manuals |
Page 42 highlights
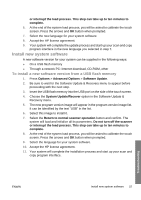
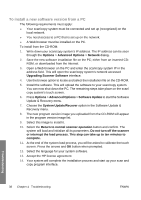
To install a new software version from a PC The following requirements must apply: ● Your scan/copy system must be connected and set up (recognized) on the local network. ● You need access to a PC that is set up on the network. ● A Web browser must be installed on the PC. To install from the CD-ROM: 1. Write down your scan/copy system's IP address. The IP address can be seen through the Options > Advanced Options > Network dialog. 2. Save the new software installation file on the PC; either from an inserted CDROM, or downloaded from the Internet. 3. Open a Web browser on the PC and enter the scan/copy system IP in the address field. This will open the scan/copy system's network accessed Upgrading Scanner Software interface. 4. Use the browse option to locate and select the installation file on the CD-ROM. 5. Install the software. This will upload the software to your scan/copy system. You can now shut down the PC. The remaining steps take place on the scan/ copy system's touch screen. 6. Press Options > Advanced Options > Software Update to start the Software Update & Recovery menu. 7. Choose the System Update/Recover option in the Software Update & Recovery menu. 8. The new program version image you uploaded from the CD-ROM will appear in the program version image list. 9. Select this image to install it. 10. Select the Return to normal scanner operation button and confirm. The system will load and initialize all its parameters. Do not turn off the scanner or interrupt the load process. This step can take up to ten minutes to complete. 11. At the end of the system load process, you will be asked to calibrate the touch screen. Press the arrows and OK button when prompted. 12. Select the language for your system software. 13. Accept the HP license agreement. 14. Your system will complete the installation process and start up your scan and copy program interface. Troubleshooting 38 Chapter 4 Troubleshooting ENWW
-
 1
1 -
2
-
3
-
4
-
5
-
6
-
7
-
8
-
9
-
10
-
11
-
12
-
13
-
14
-
15
-
16
-
17
-
18
-
19
-
20
-
21
-
22
-
23
-
24
-
25
-
26
-
27
-
28
-
29
-
30
-
31
-
32
-
33
-
34
-
35
-
36
-
 37
37 -
 38
38 -
 39
39 -
 40
40 -
 41
41 -
 42
42 -
 43
43 -
 44
44 -
 45
45 -
 46
46 -
 47
47 -
48
 |
 |