HP T1120 Hp Designjet T1120 SD-MFP - Quick Reference Guide: English - Page 38
Image cropped-not whole image scanned, A media profile cannot be generated
 |
UPC - 884420612513
View all HP T1120 manuals
Add to My Manuals
Save this manual to your list of manuals |
Page 38 highlights
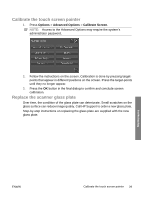
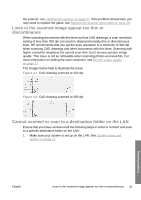
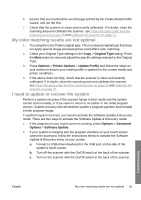
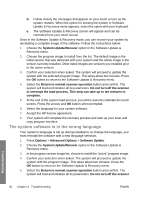
2. Destination folder setup is carried out when you install the system and afterwards through Options > Advanced Options > Manage Destinations > Add or Change. Make sure you have entered the full network path correctly. 3. Make sure you have entered the correct login information - Domain \Username and Password. Remember to enter the backslash character '\' between the domain and username. 4. Press the Test Connection button to check that your parameters are correct. If you have performed all of the above, and still cannot connect or scan to the destination folder, contact your local network administrator. Image cropped-not whole image scanned ● Your size settings may be wrong. Press the Scan Area button to check your size settings. Your Scan Area should be set to either Auto for automatic detection of the size, or to a standard or custom size that corresponds to the size of the whole original loaded in the scanner. ● Ensure that you are loading the original correctly. Be sure to align the center of the original with the scanner's center arrow marking. A media profile cannot be generated If the Create Media Profile wizard stops running or reports errors: 1. Ensure that the scanner and the printer are both turned on and ready for normal operation. 2. Ensure that your scanner is functioning. Scan a small document (to file) to test the scanner. 3. Ensure that media is loaded in the printer. 4. Ensure that the printer's media type setting corresponds to the actual media loaded. 5. Ensure that the color sheet you printed with the Create Media Profile wizard is inserted and aligned correctly in the scanner. 34 Chapter 4 Troubleshooting ENWW Troubleshooting
-
 1
1 -
2
-
3
-
4
-
5
-
6
-
7
-
8
-
9
-
10
-
11
-
12
-
13
-
14
-
15
-
16
-
17
-
18
-
19
-
20
-
21
-
22
-
23
-
24
-
25
-
26
-
27
-
28
-
29
-
30
-
31
-
32
-
 33
33 -
 34
34 -
 35
35 -
 36
36 -
 37
37 -
 38
38 -
 39
39 -
 40
40 -
 41
41 -
 42
42 -
 43
43 -
44
-
45
-
46
-
47
-
48
 |
 |