HP T1120 Hp Designjet T1120 SD-MFP - Quick Reference Guide: English - Page 18
Set the Resize value output size for Copy only
 |
UPC - 884420612513
View all HP T1120 manuals
Add to My Manuals
Save this manual to your list of manuals |
Page 18 highlights
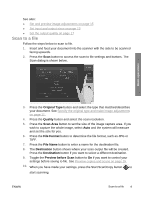
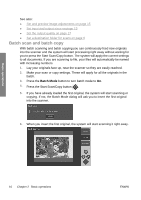
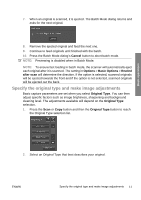
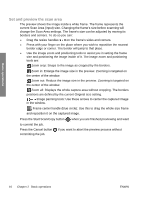
Basic operations The list offers different methods you can use to determine the Scan Area size: ● Auto: The program will automatically detect the size of the full document loaded in the scanner. You can use the preview to check that the scanner has detected the size correctly. ● Use a standard or custom size: The dialog contains a list of standard sizes and custom sizes saved on the system. Scroll through the list and select the size you want to use. To create a new custom size, follow the instructions below. ● Set size values for width and length: Press the More button to expand the Scan Area dialog. Make your width and length size settings in the fields or set Auto on width or length separately. You can save your changes to create a new custom size or use them for the current job only. NOTE: You can also set the Scan Area visually on the screen through a preview. See Preview copies and scans on page 15. Set the Resize value (output size) for Copy only 1. Press the Resize button. 2. Select No if you do not want to resize the image: that is, you want the end result to be the same size as the Scan Area. 3. Press the Size button to select a standard size (such as A2 or A4) from a list. 4. Select Scale to resize according to a scale factor (such as 50% or 32%). 14 Chapter 2 Basic operations ENWW
-
 1
1 -
2
-
3
-
4
-
5
-
6
-
7
-
8
-
9
-
10
-
11
-
12
-
 13
13 -
 14
14 -
 15
15 -
 16
16 -
 17
17 -
 18
18 -
 19
19 -
 20
20 -
 21
21 -
 22
22 -
 23
23 -
24
-
25
-
26
-
27
-
28
-
29
-
30
-
31
-
32
-
33
-
34
-
35
-
36
-
37
-
38
-
39
-
40
-
41
-
42
-
43
-
44
-
45
-
46
-
47
-
48
 |
 |
