HP T1120 Hp Designjet T1120 SD-MFP - Quick Reference Guide: English - Page 19
Load a preview scan or copy, Set and preview image adjustments
 |
UPC - 884420612513
View all HP T1120 manuals
Add to My Manuals
Save this manual to your list of manuals |
Page 19 highlights
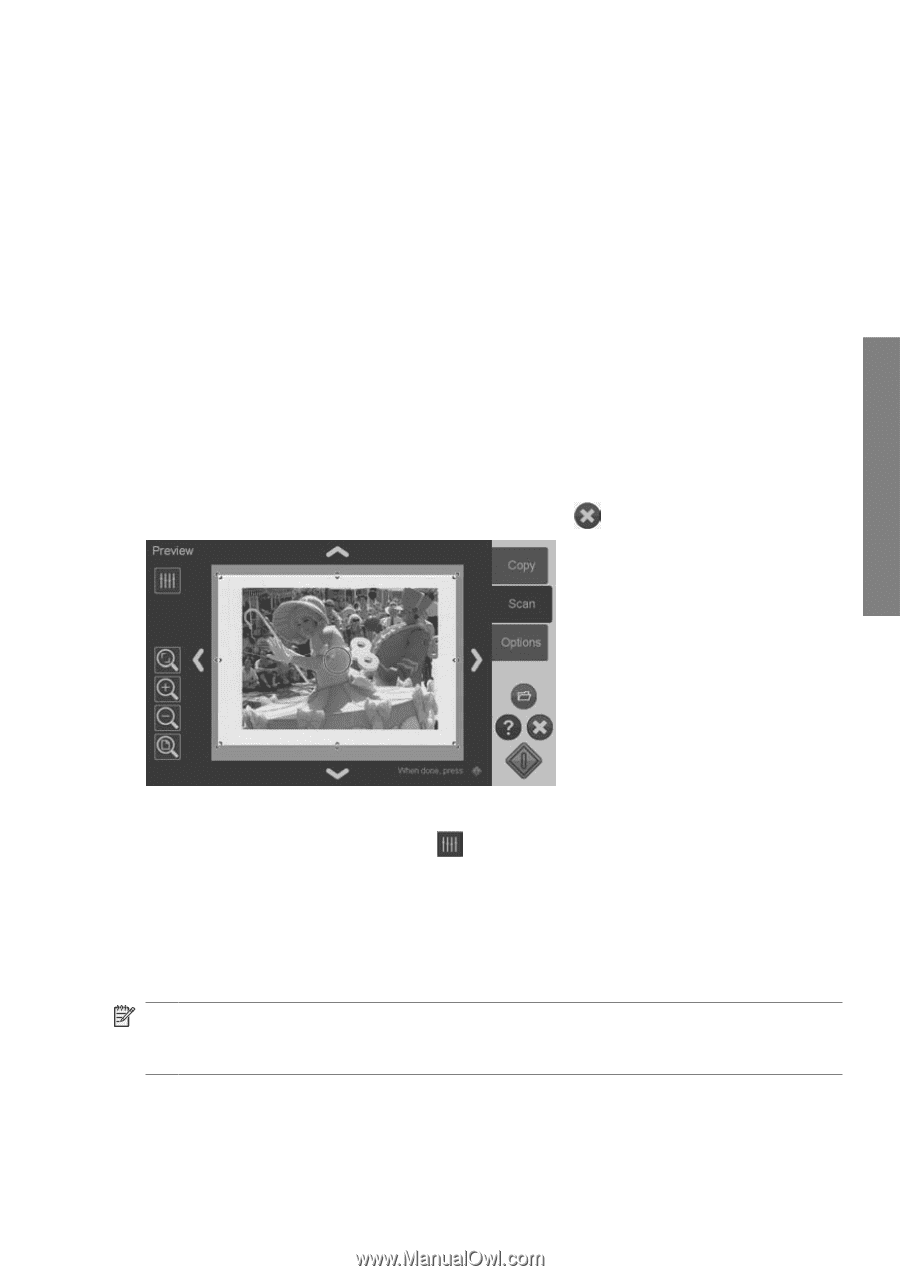
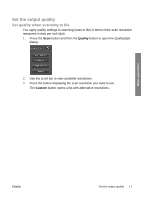
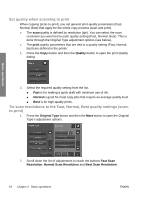
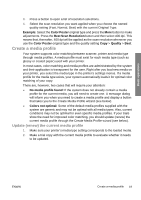
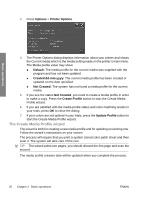
Preview copies and scans You can preview your copies and scans before committing them to the printer or file system. With previewing you can: ● Make image adjustments that are relevant for your selected Original Type, such as brightness and sharpening, and view the effects of these on your screen. ● Visually set the Scan Area (input size) using handles to drag and position a Scan Area frame on the image. ● Zoom in and out to evaluate specific image areas and the effects of your settings. Load a preview scan or copy 1. Load your original and press the Preview Before Scan/Copy button to turn preview mode to On. 2. Press the Scan or Copy button to load the preview. 3. You can at any time press the Cancel button to close the preview. Basic operations Set and preview image adjustments 1. Press the Adjustment button at the top left corner of the preview screen. 2. Make your settings in the adjustments dialog. 3. Press the OK button to close the adjustments dialog and see the effects of your settings on the preview. Use the zoom tools to inspect details and areas of interest. 4. Repeat steps 1-3 if you need to readjust your settings. NOTE: The effects of the image adjustment settings are applied and displayed in the low-resolution preview and hence do not fully represent the final image in the destination file or printed copy. ENWW Preview copies and scans 15
-
 1
1 -
2
-
3
-
4
-
5
-
6
-
7
-
8
-
9
-
10
-
11
-
12
-
13
-
 14
14 -
 15
15 -
 16
16 -
 17
17 -
 18
18 -
 19
19 -
 20
20 -
 21
21 -
 22
22 -
 23
23 -
 24
24 -
25
-
26
-
27
-
28
-
29
-
30
-
31
-
32
-
33
-
34
-
35
-
36
-
37
-
38
-
39
-
40
-
41
-
42
-
43
-
44
-
45
-
46
-
47
-
48
 |
 |