HP T5540 Administrator's Guide: Windows CE 6.0 - HP Thin Client t5530 and t554 - Page 20
Connections, Adding Connections - display last user rdp
 |
UPC - 884420407706
View all HP T5540 manuals
Add to My Manuals
Save this manual to your list of manuals |
Page 20 highlights
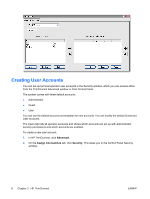
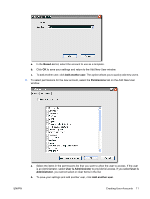
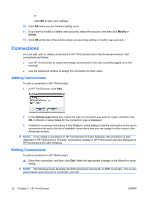
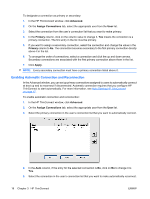
or Click OK to save your settings. 10. Click OK when you are finished adding users. 11. If you want to modify or delete user accounts, select the account, and then click Modify or Delete. 12. Click OK at the top of the window when you are done adding or modify user accounts. Connections You can add, edit, or delete connections in HP ThinConnect and in the Advanced window. Add connections as follows: ● Use HP ThinConnect to create and assign connections to the user currently logged on to the terminal. ● Use the Advanced window to assign the connection to other users. Adding Connections To add a connection in HP ThinConnect: 1. In HP ThinConnect, click Add. 2. In the Choose type dialog box, select the type of connection you want to create, and then click OK. A Wizard or setup dialog for the connection type is displayed. 3. Follow the on-screen instructions in the Wizard or setup dialog to add the connection to the user's connections list and to the list of available connections that you can assign to other users in the Advanced window. NOTE: If you create a connection in HP Connections for Citrix Software, the connection is also displayed in HP ThinConnect. Similarly, connections created in HP ThinConnect are also displayed in HP Connections for Citrix Software. Editing Connections To edit a connection in HP ThinConnect: ▲ Select the connection, and then click Edit. Make the appropriate changes in the Wizard or setup dialog. NOTE: The following image illustrates the Edit Connection window for an RDP connection. The screen varies based upon the type of connection you edit. 12 Chapter 3 HP ThinConnect ENWW
-
 1
1 -
2
-
3
-
4
-
5
-
6
-
7
-
8
-
9
-
10
-
11
-
12
-
13
-
14
-
 15
15 -
 16
16 -
 17
17 -
 18
18 -
 19
19 -
 20
20 -
 21
21 -
 22
22 -
 23
23 -
 24
24 -
 25
25 -
26
-
27
-
28
-
29
-
30
-
31
-
32
-
33
-
34
-
35
-
36
-
37
-
38
-
39
-
40
-
41
-
42
-
43
-
44
-
45
-
46
-
47
-
48
-
49
-
50
-
51
-
52
-
53
-
54
-
55
-
56
-
57
-
58
-
59
-
60
-
61
-
62
-
63
-
64
-
65
-
66
-
67
-
68
-
69
-
70
-
71
-
72
-
73
-
74
-
75
-
76
-
77
-
78
-
79
-
80
-
81
-
82
-
83
-
84
-
85
-
86
-
87
-
88
-
89
-
90
-
91
-
92
-
93
-
94
-
95
-
96
 |
 |