HP T5540 Administrator's Guide: Windows CE 6.0 - HP Thin Client t5530 and t554 - Page 68
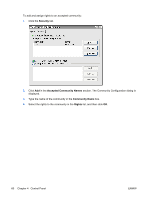
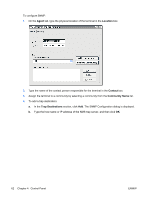
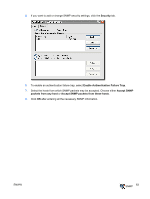
Security, Accepted Community Names, Community Name, Rights, Select the rights to the community in
 |
UPC - 884420407706
View all HP T5540 manuals
Add to My Manuals
Save this manual to your list of manuals |
Page 68 highlights
To add and assign rights to an accepted community: 1. Click the Security tab. 2. Click Add in the Accepted Community Names section. The Community Configuration dialog is displayed. 3. Type the name of the community in the Community Name box. 4. Select the rights to the community in the Rights list, and then click OK. 60 Chapter 4 Control Panel ENWW
-
 1
1 -
2
-
3
-
4
-
5
-
6
-
7
-
8
-
9
-
10
-
11
-
12
-
13
-
14
-
15
-
16
-
17
-
18
-
19
-
20
-
21
-
22
-
23
-
24
-
25
-
26
-
27
-
28
-
29
-
30
-
31
-
32
-
33
-
34
-
35
-
36
-
37
-
38
-
39
-
40
-
41
-
42
-
43
-
44
-
45
-
46
-
47
-
48
-
49
-
50
-
51
-
52
-
53
-
54
-
55
-
56
-
57
-
58
-
59
-
60
-
61
-
62
-
 63
63 -
 64
64 -
 65
65 -
 66
66 -
 67
67 -
 68
68 -
 69
69 -
 70
70 -
 71
71 -
 72
72 -
 73
73 -
74
-
75
-
76
-
77
-
78
-
79
-
80
-
81
-
82
-
83
-
84
-
85
-
86
-
87
-
88
-
89
-
90
-
91
-
92
-
93
-
94
-
95
-
96
 |
 |
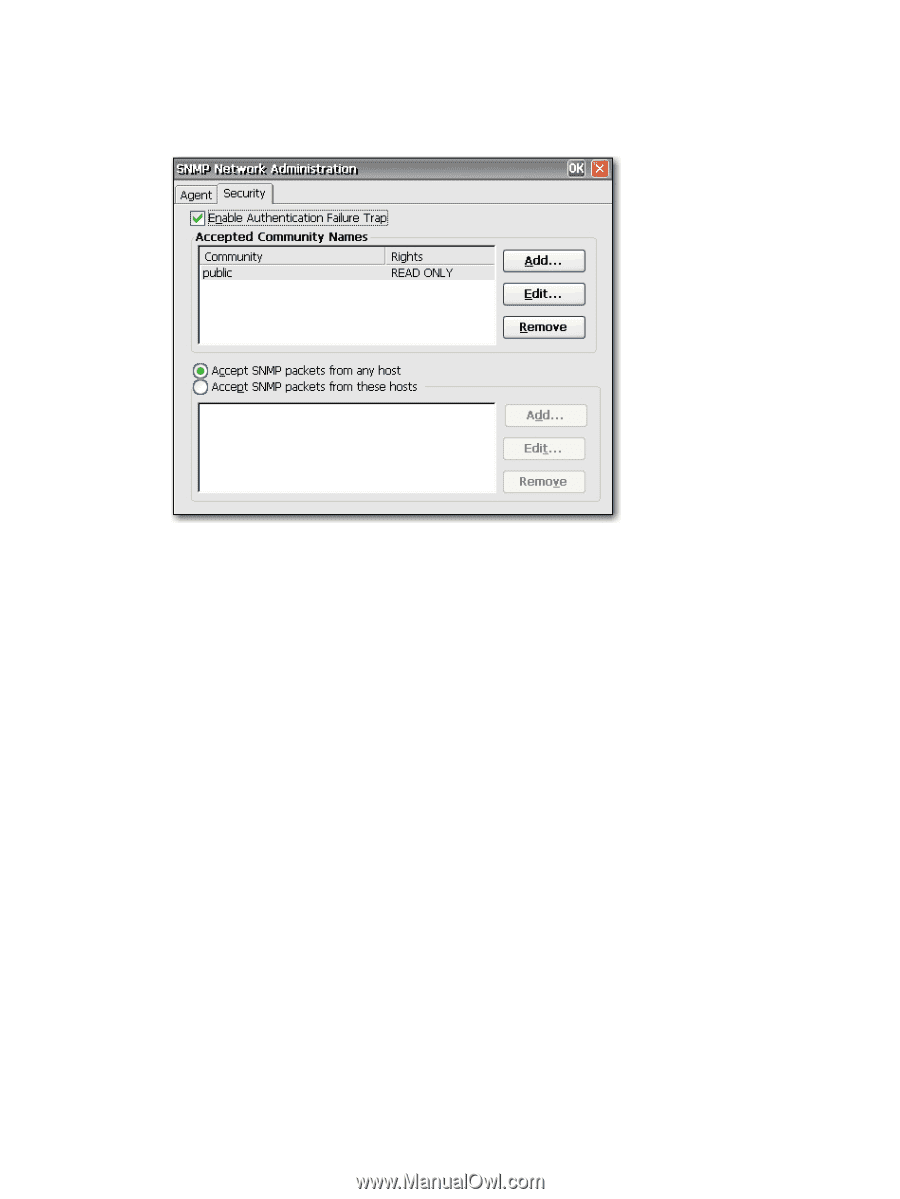
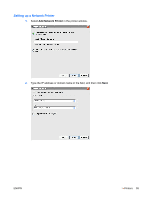
To add and assign rights to an accepted community:
1.
Click the
Security
tab.
2.
Click
Add
in the
Accepted Community Names
section. The Community Configuration dialog is
displayed.
3.
Type the name of the community in the
Community Name
box.
4.
Select the rights to the community in the
Rights
list, and then click
OK
.
60
Chapter 4
Control Panel
ENWW