Hitachi DZ-MV730A Owners Guide - Page 144
Driver and Formatter Setup button.
 |
UPC - 050585223547
View all Hitachi DZ-MV730A manuals
Add to My Manuals
Save this manual to your list of manuals |
Page 144 highlights
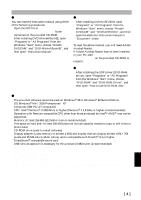
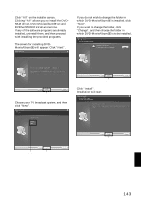
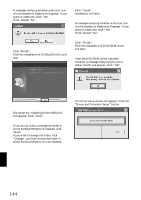
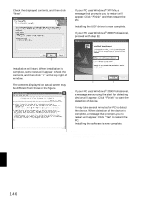
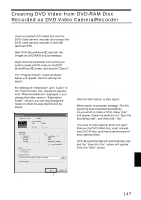
6 A message verifying whether a shortcut icon is to be created on desktop will appear: If you want to create one, click "Yes". If not, choose "No". 10 Click "Install". Installation will start. 11 A message verifying whether a shortcut icon is to be created on desktop will appear: If you want to create one, click "Yes". If not, choose "No". 7 Click "Finish". Then the installation of DVDfunSTUDIO will start. 12 Click "Finish". Then the installation of DVD-RAM driver will start. 13 After the DVD-RAM driver has been installed, a message that prompts you to restart the PC will appear: Click "OK". Click 8 The screen for installing DVDfunSTUDIO will appear: Click "Next". 9 If you do not wish to change the folder in which DVDfunSTUDIO is installed, click "Next". If you wish to change the folder, click "Change", and then choose the folder in which DVDfunSTUDIO is to be installed. Click 14 The driver setup screen will appear: Click the "Driver and Formatter Setup" button. Click English 144
-
 1
1 -
2
-
3
-
4
-
5
-
6
-
7
-
8
-
9
-
10
-
11
-
12
-
13
-
14
-
15
-
16
-
17
-
18
-
19
-
20
-
21
-
22
-
23
-
24
-
25
-
26
-
27
-
28
-
29
-
30
-
31
-
32
-
33
-
34
-
35
-
36
-
37
-
38
-
39
-
40
-
41
-
42
-
43
-
44
-
45
-
46
-
47
-
48
-
49
-
50
-
51
-
52
-
53
-
54
-
55
-
56
-
57
-
58
-
59
-
60
-
61
-
62
-
63
-
64
-
65
-
66
-
67
-
68
-
69
-
70
-
71
-
72
-
73
-
74
-
75
-
76
-
77
-
78
-
79
-
80
-
81
-
82
-
83
-
84
-
85
-
86
-
87
-
88
-
89
-
90
-
91
-
92
-
93
-
94
-
95
-
96
-
97
-
98
-
99
-
100
-
101
-
102
-
103
-
104
-
105
-
106
-
107
-
108
-
109
-
110
-
111
-
112
-
113
-
114
-
115
-
116
-
117
-
118
-
119
-
120
-
121
-
122
-
123
-
124
-
125
-
126
-
127
-
128
-
129
-
130
-
131
-
132
-
133
-
134
-
135
-
136
-
137
-
138
-
 139
139 -
 140
140 -
 141
141 -
 142
142 -
 143
143 -
 144
144 -
 145
145 -
 146
146 -
 147
147 -
 148
148 -
 149
149 -
150
-
151
-
152
-
153
-
154
-
155
-
156
-
157
-
158
-
159
-
160
-
161
-
162
-
163
-
164
-
165
-
166
-
167
-
168
-
169
-
170
-
171
-
172
-
173
-
174
-
175
-
176
-
177
-
178
-
179
-
180
-
181
-
182
-
183
-
184
-
185
-
186
-
187
-
188
-
189
-
190
 |
 |
