Hitachi DZ-MV730A Owners Guide - Page 49
Basic Techniques - lens cap
 |
UPC - 050585223547
View all Hitachi DZ-MV730A manuals
Add to My Manuals
Save this manual to your list of manuals |
Page 49 highlights
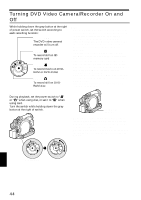
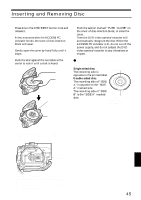
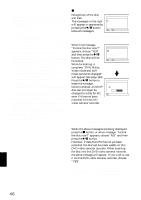
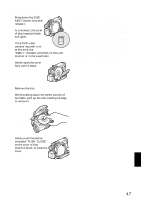
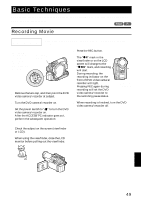
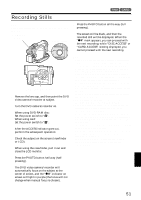
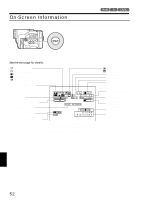
Basic Techniques This section explains about recording of movies and still images, and also basic settings on DVD video camera/recorder. 12 Recording Movie Before You Begin • Insert a recordable DVD-RAM or DVD-R disc into this DVD video camera/ recorder. Pressing REC once will start recording; pressing it once again will temporarily stop recording. ACCESS/PC indicator OFF 1 Remove the lens cap, and then point the DVD video camera/recorder at subject. 2 Turn the DVD camera/recorder on. Set the power switch to "O" to turn the DVD video camera/recorder on. After the ACCESS/PC indicator goes out, perform the subsequent operation: 4 Press the REC button. The "m" mark in the viewfinder or on the LCD screen will change to the "n" mark, and recording will start. During recording, the recording indicator on the front of DVD video camera/ recorder will light. Pressing REC again during recording will set the DVD video camera/recorder to the recording pause status. Recording indicator 5 When recording is finished, turn the DVD video camera/recorder off. 3 Check the subject on the screen (viewfinder or LCD). When using the viewfinder, close the LCD monitor before pulling out the viewfinder. English 49
-
 1
1 -
2
-
3
-
4
-
5
-
6
-
7
-
8
-
9
-
10
-
11
-
12
-
13
-
14
-
15
-
16
-
17
-
18
-
19
-
20
-
21
-
22
-
23
-
24
-
25
-
26
-
27
-
28
-
29
-
30
-
31
-
32
-
33
-
34
-
35
-
36
-
37
-
38
-
39
-
40
-
41
-
42
-
43
-
 44
44 -
 45
45 -
 46
46 -
 47
47 -
 48
48 -
 49
49 -
 50
50 -
 51
51 -
 52
52 -
 53
53 -
 54
54 -
55
-
56
-
57
-
58
-
59
-
60
-
61
-
62
-
63
-
64
-
65
-
66
-
67
-
68
-
69
-
70
-
71
-
72
-
73
-
74
-
75
-
76
-
77
-
78
-
79
-
80
-
81
-
82
-
83
-
84
-
85
-
86
-
87
-
88
-
89
-
90
-
91
-
92
-
93
-
94
-
95
-
96
-
97
-
98
-
99
-
100
-
101
-
102
-
103
-
104
-
105
-
106
-
107
-
108
-
109
-
110
-
111
-
112
-
113
-
114
-
115
-
116
-
117
-
118
-
119
-
120
-
121
-
122
-
123
-
124
-
125
-
126
-
127
-
128
-
129
-
130
-
131
-
132
-
133
-
134
-
135
-
136
-
137
-
138
-
139
-
140
-
141
-
142
-
143
-
144
-
145
-
146
-
147
-
148
-
149
-
150
-
151
-
152
-
153
-
154
-
155
-
156
-
157
-
158
-
159
-
160
-
161
-
162
-
163
-
164
-
165
-
166
-
167
-
168
-
169
-
170
-
171
-
172
-
173
-
174
-
175
-
176
-
177
-
178
-
179
-
180
-
181
-
182
-
183
-
184
-
185
-
186
-
187
-
188
-
189
-
190
 |
 |
