IBM 2109 Service Guide - Page 36
Installing the switch, Tabletop installation, Rack-mount installation, Before installing GBICs
 |
UPC - 087944519355
View all IBM 2109 manuals
Add to My Manuals
Save this manual to your list of manuals |
Page 36 highlights
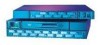
Table 14. Pre-installation checklist (continued) Step Customer action or decision 6 Decide on the switch network parameters. Comments and references Obtain the switch network parameters from your network administrator. Ethernet port configuration decisions: v Static IP address v Netmask (if required)__________ Attention: Use of incorrect network parameters can cause problems on the Ethernet network. | If the switch, the SNMP manager, or | the Syslog server are on different | TCP/IP subnets (see note), assign the | default network gateway address and | route table entries. Attention: Save this configuration for future reference. 7 Install the Ethernet cable from the None server (see note) to the network hub. 8 Install the Ethernet cable from the None network hub where the switch will be installed. | Note: The term server used here refers to the computer used for the IBM StorWatch | Specialist. Installing the switch The 2109 Model S16 Switch is installed either in a rack-mount configuration or a tabletop configuration. Note: Before installing GBICs, power cords, and the optional second power supply, install either the rubber tabletop mounting feet or install the switch in the rack. Tabletop installation The switch is shipped in its tabletop configuration. Adhesive rubber feet are supplied. These must be applied to the bottom of the switch in the four depressions provided. 1. Turn the switch upside down and lay it on its top. 2. Clean the four depressions by wiping them free of dust. 3. Remove the rubber feet from the sheet that is provided with the shipping kit, and place one rubber foot in each depression. 4. Firmly press the rubber feet in place. 5. Return the switch to its normal upright position, and place it in its intended service location. 6. Go to "Installing the optional power supply" on page 24 (even if you do not have an optional power supply). Rack-mount installation Read the following statements before starting the rack-mount installation: 20 IBM SAN Fibre Channel Switch: 2109 Model S16 Installation and Service Guide
-
 1
1 -
2
-
3
-
4
-
5
-
6
-
7
-
8
-
9
-
10
-
11
-
12
-
13
-
14
-
15
-
16
-
17
-
18
-
19
-
20
-
21
-
22
-
23
-
24
-
25
-
26
-
27
-
28
-
29
-
30
-
 31
31 -
 32
32 -
 33
33 -
 34
34 -
 35
35 -
 36
36 -
 37
37 -
 38
38 -
 39
39 -
 40
40 -
 41
41 -
42
-
43
-
44
-
45
-
46
-
47
-
48
-
49
-
50
-
51
-
52
-
53
-
54
-
55
-
56
-
57
-
58
-
59
-
60
-
61
-
62
-
63
-
64
-
65
-
66
-
67
-
68
-
69
-
70
-
71
-
72
-
73
-
74
-
75
-
76
-
77
-
78
-
79
-
80
-
81
-
82
-
83
-
84
-
85
-
86
-
87
-
88
-
89
-
90
-
91
-
92
-
93
-
94
-
95
-
96
-
97
-
98
-
99
-
100
-
101
-
102
-
103
-
104
-
105
-
106
-
107
-
108
-
109
-
110
-
111
-
112
-
113
-
114
-
115
-
116
-
117
-
118
-
119
-
120
-
121
-
122
-
123
-
124
-
125
-
126
-
127
-
128
-
129
-
130
-
131
-
132
-
133
-
134
-
135
-
136
-
137
-
138
-
139
-
140
-
141
-
142
-
143
-
144
-
145
-
146
-
147
-
148
-
149
-
150
-
151
-
152
-
153
-
154
-
155
-
156
-
157
-
158
-
159
-
160
-
161
-
162
-
163
-
164
-
165
-
166
-
167
-
168
-
169
-
170
-
171
-
172
-
173
-
174
-
175
-
176
-
177
-
178
 |
 |
