IBM 2109 Service Guide - Page 42
Setting the IP address, customer LAN Administrator. - factory default
 |
UPC - 087944519355
View all IBM 2109 manuals
Add to My Manuals
Save this manual to your list of manuals |
Page 42 highlights
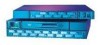
Dust protection rubber plug Figure 12. GBIC SJ000051 Figure 13 shows the front of the GBIC. The dust protection rubber plug must remain in the GBIC until a fibre-channel cable is inserted. The other end of the GBIC is inserted in the switch. The GBICs are keyed and only seat if inserted correctly. The GBICs in the top row of ports are inserted with the swing handle down as shown in Figure 13. The GBICs in the bottom row of ports are rotated 180° so that the swing handle is on top. Swing handle SJ000058 Figure 13. GBIC swing handle Setting the IP address The switch ships from the factory with the default IP address (10.77.77.77) pre-installed on the switch. This IP address is noted on a label on the top front edge of the switch. This address is for the external Ethernet connection. Use this default address to attach to the customer's local area network (LAN) and to establish a network connection to the switch. You can change this IP address by using a Telnet command issued from any server having access to the same LAN. This is the easiest way to set the IP address. Ask the customer's LAN administrator if the default address can be used. If this is not possible, set the IP address using the front panel. See "Setting the IP address from the front panel" on page 28. Instructions are provided for setting the IP address using either the front panel or the Ethernet port. The locations of these ports are shown in Figure 14 on page 27. Set the IP address by using the pre-installation checklist you obtained from the customer LAN Administrator. 26 IBM SAN Fibre Channel Switch: 2109 Model S16 Installation and Service Guide
-
 1
1 -
2
-
3
-
4
-
5
-
6
-
7
-
8
-
9
-
10
-
11
-
12
-
13
-
14
-
15
-
16
-
17
-
18
-
19
-
20
-
21
-
22
-
23
-
24
-
25
-
26
-
27
-
28
-
29
-
30
-
31
-
32
-
33
-
34
-
35
-
36
-
 37
37 -
 38
38 -
 39
39 -
 40
40 -
 41
41 -
 42
42 -
 43
43 -
 44
44 -
 45
45 -
 46
46 -
 47
47 -
48
-
49
-
50
-
51
-
52
-
53
-
54
-
55
-
56
-
57
-
58
-
59
-
60
-
61
-
62
-
63
-
64
-
65
-
66
-
67
-
68
-
69
-
70
-
71
-
72
-
73
-
74
-
75
-
76
-
77
-
78
-
79
-
80
-
81
-
82
-
83
-
84
-
85
-
86
-
87
-
88
-
89
-
90
-
91
-
92
-
93
-
94
-
95
-
96
-
97
-
98
-
99
-
100
-
101
-
102
-
103
-
104
-
105
-
106
-
107
-
108
-
109
-
110
-
111
-
112
-
113
-
114
-
115
-
116
-
117
-
118
-
119
-
120
-
121
-
122
-
123
-
124
-
125
-
126
-
127
-
128
-
129
-
130
-
131
-
132
-
133
-
134
-
135
-
136
-
137
-
138
-
139
-
140
-
141
-
142
-
143
-
144
-
145
-
146
-
147
-
148
-
149
-
150
-
151
-
152
-
153
-
154
-
155
-
156
-
157
-
158
-
159
-
160
-
161
-
162
-
163
-
164
-
165
-
166
-
167
-
168
-
169
-
170
-
171
-
172
-
173
-
174
-
175
-
176
-
177
-
178
 |
 |
