IBM 2109 Service Guide - Page 67
Removing the old chassis, Installing the new chassis, Verifying switch repair
 |
UPC - 087944519355
View all IBM 2109 manuals
Add to My Manuals
Save this manual to your list of manuals |
Page 67 highlights
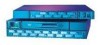
Removing the old chassis 1. Turn off the unit. 2. Remove the power supplies. See "Replacing the power supply" on page 45. 3. Remove the system board assembly. See "Replacing the system board assembly" on page 49. 4. Remove the fan assembly. See "Replacing a fan assembly" on page 48. Installing the new chassis 1. Install the old fan assembly into the new chassis. See "Replacing a fan assembly" on page 48. 2. Install the old system board assembly into the new chassis. See "Replacing the system board assembly" on page 49. 3. Install the old power supplies into the new chassis. See "Replacing the power supply" on page 45. 4. Go to "Verifying switch repair". Figure 22. Chassis with touchpad SJ000061 Verifying switch repair If a switch part has been replaced or you wish to check the switch operation for any reason, the following is a quick process for verifying the switch function. Some parts might have been replaced without turning the switch off or disrupting other operations on the switch (GBIC power supplies and fans, for example). The following checkout is written in two sections. The first assumes that the repair was done without turning off the switch, the second assumes that the switch was turned off for the repair. Chapter 5. Replacing FRUs 51
-
 1
1 -
2
-
3
-
4
-
5
-
6
-
7
-
8
-
9
-
10
-
11
-
12
-
13
-
14
-
15
-
16
-
17
-
18
-
19
-
20
-
21
-
22
-
23
-
24
-
25
-
26
-
27
-
28
-
29
-
30
-
31
-
32
-
33
-
34
-
35
-
36
-
37
-
38
-
39
-
40
-
41
-
42
-
43
-
44
-
45
-
46
-
47
-
48
-
49
-
50
-
51
-
52
-
53
-
54
-
55
-
56
-
57
-
58
-
59
-
60
-
61
-
 62
62 -
 63
63 -
 64
64 -
 65
65 -
 66
66 -
 67
67 -
 68
68 -
 69
69 -
 70
70 -
 71
71 -
 72
72 -
73
-
74
-
75
-
76
-
77
-
78
-
79
-
80
-
81
-
82
-
83
-
84
-
85
-
86
-
87
-
88
-
89
-
90
-
91
-
92
-
93
-
94
-
95
-
96
-
97
-
98
-
99
-
100
-
101
-
102
-
103
-
104
-
105
-
106
-
107
-
108
-
109
-
110
-
111
-
112
-
113
-
114
-
115
-
116
-
117
-
118
-
119
-
120
-
121
-
122
-
123
-
124
-
125
-
126
-
127
-
128
-
129
-
130
-
131
-
132
-
133
-
134
-
135
-
136
-
137
-
138
-
139
-
140
-
141
-
142
-
143
-
144
-
145
-
146
-
147
-
148
-
149
-
150
-
151
-
152
-
153
-
154
-
155
-
156
-
157
-
158
-
159
-
160
-
161
-
162
-
163
-
164
-
165
-
166
-
167
-
168
-
169
-
170
-
171
-
172
-
173
-
174
-
175
-
176
-
177
-
178
 |
 |
